Wood Filler Vs. Spackle: What Are The Major Differences?

When it comes to putting together a project, you’re bound to have to affix things to one another. This is just part of life. When you have all those holes from nails and other stuff, you will need (erm, want) to smooth things out with a filler. Wood filler and spackle are both popular, but which one is right for you?
Wood filler is more flexible than spackle and is designed to cling to wood. Spackle does not work well with wood since it doesn’t have the right chemical makeup to make it stick long-term. Spackle is used for drywall and stone, while wood filler is made for wood.
Knowing the right material for patching up nail dips, small holes, and pin pricks is vital to keeping your home looking smooth and seamless. Before you try to seal up those holes, read our guide on how to make things easier.
Do You Need Wall and Ceiling Contractors?
Get free, zero-commitment quotes from pro contractors near you.

Can You Use Spackle And Wood Filler Interchangeably?
Technically, you can use spackle in place of wood filler and wood filler in place of spackle. Both of these items are made to patch up a small chip, hole, or nail spot. However, that doesn’t mean that they are perfect replacements. Most people would describe them as a stopgap or a somewhat cheap and desperate Plan B.
If you are good at application, then you probably won’t notice that much of a difference with most cases. It’s only when you have rare woods or delicate wall work that you might notice a very serious difference. If you are currently working on a very delicate project, do not try to substitute your filler.
What Happens If You Use The Wrong Filler?
As long as you apply it well? Nothing. However, there are a bunch of issues that can arise when you use filler instead of spackle and vice versa. Most of the time, you will notice small issues that might later turn into more large-scale wear and tear. These are the most common problems that can arise.
- If you use spackle when you should use wood filler, then you will notice that your hole might look a little awkward. Wood filler on drywall will look lightly discolored, or if you have a darker shade of filler, it’ll resemble a dark spot on your drywall. Meanwhile, spackle will look like someone filled your hole with chalk.
- In some cases, spackle won’t adhere to wood. Wood filler can adhere to drywall, but it can be a gambit as far as seeing things work the other way around. You might also notice that spackle will shrink as it dries, so if you want to use it on wood, you may need several applications.
- Spackle tends to crumble more than wood. A lot of people who work with spackle will tell you that it often feels crumbly to the touch. This can be problematic if you need it to work on curved wood that gets a lot of traction and touch.
- Many, if not most, people notice less staying power if they use the wrong filler for their hole. So while it will work, it will not last as long as it should. With a good layer of paint, it will still be less noticeable and it may also be secured in place a bit better.
Will Using The Wrong Filler Or Spackle Harm Your Items?
For the most part, you shouldn’t expect wood filler or spackle to damage your items. If you work with drywall, you already know that this material is pretty resilient. With that said, wood filler should always be used on antique wood items rather than spackle. After all, you want to keep the integrity of antiques for as long as possible.
How To Use Spackle (Or Filler) On Items That Don’t Typically Use It
Let’s say that you want to use spackle instead of wood filler on wood, or that you want to use filler instead of spackle. Here’s how you can do it without too much of a problem:
- First, try to find a good color for your filler or a paint for your spackle. To get things looking perfect, you need to match the color of the surrounding area. If you are using spackle, grab a small sample of paint in your shade. If you are using filler, grab the one that looks most like your wall. Grab paint if you can’t find a filler color similar to yours.
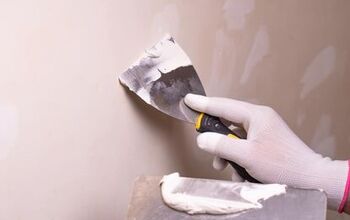
- Apply the filler or spackle to the hole. The best way to do this is to read the instructions on the container and follow through. Use a spackle spreader or similar to edge off any excess.
- If you are using spackle, wait for it to dry and add another layer. Spackle shrinks more, so you are probably going to need to add another coat. You can check the spackling to make sure. If you don’t need another layer, skip this step.
- Use very fine sandpaper to sand things down if necessary. In a lot of cases, it won’t be necessary. However, it can help if you have a nick or edges that look a little bit gritty.
- Wipe down the area and apply paint if you bought it. A quick, clean dot of paint over the nail hole is going to be enough to hide things well. Let the paint dry, and you’re good to go.
Why Does It Make Sense To Use Spackle For Drywall And Filler For Wood?
Honestly, it’s because both formulas are geared towards different goals. Drywall is the main reason why spackle was invented. It’s also the reason why spackle tends to be chalky or stone-like. Wood filler is literally made of wood pulp and epoxy, which is why it keeps the same texture as wood.
Simply put, it’s the same reason why you wouldn’t use a Honda Civic in a Formula 1 race and why you wouldn’t use a race car for your daily commute. They are made for entirely different purposes!
Additional Tips For Spackle And Wood Filler Success
There are a lot of ways that you can use to make sure that you get the best possible results. These tips below are great for first-timers who want to have the best results:
- Choose the appropriate fill-in for the job if you can. Wood filler for wood, spackle for drywall. If you have any budget whatsoever, go with the best choice for the job. If you’re really in a bind, you can make your own faux filler from sawdust and wood glue.
- Overfill your hole if you are using wood filler. Spackle shrinks, but often needs to have multiple layers for small cracks. Wood filler, on the other hand, tends to shrink and dip when it dries. Overfilling will usually give you a more flush appearance.
- If you don’t want to do all that, you can always just hide the hole by placing something in front of it. That’s an option I’ve used in the past. It won’t always work with all your projects, but it’s worked enough times to be worth noting.
- No matter what product you’re using, make sure to get one that has good reviews. The best way to ensure you get good results is to start with the best possible tools. That includes fillers. It’s worth that extra splurge, especially if you need to do some color matching.
Do You Need Wall and Ceiling Contractors?
Get free, zero-commitment quotes from pro contractors near you.
Related Questions
Can you use caulk to cover up holes in a wall?
Generally speaking, caulk is not meant to do the same thing as wood filler or repairs. Caulk is more for filling in gaps in a bathroom, waterproofing, and sealing fish tanks. Using it to patch wood will not work out well, simply because you can’t paint over caulk and there’s a chance that it may be noticeably different in texture. So, don’t do it.
What is the best material to fill in large holes?
There are three main schools of thought on this. Wood putty tends to be the best for visible defects in wooden items like flooring or cracks in a chair’s backing. Two-part epoxy tends to work best with larger holes like the ones found in sills, moldings, and doorjambs.Of course, if you have a very large hole in your drywall, you may need to use a mixture of mesh and spackle to make your holes go away. In extreme cases, you may actually need even more sturdy wear.
Is it possible to sand down spackle that has been put on wood?
Much like with wood putty or wood filler, spackle is designed to be sanded down so that you get a smooth, seamless finish. In order to do this the right way, you are going to have to ensure that your wood’s spackle is totally dry. This can take anywhere from 15 minutes to an hour, depending on how much you globbed on.Once it’s dry, gently use a fine grit sandpaper swatch to grind down any nicks, bobs, and spurs that your spackle may have.

Ossiana Tepfenhart is an expert writer, focusing on interior design and general home tips. Writing is her life, and it's what she does best. Her interests include art and real estate investments.
More by Ossiana Tepfenhart