Whole House Filter Leaking From Top? (Quick Fix)
Clean filtered water has never been more important than it is today. Whole house water filters are a common way to ensure all the water in your home is clean and safe for all intended purposes. It is understandable that you would want to immediately fix your whole house water filter when it starts leaking from the top.
When your whole house water filter is leaking from the top the most likely problem is a faulty o-ring or a crack within the filter’s housing. Turn off the water supply and follow the steps to remove your filter. Check the existing O-rings and replace them when necessary. Investigate the fittings and canister for cracks and replace any parts that are cracked or damaged.
A leaking whole house water filter can be a very frustrating problem. Luckily there are only a few likely causes for this frustration, and many of these problems have quick fixes. Before you are able to fix the problem, however, you first must identify the source of the leak.
Identify Where The Leak Is Coming From
The best way to get an idea as to how to fix your leaking whole house water filter is to find exactly where the leak is coming from. When your water filter appears to be leaking from the top, do your best to get a closer look to see exactly how the water is escaping.
If you notice the water leaking through a visible crack then you have most likely found your culprit. Rather than trying to fix the crack it is best to just buy a replacement for the piece of equipment. It is more than likely an inexpensive replacement part, and often if there is an unprovoked crack then the piece is likely losing its integrity, and needs to be replaced anyway.
If the water looks like it is leaking through the threads or an unidentifiable source within the filter, then you may need to investigate further. The threads may be damaged. There is also a good chance there is an issue with one of the O-rings inside the filter. In order to determine exactly what is wrong, you should follow the steps below in order to safely investigate the inner-workings of your whole house water filter system.
Check Your O-rings
If you cannot easily identify the reason for your whole house water filter leak then you should learn a bit about O-rings. O-rings are meant to properly block the passage of liquid or gas. These small rubber rings should be bendable and properly lubricated with silicone.
If you notice your O-rings have hardened, are cracked or damaged, then they need to be replaced. In order to see if the O-rings in your whole water filter are the cause of your leak, then you should follow the steps below in order to safely access and replace your o-rings.
Six Steps To Changing Your O-ring
Getting to the O-ring is going to be a process within itself. It is a simple job; however, it can be tedious. Be sure to carefully follow the steps in order to make the process as smooth as possible.
Step One: Shut off the water
The very first order of business is going to be shutting off the water. This will help you to get underneath the pressure release button without making a mess.
Step Two: Release the pressure
After the water is shut off, turn your faucet on and leave it on. This will depressurize any lines so that you can open the cartridge.
Step Three: Remove the Sump
The sump is the bottom part of the filter housing. After you remove the sump, you should see a small screw under the red button.
Step Four: Remove the Screw
This usually takes a Philips head screwdriver. The screw also has a small O-ring on it, so be careful. After the screw is out, gently remove the O-ring from the screw.
Step Five: Replace the O-ring
Should you discover debris on the O-ring, it may be possible to clean and re-lubricate it so that it is possible to re-use it. Otherwise, change it for a new one, using a drop of a silicone-based lubricant. Tighten it so the screw is secure but avoid tightening it too much.
Step Six: Check for leaks
Place the filter and sump back into position on the housing, and carefully open the tap. Inspect the area for leaks, and if there are no signs of one, the job is complete. However, if the leak persists around the button’s site, it could mean that the housing is damaged and will need replacing.
Inspect The FIlter And Housing Interior
If your whole house water filter is still leaking from the top after you replaced the O-rings, you should check the filtration system further. Use a flashlight to check the filter housing and the threads for any cracks. You should also clean areas that look dirty or that have collected sand or dirt. This debris can cause leaks.
If you do not notice any immediate cracks, follow the steps below to investigate the filter itself to find any other potential sources of the leak.
Step 1: Isolate The Filter Housing
First, you’ll need to shut off the water supply to reduce the water pressure. To prevent water from entering, you have to locate and isolate the filter housing.
By shutting the water valves to ‘OFF,’ you also prevent water from flooding the floor of your home. The shut-off valves are usually situated close to the housing on either side.
Step 2: Turn Off The Water Storage Pressure Tank
There will probably be a lever for the water storage pressure tank. Once you have turned this off, double-check by opening the cold water tap at a sink that you are sure is in regular use- for example, your kitchen sink will be perfect. Switch on the tap and allow it to keep running until the water flow stops.
Step 3: Separate The Filter
Next, close off the water that is beyond the filter. Locate the shut-off lever or hose spigot type shut off to separate the filter from the other parts of the property. This lever is usually situated just beyond the filter housing.
Step 4: Release The Pressure Inside The Housing
Make sure the pressure is released inside the housing. This is achieved by firmly pressing the red button located on top of the housing.
When pressed, a few drops of water may come dribbling out, together with a sudden release of air. This is expected and is no cause for alarm: it is merely the remaining pressure in the housing escaping.
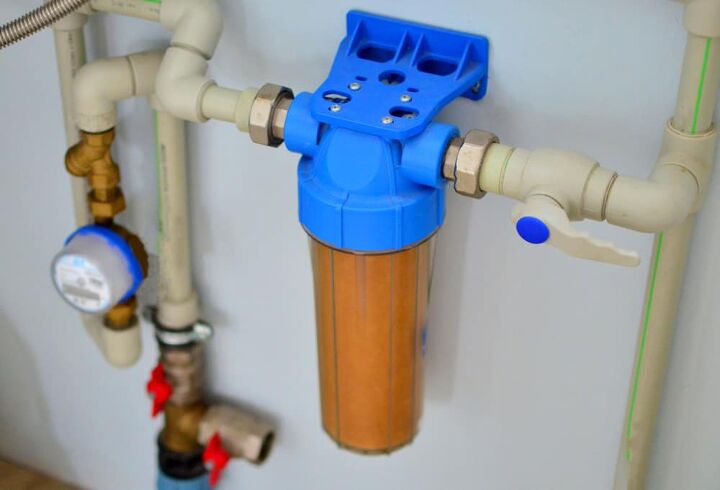
Step 5: Unscrew The Filter Sump
As the water has been turned off from both sides of the housing, it is now possible to unscrew the filter sump. This is the base of the housing: it may resemble a large blue drinking glass or a glass test tube. It will normally unscrew anti-clockwise, assuming you are below it and looking upwards.
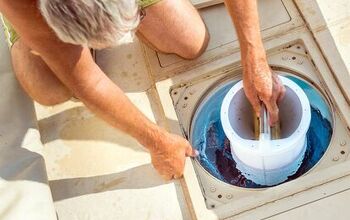
Step 6: Remove The Sump
At this point, it may be a good idea to have a bucket or towel to hand, as well as a volunteer to aid. Take hold of the sump wrench that would have been supplied with the filter housing. Slide over any grooves up to the point where it fits tightly.
Steadying the housing by holding it with one hand, at the top, rotate the sump, without forcing it, so that it loosens enough for you to unscrew it completely.
Step 7: Remove The Cartridge Filter
Once the sump is removed, the cartridge filter should also be taken out. Don’t pour any water away as it can be used to rinse the sump. Now, the sump can be placed into the bucket as the O-ring needs to be checked.
It is not necessary to remove the O-ring at this point. It is likely that the lower surface of the O-ring is undamaged and is not the reason for the leak.
Step 8: Clean The Upper O-ring
Run your fingertip over the top of the O-ring to clean it. Typically, you’ll sense some pieces of grit as you move across it. Do this a couple of times until the surface feels smooth and even. Use a few drops of water to rinse any remaining grip from the top of the O-ring.
Step 9: Replace The O-ring
On the other hand, if your O-ring appears to have developed flat areas, possibly due to age or it being pinched. It just needs to be replaced. Whatever the reason, if the O-ring doesn’t fit perfectly into the groove, you could try cutting a minute section to help it sit correctly.
Only cut the smallest amount to help it fit: 1/6th of an inch would be an excellent place to start, and you can always cut a little more if needed. However, this option is really only to be used in the case of an emergency.
Step 10: Put It Back Together
Using the instructions in reverse, put the filter back together, ensuring that all connections are tight. Make sure you don’t over-tighten, as this can later be an issue.
Step 11: Check For Leaks
Once you’ve put the filter back together and turned the water back on, you’ll need to check for leaks. This can be done by turning on your water and letting the filter work for about 5 minutes.
If you see more leaks, you’ve either done something wrong, or your filter housing is cracked, and you will need to replace your entire unit.
It’s a good idea to purchase a supply of O-rings. Aim to have at least two on hand at any one time so that in the event that you need to replace the current one while you are changing the cartridge of the inline filter due to expansion or other damage, you will be able to do the job promptly and efficiently.
Related Questions
How often should you change the whole house water filter?
You should change your whole house water filter at least every three to six months. This is because it filters your home’s entire water system, which means that the buildup and residue accumulates a lot faster than if you had a faucet-based system installed.
Summarizing The Points
When your whole house water filter is leaking from the top you should do your best to identify the source of the leak yourself. You can follow the steps to turn off your water and then check the threads and canister for any small cracks, and then check your O-rings.
Any small cracks are likely sources of the leak, and should be repaired by replacing any cracked parts with new ones. The other likely source of the leak is and old or faulty O-ring. Inspect all O-rings and replace faulty ones when you turn off the water and take a closer look at the filter.
Related Guides

Heather is a passionate writer who loves anything DIY. Growing up, she learned everything from home repairs to design, and wants to share her tips with you. When she's not writing, she's usually hiking or searching for her next DIY project.
More by Heather Robbins


![10 Best Scroll Saws for 2022 [Ultimate Reviews & Buyer's Guide]](https://cdn-fastly.upgradedhome.com/media/2023/07/31/9070684/10-best-scroll-saws-for-2022-ultimate-reviews-buyer-s-guide.jpg?size=350x220)

![10 Best Electric Lawn Mowers - [2022 Reviews & Top Rated Models]](https://cdn-fastly.upgradedhome.com/media/2023/07/31/9070486/10-best-electric-lawn-mowers-2022-reviews-top-rated-models.jpg?size=350x220)