How To Remove Polyurethane From Wood Without Removing The Stain
Polyurethane finishes are applied to wood to protect the surface from water or chemical spills and other types of damage. Typically they add a satin or gloss appearance to the wood. However, you’ll probably want to preserve the wood stain underneath when you eventually remove the polyurethane. So, how do you remove polyurethane without removing the stain?
First, you need to ensure you have the correct tools and the area prepped correctly. Then, apply the citrus stripper gel, wait for 24 hours and do a scrape test. After, you can remove the product and prepare it for repainting. There are other methods in this article we’ll discuss as well.
Removing polyurethane without stripping the stain is important. Therefore, below, we’ve included three different methods you can use to do that. The method you choose depends on your preference and the materials you already have on hand.
Do You Need Painting or Staining Services?
Get free, zero-commitment quotes from pro contractors near you.

Remove Polyurethane From Wood Without Removing Stain
You’ll need to remove a specialist stripping product, spreading it onto the wood with a paintbrush. Once you’ve applied it, leave it on, and carry out small ‘test scrapes’ every 30 minutes or so, for up to 24 hours, according to the number of layers you’ll need to remove
Once you’ve scraped away all the layers, remove any residue with a paint stripper wash. The final step is to prepare the newly-stripped surface of the wood using mineral spirit.
For the best results, you’ll need to be patient and ensure it is completely clean and dried out before applying fresh stain or paint.
Remove Polyurethane From Wood With Stripper
Wood stripper works great if you’re looking to remove the polyurethane from hew good without affecting or ruining the stain. Below are the steps on how to do that.
Step 1: Prepare The Work Area
This needs to e well-ventilated as you’re working with chemicals. If you’re working inside, all the windows and doors should be open. If you have a fan, switch it on to create good air circulation.
Tools And Equipment:
- Citrus stripper gel
- A plastic scraping tool
- Old toothbrush – to access hard to reach areas
- Stripping pad for more stubborn areas
- Chemical-resistant gloves
- Chemical splash goggles.
- Drop cloths or newspapers to protect the floor and other items in the vicinity.
Step 2: Apply The Gel
Ensuring that the citrus stripper’s container is closed shake it well. Pour it carefully into a deep tray or container and brush a layer onto the wood. Then work the product into the corners using an old toothbrush.
Step 3: Wait And Test Scrape
Wait for between 30 minutes to 24 hours. If you are leaving the product on overnight, cover the item with a plastic sheet. Using the plastic scraping tool, scrape away a small area, in an inconspicuous corner. If you see it’s easy to remove, the product is ready to come off.
You’ll also want to re-do the test scrape, according to how many layers of polyurethane you want to remove. The citrus stripper can remove as many as five layers of paint each time you apply.
Step 4: Remove The Product
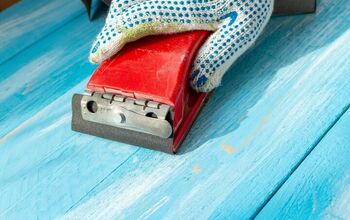
Using a plastic scraping tool, scrape the product off the wood, working in the direction of the grain. After, use the abrasive stripping pad dipped in a little citrus stripper to remove them and stubborn patches.
Step 5: Prepare For Re-painting
The final step is to use a paint stripper wash to get rid of any final residues left on the wood and prepare the surface for re-painting or re-staining. Just ensure you give it time to dry out completely before starting the restoration.
Remove Polyurethane With Denatured Alcohol And Lacquer Thinner
While this is a bit more chemical-based, it does a great job at removing everything without affecting or stripping the stain
Step 1: Prepare The Work Area
You’ll need to take a few sensible precautions as you’ll be using strong chemicals. First, your work area will need adequate ventilation. If working inside, open all windows and doors to assist airflow.
You’ll also need protective gloves and goggles. Don’t attempt this method without them. If you have any issues with breathing difficulties or perhaps an asthma problem, then a mask is required as a minimum. Use heavy plastic cloths to protect your work area and any nearby items.
Step 2: Make A Solution Of Denatured Alcohol And Lacquer Thinner
These two ingredients can be mixed, in equal parts, in a plastic bucket or even an empty paint can. The lacquer thinner serves to dissolve the paint and varnish, while the denatured alcohol acts as a cleaning agent.
Mix thoroughly using a wooden stick. The advantage of this mixture of denatured alcohol and lacquer thinner is while it will remove the finish from the surface of the wood, it’s not strong enough to damage the wood itself. Therefore, it won’t strip away the stain.
Step 3: Use The Mixture To Remove Polyurethane
Use a paintbrush to apply the solution to the polyurethane finish. To get the best results, cover each area two or three times, so the polyurethane is thickly and evenly covered.
Step 4: Remove The Mixture After Waiting For 10 Seconds
Once applied, let it soak into the wood for a few seconds. Then, using a steel wool pad rub gently in the direction of the grain. Keep working over each area until the top layers are completely stripped off.
Step 5: Clean The Wood With Warm Water
Once you’ve wiped away the old polyurethane with the steel wool pad, it’s time to rinse the wood. Use a specialized wood-cleaner to ensure every trace of dirt is removed. Finish the process with the final warm water rinse and dry with a soft, clean cloth.
Use Baking Soda And Vinegar To Remove Polyurethane
Many people feel uncomfortable using strong chemicals and prefer to find a more natural alternative. The good news is that there is an easy and cost-effective solution to this dilemma.
Step 1: Prepare The Solution
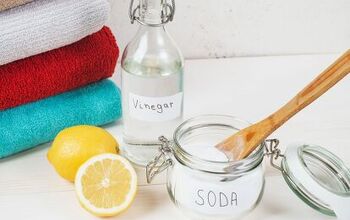
You can make a paste of baking soda, cleaning vinegar, and cornstarch which will be effective in stripping polyurethane from wood. Simply mix 4 cups of hot water with 1 cup of cornstarch to form a thick paste.
Place 4 cups of water in a second bowl, add a tablespoon of vinegar and half a cup of baking soda. Mix well, then add to the first mixture and combine thoroughly.
Step 2: Apply The Mixture With A Paintbrush
Apply the solution to the wood in the same way as previous methods. Once you’ve coated the wood with a thick, even layer, leave it for a few minutes to give it time to soak into the wood. One advantage of this method is that it will not result in the discoloration of the wood’s surface.
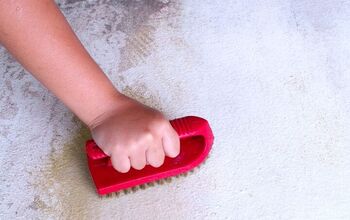
Next, scrub the wood with a wire pad. Don’t be concerned about applying some pressure as this won’t damage the wood. When you’ve finished washing, either let the area dry naturally or use a hairdryer. The most important thing is that you allow the wood to dry completely.
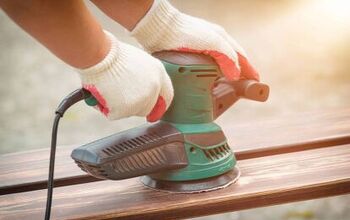
Step 3: Prepare The Surface For Re-staining OPr Re-painting
To prepare the surface correctly, you’ll need various sandpapers: 60, 80, and 120 grade. Begin with the heaviest, the 60-grade. Take care to sand in the direction of the wood’s natural grain to avoid damage.
Working against the grain will create small scratches and indentations across the surface, which won’t be attractive when you re-paint.
This is an easy mistake to make, especially when you’re in a hurry to make progress, but it won’t create a smooth surface on which to paint.
After sanding for some time, the polyurethane will start to disappear, revealing the natural color of the wood. Next, substitute the 80-grit sandpaper. This won’t require as much time as with the 60-grit.’
Finishing The Surface
Each time you change sandpaper, the wood will get smoother. Finish off with the 120-grit paper. Once you’re satisfied, use a clean, dry cloth to wipe the surface and remove any remaining dust or debris.
Although the process is somewhat time-consuming, you should be left with a perfect wooden surface, with no trace of polyurethane left so that patience will pay off.
Can You Sand Off Polyurethane?
Yes, there is no reason why you can’t remove polyurethane by sanding. Sandpaper alone is unlikely to be enough to strip off polyurethane, it can be used to remove any residual polyurethane from the wood.
120-grit sandpaper or even 150-grit sandpaper can work well to strip off any excess layers of polyurethane. It will also help to create a far smoother surface than previously.
The best approach is always to begin with the heaviest grit sandpaper. While using lighter grades will eventually give you the smooth results you want, it will take far longer.
Do You Need Painting or Staining Services?
Get free, zero-commitment quotes from pro contractors near you.
Summary
It is entirely possible to remove polyurethane from wood without stripping the stain, and there are at least three effective methods you can use to achieve a great result. The key to success is to use the correct tools and products and take all safety precautions before starting work.
Finally, attention to detail and patience in ensuring the wood is completely dry before re-staining will ensure that your DIY project is successful and your wood is restored to its natural beauty. With patience and care, you can easily do it on your own without calling an expert. It will save money and give you a learning experience as well.

Heather is a passionate writer who loves anything DIY. Growing up, she learned everything from home repairs to design, and wants to share her tips with you. When she's not writing, she's usually hiking or searching for her next DIY project.
More by Heather Robbins