How To Fix Bulging Drywall Seams
Nothing ruins the appearance of a room like bulging drywall. It’s an ever-present eyesore that needs to be dealt with before you’ll truly be happy with the look of your home.
Fix bulging drywall seams by using a stud finder to identify loose, missing, or over-driven drywall screws. Cut into the wall with a utility knife, remove the problem screws, and replace them with new ones. Finish by patching the wall with joint compound, priming it, then painting it.
However, there are several reasons why your drywall seams could be bulging. Each requires a different fix. That means the first step in repairing the issue is understanding why your drywall is bulging.
Do You Need Drywall Repair Services?
Get free, zero-commitment quotes from pro contractors near you.

Start By Understanding Why Your Drywall is Bulging
Bulging drywall is often caused by mistakes made during the construction process. Whoever built your home could have:
- Overdriven the drywall fasteners
- Failed to secure the drywall properly
- Butted two sheets of drywall too closely together
Bulging drywall seams can also be caused by leaks and homes that have undergone considerable settling. Each of these issues could be the cause of your issue.
The best way to identify the cause of your bulging drywall is with a methodical, step-by-step approach. Start by checking causes that you can fix yourself. Check for more complicated causes only if clear signs present themselves or you’ve already exhausted every easier fix.
What Tools Do You Need to Fix Bulging Drywall Seams?
Before you can take care of your bulging drywall seams, you’ll need to gather the right equipment. Here’s what you need:
- Stud finder tool
- Utility knife or other drywall cutting tool
- Screwdriver
- #6 or #8 drywall screws
- Joint compound (also called drywall mud)
- 150-grit sandpaper
- Primer
- Paint (to match your existing walls)
Bulging Drywall Seam Causes: Loose or Missing Screws
Loose and missing screws are a common cause of bulging drywall. If you feel the drywall move after pressing against the bulge, this may be what’s happened to it.
This issue is caused by poor installation practices. A worker may not have driven the drywall screws completely into the wall, which results in loose-fitting drywall that appears as bulging.
How to Fix a Loose or Missing Screw in Your Drywall
- Start by using your stud finder to identify the problem screws.
- Cut into the affected part of the drywall with your utility knife.
- Use the screwdriver to remove the problem screws.
- Replace them with new #6 or #8 drywall screws, about 1.5 inches away from either side of the old one
- Make sure the screw head sinks just below the surface of the drywall, creating a dimple. If you’ve broken through the paper, you’ve gone too far.
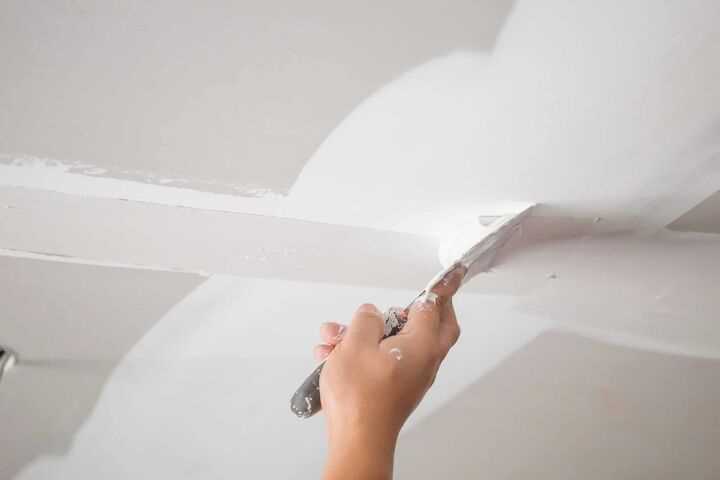
- Begin closing the hole by applying several thin coats of joint compound to it.
- Use 150-grit sandpaper to smooth the surface.
- Prime the affected area.
- Finish by painting the affected area so it matches your other walls.
Bulging Drywall Seams Causes: Screws Driven Too Deep
Your bulging drywall could also have been caused by screws being driven too deep into it. This tears the paper and damages the drywall’s interior core. When joint compound is applied on top of this damage, it often results in a bulge.
How to Fix Screws Driven Too Deep in Your Drywall
- Use a stud finder tool to locate the affected area of the drywall.
- Cut into that area with a utility knife.
- Use a screwdriver to replace problem screws, if possible.
- Replace them with new #6 or #8 drywall screws, about 1.5 inches away from the old ones.
- Make sure the screw heads sink just below the surface of the drywall, creating a dimple.
- Close the hole by applying several thin coats of joint compound to it.
- Use 150-grit sandpaper to smooth the surface.
- Prime the affected area.
- Finish by painting the affected area to match your other walls.
Bulging Drywall Seams Causes: Surface Bulges
It’s also possible that your drywall bulges are unrelated to interior screws. Surface bulges are usually caused by poor finishing work. An installer may have put two sheets of drywall too closely together, creating a bulge along the seams.
How to Fix Drywall Surface Bulges
- Start by sanding away as much of the affected area as possible with 150-grit paper.
- Apply new drywall tape to the seams that were bulging as needed.
- Feather out the affected area with joint compound to ensure new bulges don’t occur.
- Sandpaper over everything with 150-grit paper one more time to make sure the area is flat and uniform with your other walls.
- Prime the affected area.
- Paint the affected area to make it match the rest of your home.
Bulging Drywall Seams Causes: Sagging Ceilings
Many of the issues that make drywall sag also apply to ceilings. However, if you’ve got sagging ceilings with multiple bulges, your fix will be a bit more challenging.
Sagging ceilings are often caused when installers use drywall that’s too thin for ceiling use. To fix this, experts typically recommend ripping out and replacing the drywall altogether. However, this is messy, complex work.
A better strategy is to support the affected drywall while leaving it intact. You can do this with furring strips that will create a thicker sheet of ceiling board to eliminate your sagging issue.
How to Fix Sagging Ceilings
- Start by installing 1-by-3-inch furring strips on top of the existing drywall.
- Take care to install furring strips along the length of each ceiling framing member to avoid any future problems.
- Add sheets of 5/8 inch drywall on top of the furring strips to give your ceiling the thickness it needs to prevent sagging.
- Secure the drywall and furring strips with 2 1/2-inch drywall screws spread every 2 feet across the furring strip.
- Get ready to create a uniform surface by applying joint compound in the affected areas.
- Sand the new surface with 150-grit paper.
- Prime the affected area.
- Paint the affected area to match your other ceilings.
Bulging Drywall Seams: Plumbing Leaks
If the cause is related to a plumbing leak, bulges are a result of water pooling behind the drywall. These issues are generally present in the ceiling. However, if a large amount of water has accumulated behind your drywall, they can also occur in the walls.
Persistent leaks will be evident of discoloration on the walls like water stains. To fix this issue, you first need to locate the cause of the leak and repair it. Once the area has dried completely, you must replace the entire drywall panel.
Bulging Drywall Seams: Improper Use of Joint Compound
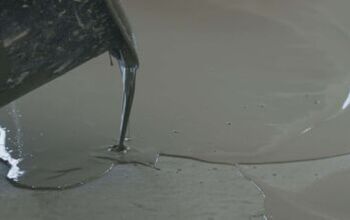
As previously mentioned, it’s not uncommon for bulging drywall seams to be a direct result of poor drywall installation. In order for the joints between drywall panels to disappear once the drywall is painted, the seams need to be covered with joint compound in a very particular manner.
The proper method involves applying the joint compound in a series of layers, with each one increasing in width. If the joint compound isn’t applied in an appropriate way, you will have bulging drywall seams. Fortunately, this is often something that can be easily repaired by a professional.
Find a Contractor to Fix Bulging Drywall
If your bulging drywall seams are a bit too complex for your home repair skills, don’t worry. There are plenty of contractors who specialize in these kinds of issues. Finding one has never been easier thanks to the internet and websites like Yelp, Angie’s List, and Porch.
A contractor may fix the issues by applying a skim coat of compound over the entire wall. This creates a flat, new-looking wall that’s free from all bulges and bumps.
Don’t try to apply a skim coat of compound on your own unless you’ve done it before. The work is more complicated than you’d think. It requires a trained hand and a specific installation process. Doing it on your own could make your bulging drywall seams even worse.
Do You Need Drywall Repair Services?
Get free, zero-commitment quotes from pro contractors near you.
Wrapping It Up
Before you can truly be happy with the appearance of your home, those unsightly drywall bulges must be dealt with. Although drywall that is properly installed will appear flat, smooth, and blemish-free, anything from basic installation mistakes and natural home settling to plumbing leaks can result in bulges and bumps in your drywall finish.
Thankfully, most of these common problems can be easily remedied by the average homeowner with the help of just a few tools. Though, when in doubt, it never hurts to call in the assistance of a certified professional. After all, hiring an expert almost always yields the best results.
Related Questions
How do you hide drywall seams on the ceiling?
You can do this with some drywall tape and joint compound. Just fill in any recesses to make them level with the rest of the ceiling and tape over them for a seamless finish.
Why is my drywall tape showing?
Drywall tape is actually supposed to show through the filler coat. If you’ve already applied a final coat and it’s still showing, apply more thin layers until the problem’s solved.
Is mesh or paper tape better for drywall?
Paper drywall tape is usually a better option. It’s a bit stronger than mesh tape and more versatile. That being said, mesh tape does offer the benefit of better moisture resistance.
Can you caulk drywall seams?
Caulk is a commonly-used alternative for standard drywall patching compound. There’s nothing wrong with using it as you repair your seams. Just make sure you select a paintable caulk to avoid any issues down the line.

We are a team of passionate homeowners, home improvement pros, and DIY enthusiasts who enjoy sharing home improvement, housekeeping, decorating, and more with other homeowners! Whether you're looking for a step-by-step guide on fixing an appliance or the cost of installing a fence, we've here to help.
More by Upgraded Home Team


![10 Best Electric Lawn Mowers - [2022 Reviews & Top Rated Models]](https://cdn-fastly.upgradedhome.com/media/2023/07/31/9070486/10-best-electric-lawn-mowers-2022-reviews-top-rated-models.jpg?size=350x220)