How To Build A Freestanding Pallet Wall
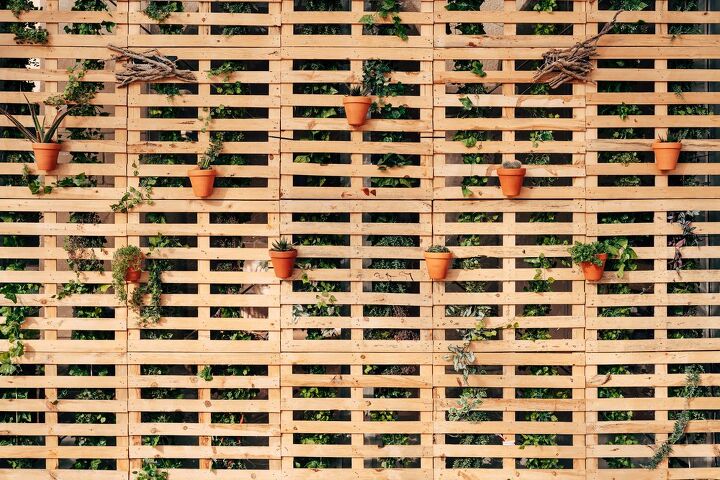
Hipster homes love industrial looks. This is a fact we all know. Pallet furniture has been a staple of hipsters for ages, and truthfully, it’s a good look. Pallets can be turned into tables, beds, and, yes, freestanding walls, too. If you’ve been looking for a cheap way to make a freestanding wall, the answer might just be found in a pile of pallets.
Building a pallet wall means you’ll need to gather up supplies, determine the length of the wall you want to make, and then add some studs. Once you have your studs in place, you’re going to have to add plates that will hold your pallets together and provide stability. After that, you’re going to have to arrange the pallets together, using paneling and bolts to fit them together.
Putting together your freestanding pallet wall sounds complicated, but it doesn’t have to be. This guide will show you how to make a DIY day project from this simple endeavor. This is a lot easier than it sounds.
Do You Need to Hire a Framing Contractor?
Get free, zero-commitment quotes from pro contractors near you.

What Will You Need?
In order to kick off this home project, you will need to have the right supplies. Here’s what you’re going to need to pick up from the hardware store:
- A saw
- 80-grit sandpaper
- Bolts, nails, and screws
- Pine wood
- A screwdriver
- A protective sheet
- A power drill
- Wood glue
- Wood finish in the color of your choice
- Shelving feet
- Pallets!
By ensuring that you have the proper materials and tools before starting, you will avoid any unwanted speedbumps along the way. The most frustrating part about DIY projects is having to stop in order to go purchase a new tool or a forgotten material.
Start Off By Figuring Out Your Pallet Wall’s Dimensions
The first thing you’re going to want to do is to figure out how big you want your standalone wall to be. Most of these projects will have them at varying widths, with a height that’s slightly under a door’s typical height. Once you’ve figured out the dimensions, cut two pine boards to act as the top and bottom “plates” of your wall.
If your pallet wall is going to be larger than the width of one pallet, then you may need a third plate. In these cases, you will need to have the middle plate be used as a way to connect the two pallets.
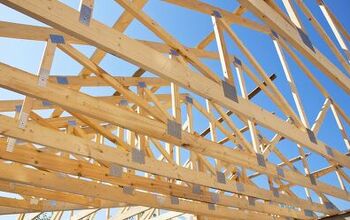
Next, You’re Going To Need To Install Your Studs And Sand The Corners Of The Plates
Studs are going to be what will add structure to your wall. To do this, you will need to lay the two pine plates next to one another and install studs on them. The studs should be at least 15 inches apart and should be lined up perfectly between the two plates. Count the number of studs, and make the cuts.
Smooth out the wood with sandpaper before getting to the next step. Make sure you get the corners and the edges, as you won’t be able to do this later. You can check the sanding efficiency by running your hand along with the wood. However, you want to do this slowly; otherwise, you may get a sliver.
Get Your Power Drill
Once you’ve gotten to this point, you’re going to need to grab your power drill and switch it with a 1/16 inch drill bit. Flip the plates over so that the broader portion of the plate can be seen up top. Grab your drill and make two small holes in the same area that you have your studs. Add screw tips to each of the holes.
Add wood glue to each of the studs, as well as each of the stud marks. This is to ensure that the studs really stick where they need to. Otherwise, later on, you’re going to have to go back and fix it.
Add Paneling To The Studs
The next step in this procedure is to add paneling to the plates. The plates should be placed width-side up when the paneling is added. Place your paneling on the top and bottom plates, cutting away excess paneling. Use nails and screws to fix the paneling into place. This gives you the base of your wall and lets you have a cute background to it.
This is going to be the back of your wall. All of the plates for your wall should be visible if you look at the wall from the front side.
Then, Affix The Pallets To The Plates Using A Hammer And 3-inch Bolts
To finally get the pallets to be put together, you’re going to place the pallets face down on the ground. Then, use three-inch bolts to affix the pallets to the plates. If the pallets end up being longer than the plates, use a saw to cut away the excess pallet material and use spare wood to get the pallet’s boards adequately affixed to the plate and keep the wall’s build even.
The next issue is figuring out whether you want a “hangable” wall or if you want a pallet wall that’s fully covered with pallet wood. So, you have two options from here:
- If you have long pallet boards or similar materials, you can fill in the pallet gaps with them. This gives you a more complete look. However, you will need to sand down the reclaimed pallet portions to do this, and you might have a hard time getting the wood to be entirely matched up.
- If you want those trendy gaps for artwork or lights, you can leave the pallets as-is. This is easy to do since it doesn’t add any extra steps.
Finish Your Pallet Wall’s Texture
Once everything is put together, you’re going to need to work on adding a finish to your pallet. If you are looking for a smoother pallet look (splinter-free), then you will need to use sandpaper to brush away excess splinters. Regardless of the splinter choice you make, you also will need to sand the sides to ensure that everything is even.
Another way to ensure that the splinters are sanded efficiently is by taking a cotton shirt or a washcloth and rubbing it along your pallet. If it catches at all, then it’s a good idea for you to sand that area down more until it’s smooth enough. This will help ensure there are no slivers that pop up.
Stain Your Wood
Place a protective sheet over the paneling but under the pallet’s wood. Then, add a varnish to the pallet wood and plates in the color of your choice, using the instructions provided on the varnish’s can. Let the stain dry. This gives your pallet wall a finished, polished look.
Make sure that the varnish is completely dry before you try to move it. Otherwise, you will ruin the look, which will require you to re-sand the entire wall, only to stain it all again.
Add Feet To Your Wall
Finally, grab a package of metal shelving feet, and screw them into the corners of your pallet wall. This adds just a little more stability and makes it easier to maneuver. We suggest using metal feet that are bolted to the bottom of the plates and extend both ways, with a truss to help hold up the wall.
Finding Free Pallets Near You
There is no reason to purchase pallets because there are so many places where you can get these for free. You can build as many pallet walls as you want almost for free!
Check around and call different places to ask if they have any pallets you can take off of their hands. Some of them will have paint on them, but you can always sand it away so that you can color it, or stain it the way you want to.
Some different places to check include:
- Pet stores
- Furniture stores
- Liquor and smoke shops
- Schools
- Flooring stores or home improvement stores
- Stationary shops
- Country stores for livestock supplies
Do You Need to Hire a Framing Contractor?
Get free, zero-commitment quotes from pro contractors near you.
Our Final Take
These instructions may sound involved and rigid, but there’s some good news to be had here. These instructions aren’t really as rigid as they first appear to be. The cool thing about making a freestanding pallet wall is that there are a bunch of different ways to do it. It all depends on the aesthetic that you want to achieve, as well as the purpose of the wall you’re making.
For example, if you want to make a full partition wall, you may want to add in extra pallet boards to cover up the paneling. On the other hand, if you’re looking for a portable wall that can have string lights run through, adding wheeled feet to a wall that has space between the pallets makes a little more sense. Don’t want varnish, but want to paint? Go for it.
What we’re saying is that pallets are incredibly malleable. So, don’t be afraid to experiment or get creative with our instructions. After all, the sky’s the limit when you have materials as versatile as shipping pallets.

Ossiana Tepfenhart is an expert writer, focusing on interior design and general home tips. Writing is her life, and it's what she does best. Her interests include art and real estate investments.
More by Ossiana Tepfenhart