How To Build A Fence Gate That Won't Sag
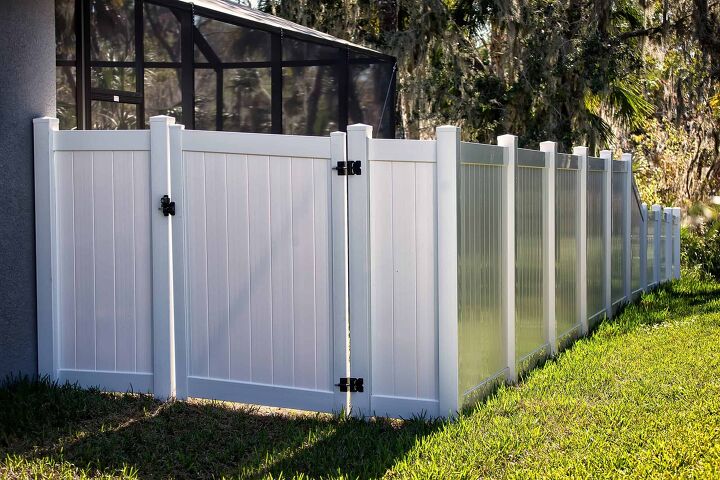
If you’ve ever been to a home that’s looked a little worse for the wear, chances are the first thing you noticed was that the house’s fence gate was a little droopy. Maybe it sagged so much, you actually had to lift the gate up in order to open or close it. It’s a common problem, but thankfully, it’s one that can be easily avoided if you know how to properly build a gate.
Fence gates usually sag because homemade fencing tends to be less stable than it should be. In order to prevent your garden gate from sagging, you will need to create a tension pull or a brace to help support the weight of the gate. Rigid woodworking joints, choosing a good material, and adding a diagonal bar to stabilize the gate’s frame can all help.
Woodworking aficionados who have been wondering how the pros make such beautiful sag-free fences need not wonder anymore. This guide will give you the scoop on how to make the best fence gate you’ve ever had.
Do You Need Fence Installation or Repair Services?
Get free, zero-commitment quotes from pro contractors near you.

Choosing Materials For A Sag-Free Fence Gate
When you’re choosing your materials, you want to opt for stuff that is known for being strong and sturdy. This means that metal gates are often the best choice, if you’re a metalworker by trade. Most of us aren’t, though, so it’s all about choosing the right type of wood. The best types of rot-proof wood to use for a fence gate include:
- Cedar. It repels bugs and is super strong. It’s also one of the more affordable woods on this list.
- Teak. It’s fancy, strong, and resistant to rot. The big drawback with teak is that it tends to be pricier. Still, if it’s in budget, it’s worth the splurge.
- Mahogany. Ooh, fancy, aren’t you? This type of wood may need an additional finish to ensure it can stand up to the elements well.
- Redwood. Redwood fences are highly regarded for their high strength.
A Note About Other Gate Materials
Obviously, wood alone does not a gate make. You will have other parts that make a gate a gate. Much like with your wood selection, choosing the right gate elements can reduce sagging immensely.
- When you’re making a sag-free gate, spring door closers will not be your friend. The constant slamming from the closers will twist and warp your wood in no time. A better option would be to use a weight on a chain tied to a post nearby to act as an automatic closer instead.
- Use a concrete base to the fence posts near the gate. Wood can rot on its own, which can lead to sagging later on down the line. To ensure that your fence won’t sag later, encase your fence posts in concrete around three times their diameter. If you live in an area that’s swampy, termite-prone, or wet, add post anchors too.
- Always use gate latches and hinges designed for outdoor use. Sure, the indoor latches and gates might be cheaper, but they’re not right for the job. Since they are not treated to withstand the elements, they’ll rust quickly and eventually require replacement. If you need help picking hardware, keep an eye out for brass hardware. It doesn’t stain or rust!
- When in doubt of your wood’s strength and resistance, treat it. Adding a finish or whitewashing your garden gate will only help protect it from the elements.
How To Join Your Wood Well For A Sag-Free Fence
Regular DIY wood joining methods aren’t going to be very useful if you’re trying to make a fence that doesn’t sag. To get good results, you will have to use joinery methods that are a little more professional in nature. This topic alone could easily make for an article in and of itself. However, we’re going to go through the most popular joining methods on a light level here:
- Mortise-and-tenon joint. This is a fancy name for having wood joined by carving out slats in one joint, carving a slat shape into the other, and binding them together. It’s considered to be the strongest joining method out there and has been used for centuries for this reason. You will want a tight fit to make this work with your fence.
- Dovetail joints. Mortise-and-tenon joints are known for being tricky to do, so you may need to opt for the second strongest join out there, the dovetail. Dovetail joints use dovetailed cutouts that fit together to hold together wood with a higher rate of strength. You will need to glue these, too.
- Half lap joints. Without a doubt, these are the easiest to cut. This involves partially overlapping the wood by cutting out sections. This creates a thinner, yet paradoxically stronger, fence gate.
Commonalities
If you haven’t noticed, all of these joining methods have a couple of things in common. First off, none of them mention nailing anything into anything. Second, they all involve using fitted pegs, slats, or cutouts to push and pull against one another. Third, they all involve skilled cuts.
The joining issue is going to be the biggest hurdle for people who are relatively new to woodworking. That’s why this project is not one we’d suggest for people who are still learning the ropes. Building a gate fence is a task better suited for intermediate to advanced woodworkers, or professionals.
Using A Diagonal Bar
In order to ensure that you have a strong, sag-free garden fence, you need to make sure that your fence has some way of getting the tension or compression it needs to stay stable. The thing is, rectangular fences are not going to afford that naturally. While some woodworking fans might suggest a pulley system to give your gate tension, we’re not fans of this.
Pulleys and strings can be an eyesore in many situations. Besides, they can break or get tossed around during high winds. A better option would be to add a compression bar to the back of your fence that goes on the opposite diagonal. This will keep your fence compressed together, which in turn, helps it stand up on its own.
Fixing A Sagging Wooden Or Metal Fence Gate
If you already have a fence gate that is sagging, there are some steps that you can take to fix it. So if you weren’t the one who built this and need to fix someone else’s mistake, we’ve included some instructions for you.
Tools And Materials You Will Need
- Handsaw
- Sledgehammer
- Carpenter’s or a laser level
- Post-hole shovel
- Shovel
- Drill
- Drill bits
- Socket wrench set
- Pliers
- Quick setting concrete mix that is in a bag
- Stainless or galvanized carriage bolts that include the nuts and washers
- Anti-sag gate kit
- Gravel that is compactable
- New fence post
- 2 scrap boards
- Wooden stakes
- Screws
- Duct tape
Instructions
Step 1: Add On The Corner Brackets
In the anti-sag kit, there should be two corner brackets. You will need to install both of these on the inside gate frame with the screws that are provided. One of the brackets will sit o the bottom corner away from the hinge. The other corner bracket will go on the top corner that’s closest to the top hinge, diagonally across from the corner bracket you set on the bottom.
Step 2: Intsall The Turnbuckle And Cable
Fully extend the turnbuckle by unscrewing it so that you can hook it onto the bracket you est in the upper corner. You will then need to thread the cable into the turnbuckle and through the bracket that’s in the lower corner to connect all the take-up fittings
Next, you will have to secure the ends of hte cables according to the manufacturing instructions. This might involve creating loops and cable clamps. You can tighten this using your wrench set and pliers. However, you’ll want to pull the cable as tight as it can go before you install the clamps.
Step 3: Sinch And Tighten The Cable
Use the take-up fittings if you have them to tighten the cable. You will need to make sure you remove as much slack as possible. Then, you will need to turn the turnbuckle to help tighten the cable. This should pull the gate into a square shape. Then, close the gate and make sure it fits the correct way. Tighten the cable as needed for any last touches.
Do You Need Fence Installation or Repair Services?
Get free, zero-commitment quotes from pro contractors near you.
Our Final Take
Putting together a fence that won’t sag is a project that is deceptively tricky, but it can be done if you have good wood joining skills. The big issue that you have to face when you’re building a sag-free fence is stability. Most fences sag because their structure isn’t stable, their materials aren’t good, or a mix of the two. Your task is to work to prevent that from happening.
Using advanced wood joining techniques, investing in high-strength materials, and making a point of using smart engineering techniques is what you’re going to need to do. By making sure that your fence’s build has a strong foundation in terms of wood choice, structural options, and hardware, you set your project up for success.
With that said, this isn’t a project meant for everyone. If you’re green to the world of woodworking, it might just be smarter to hire someone else to do it. After all, you don’t want to have to fix your work later on.

Ossiana Tepfenhart is an expert writer, focusing on interior design and general home tips. Writing is her life, and it's what she does best. Her interests include art and real estate investments.
More by Ossiana Tepfenhart


![The 10 Best Table Saws - [2022 Reviews & Buyer's Guide]](https://cdn-fastly.upgradedhome.com/media/2023/07/31/9070645/the-10-best-table-saws-2022-reviews-buyer-s-guide.jpg?size=350x220)