What Size Wire To Run To A Shed? (Find Out Now!)


Electrical work may be confusing even to an experienced DIYer, especially when it comes to wire gauge. Wire gauge is the thickness of a wire and it can affect how much of an electrical load it can handle. So, what size wire should you run to a shed?
Run 14-gauge wire to a shed that is 20-50 feet away from your home, as long as local building codes permit it. Thick gauge wire is durable and can support a 15-amp, 120-volt breaker box, and you can safely bury it 12” deep. Generally, 12-14 gauge wire can support up to 240 volts if the shed is under 50 feet from the house.
Check local building codes to make sure that it is permitted in your municipality. Always turn off your home’s power when you run wire from it to a shed. Follow along as we explore what size wire is ideal to run to a shed.
Do You Need Electricial Wiring or Panel Upgrade Services?
Get free, zero-commitment quotes from pro contractors near you.

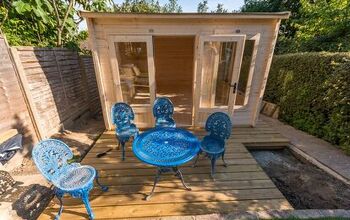
What Size Wire to Run to a Shed
You must run 14-gauge wire to a shed if it is within 20 feet of your home. This is ideal if you install a 15-amp breaker which is perfect for a shed. Generally, 14-gauge wire can support 120-volt breakers which should support all of your shed’s power needs without voltage drops.
Try to bury 14-gauge wire no deeper than 12” to avoid damage and save yourself the trouble. However, wire size varies based on how far your shed is from your home. Local building codes vary and some municipalities have specific rules about wire gauge and even the distance between your house and shed.
The last thing that you want to do is under-power or overpower your shed. This can be potentially dangerous and will certainly affect your energy bills. Luckily, 14-gauge wire is easy to come by and you can fit it into any electrical conduit.
How to Run Wire to a Shed
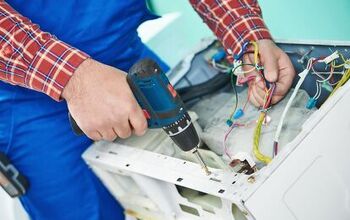
It may seem daunting, but it only takes 8 steps to run wire to a shed. Turn off your house’s power before you begin so that you can safely work and avoid electrical shock. It’s important to follow each of the steps closely so that you can properly power your shed without worrying about voltage drops or safety hazards.
- Determine the amount of power you will need.
- Check local codes.
- Select the size and amount of wire you need.
- Add a subpanel and circuit breaker.
- Dig a three-foot trench in the ground.
- Place conduit in the trench.
- Thread your wire through the conduit with as few bends as possible.
- Bury the wires.
Electrical work is tricky, and the most important thing is to exercise caution. You run the risk of electrical shock and can potentially damage your home’s existing electrical work when you run wire from your house to a shed. Let’s take a step-by-step look at how you can run wire to a shed.
1. Determine The Amount Of Power You Will Need
First, ask yourself how much power you will need for the project. Typically, most sheds only need 120 volts for the lights inside. However, if you want to install an outlet, you will need 240 volts.
In this case, be sure that any lights you purchase can handle 240 volts. It ensures that you do not need to run multiple lines of electricity to your shed.
2. Check Local Code Requirements
Your next step will be to check on what you need to provide electric wiring to your shed. In many cases, underground wiring to your shed may require a building permit.
Check with your zone enforcement officer for details. You may need to be a certified contractor. It is best to find out before you start digging up the yard.
3. Select The Size And Amount Of Wire You Need
After you determined the voltage, you will want to measure your house and the shed’s distance. If the shed nears 50 feet away, you will have to adhere to distance requirements behind the gauge of wire you choose.
In most cases, you will want to choose between 12 and 14 AWG, or American Wire Gauge. These both assume that you have a shed within 50 feet of your location.
If your shed is more than 50 feet from your space, you will need to reduce the AWG of your cable to account for this. At this point, you will need to calculate the voltage drop. You can do this with the formula below.
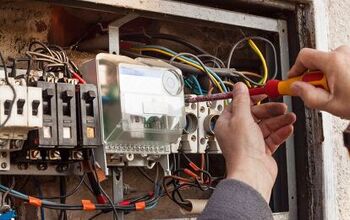
4. Add A Subpanel And A Circuit Breaker
At this point, you need to be sure that you have enough knowledge of electricity to go forward. A subpanel allows you to control the amount of wiring coming out of a single panel. It is an electrician’s form of sorting.
A circuit breaker will allow you to control when the electricity no longer going to the shed. Just like the one in your house, it will turn off when it gets overloaded.
You will need to be sure that your circuit breaker has enough room to include your shed at the bare minimum. If it does not, you will need to install a new one.
5. Dig A Three Foot Trench In The Ground
Here comes the hard part.
For wires which do not have a rigid metal covering, you will need to dig a trench that is three feet deep. This number is the minimum amount required by most city ordinances, so you will want to check this number with your ordinance officer before beginning.
Typically, the NEC requires you to have three feet of depth for any conduit. With cooperation with local city groups, you can feasibly reduce this number to one-foot deep. Be sure to mention whether or not you plan on burying this under concrete. That tends to reduce the depth at which you plant, but might complicate the process if something malfunctions.
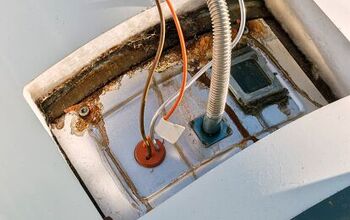
6. Place A Conduit In The Trench
After your trench, you will want to pick a PVC pipe as a standard conduit. A conduit is simply a carrier of the wire between points. If the wire was bare, it could cause a potential electrical and fire hazard. Insects will also eat through your wire.
You will also want to be sure that the conduit does not go too deep inside your vault or building. Three inches is the typical minimum in this case.
7. Thread Your Wire Through The Conduit With Minimal Bends
You will also want to be sure that the conduit has as few bends as possible. NEC guidelines do not allow more than two 90 degree turns. Going beyond these requirements will cause your cable to become a fire hazard.
If you need to force your PVC pipes to bend, you can heat them with a propane torch and turn them slowly. Again, do this as little as possible to avoid excessive bends.
8. Bury The Conduit
Assuming you have already connected your wires, you can begin the process of burying them. Be sure that everything is secured and connected before starting this process.
Some diggers place sand between the PVC and the dirt for further stability and protection. The sand will fortify the PVC pipes as it gets wet. Label the location with tape or a small flag so that nobody digs too deep and damages the wire. This will come in handy when you sell your home.
How Much Does It Cost To Wire A Shed For Electricity?
If you decide to do this project yourself, the answer depends heavily on the materials you use. Larger gauge wires tend to be more expensive, but PVC pipes are typically pretty inexpensive. With this in mind, do not expect to spend more than $200 on this DIY project.
If you decide to hire a professional electrician, expect to add a couple of hundred dollars to your project. You can pay as much as $500 depending upon the length between your house and the shed.
If you wish to include more complicated projects which include larger electronics, expect that number to increase to nearly $1000.
Regulations
Local permit offices often require that you obtain a permit to wire your shed. Contact the office and find out what their requirements are. Generally, permit offices require that you provide your plan, and they may send somebody to survey the land.
If you live in rural out-of-city locations, the zoning locations will depend upon your county. Like South Dakota, Arkansas, and Wyoming, some states do not have regulations in individual counties. Never assume that you know and always follow safe wiring practices.
The NEC states that most locations require a single branch to supply a building. That means you should only have a single circuit or sub-panel. If you prefer to avoid a sub panel, you will have to check with local zoning to ensure they allow this. In most cases, you will need some element of control.
Without a sub panel, it can be not easy to differentiate what goes to where. Also, additional panels will give you an allowance for expansion for the future. If you turn your small shed into a small den, you will thank yourself later by giving yourself the budget to add the extra panel.
Related Guides
I'm a guy who becomes the expert of whatever I stumble upon, writing-wise. I've written tons about cool home products, home improvement, and smart technology in the home. I'm also the proud father of a kiddo born on new years, making my holidays very busy.
More by Eli Smith