What Size Nails for Crown Molding? (Find Out Now!)
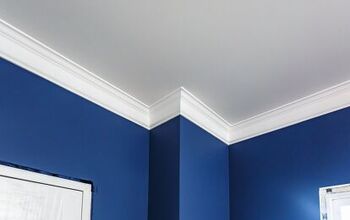
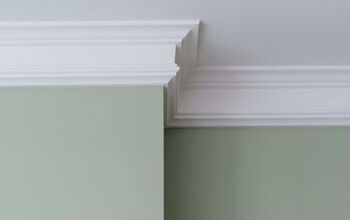
Crown molding is a way to add a bit of flair and style to any room. It works to hide the imperfections that your walls can have. It can even add value to your home as they are still somewhat uncommonly found in homes.
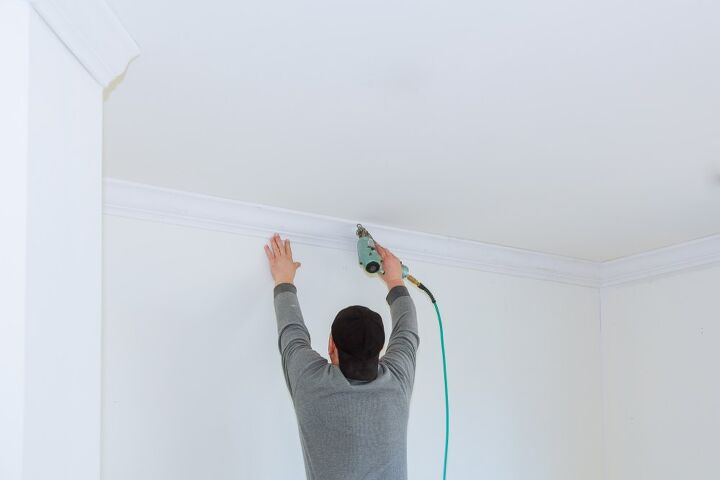
Having the right nails is key to securing the crown molding. You use finishing nails as well as a finishing gun to nail down crown molding. It is important to ensure that your crown molding is secure. When it comes to properly secure crown molding, you need 2” nails to do the job, nailing to the framed stud wall carefully so as to not damage the molding.
Do You Need Interior Trim or Decorative Molding Installation?
Get free, zero-commitment quotes from pro contractors near you.

Why Go with Crown Molding?
You may be asking yourself why even go through the trouble of installing crown molding in the first place. The answer is somewhat simple: there are more than a few benefits to having crown molding installed.
For one, it can hide the imperfections that can come with time. Homes can shift, which can lead to cracks and blemishes on the walls. Crown molding can hide those things. They also diversify the number of design options that you have with your trim and molding.
Finally, crown molding has been shown to add value to a home. If you are considering selling your home in the near future, crown molding may be a great addition to give you a little bit of a value boost.
What Do You Nail Crown Molding To?
If you are attempting to install crown molding yourself, it is important to know all the details beforehand. Like where you are nailing the molding, what you’re nailing it with, and how much crown molding you need.
When you nail crown molding, you are nailing it to the framed stud wall. Studs are typically about 16” on center for 2×4 walls. For 2×6 walls, they are 24” on center. That means there are ceiling joists stick-framed at intervals of 12”, 16”, and 24” for the center trusses.
You nail into either the top plates or studs at the bottom portion of your crown molding in order to fasten it. From there, you would have to cross nail the top to hold it tight to just about any kind of ceiling.
What Size Nails are Used?
Your average crown molding requires 2” finishing nails. You don’t want to hammer finishing nails in; use a compressor and a finishing gun to nail down your crown molding. Make sure that the outside corners are done using a brad nailer with 1” brad nails.
Be certain to nail into the higher profiles of your crown molding. Doing so makes it much easier to fill and sand than it would be if you were to nail into a crevice. For crown molding that has a 3” rise or less, you don’t have to mark out the studs as you will be nailing the top plates instead.
Knowing How Much Crown Molding to Use
One of the most integral parts of installing crown molding is ensuring that you have enough for the job at hand. Determine where the molding is going to be used in order to estimate just how much of each type will be necessary.
You can find crown molding in lengths typically range from 3’ to 16’ depending on where you look. Where possible, use the shorter pieces rather than buying a big long piece. This way, you can do the job with several short pieces instead of having to cut down the long piece.
Most homes consist of a total length of 8 feet or less. You can always buy just a little bit more than you know that you will need as a safeguard.
Choosing the Right Size of Molding
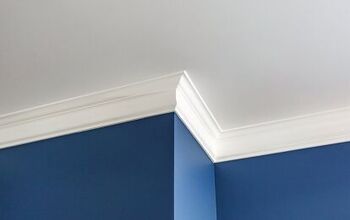
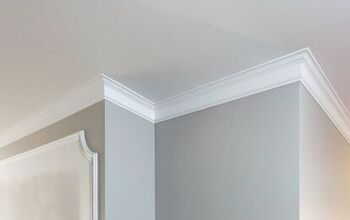
While the length of molding is important to determine, you must also figure out what size molding you want to install. Most crown molding ranges from anywhere between 2-1/4” to 7-1/4”. There are a few considerations to take into account before deciding the size of your molding.
First, you will have to consider your home’s style and find a size that best matches it. You want a molding size that is appropriate given the ceiling size of the room. Where you have taller ceilings, you want wider crown molding. It really is about finding the right fit based on the specifications of the rooms where you will be installing it.
Cutting Crown Molding
Should you decide to perform the installation yourself, you will need to know how to properly cut the crown molding. There are generally two methods when it comes to cutting crown molding. Those are the flat and in position methods.
In Position Method
When referring to the “in position” method, it means placing the crown molding on your miter saw at the angle that it is going to be installed. You would then only use the miter portion, not the bevel portion, of the saw. So, if you had an 80-degree corner, set your saw to 40 degrees.
This method is much simpler to measure and cut out than the other. This is the ideal cutting position for beginners. Just make sure that the molding stays in position. If it moves, your cut may be imperfect as well.
Flat Method
The flat method is when you have crown molding that is too large to cut in the “in position” method. You use both the bevel and miter settings of your saw here with the molding laying down flat. You then use compound angles to make your cuts.
This is a much more precise method since the molding can be held straight on the miter saw. If you have to flip the crown molding or move the bevel, you might have difficulty remembering whether the bottom or top hits the fence. Keep visual references nearby if you plan on using this method.
Do You Need Interior Trim or Decorative Molding Installation?
Get free, zero-commitment quotes from pro contractors near you.
Crown Molding for Curved Walls
If you have a curved wall, don’t panic. There are lightweight, flexible crown molding options for curved walls as well. They have all the same benefits of wood but can hold up against splitting, cracking, and breaking. Just be prepared to pay more than you would have for standard crown molding.

Ryan Womeldorf has more than a decade of experience writing. He loves to blog about construction, plumbing, and other home topics. Ryan also loves hockey and a lifelong Buffalo sports fan.
More by Ryan Womeldorf


![10 Most Dangerous Neighborhoods in Baltimore [Updated]](https://cdn-fastly.upgradedhome.com/media/2023/07/31/9075655/10-most-dangerous-neighborhoods-in-baltimore-updated.jpg?size=350x220)