


What Is Paint Flashing? (Find Out How to Fix and Prevent It!)
It’s important to know the proper process of applying interior paint, which is exactly why master painters are considered “masters” for a reason. They’ve had years of experience making mistakes and know how to avoid them. Whereas, the average homeowner trying to perform an extensive painting job is far more likely to end up having to re-do the entire surface – wasting money, time, and materials. With that said, you may be wondering: What is paint flashing?
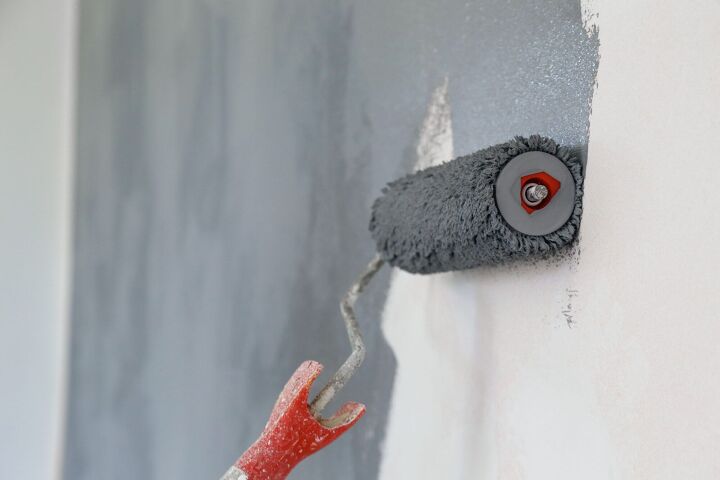
Oftentimes, inexperienced or DIY paints roll out a ceiling or wall and then use a brush to perform the “cut in.” This causes paint “flashing,” which can be described as a shine or sheen that is left where the cut in was done. Instead of a smooth transition between the rolled and brushed-in areas, what results is a distinct sheen that draws the eye to the defects.
It’s very common for paint touch-ups on walls and ceilings to cause some sort of unsightly finish when compared to the old paint. However, there are ways to paint successfully and avoid flashing and other undesirable results.
Do You Need to Hire a Paint Contractor?
Get free, zero-commitment quotes from pro contractors near you.

What is Paint Flashing?
The term “flashing” is used by paint professionals to refer to the clear difference in finish that often occurs when you retouch shiny or old paints. When light reflects the surface of a freshly painted surface, this flashing is displayed as a shimmering effect.
It is most obvious when viewed from the side, as you’ll have a better view of the imperfections on a surface when the light hits it. In most cases, any difference in the overall finish of a paint job is called flashing.
What Causes Paint Flashing?
This phenomenon can happen because of a number of reasons. For starters, flashing will occur if a drywall patch was not textured to match the rest of the wall or ceiling. It can also happen when a shiny finish is applied over a bare wall patch. In this case, a quality primer was not applied first to a textured or newly applied drywall. Wall repair spackle and mud has to be primed using a latex primer before it can be finished with a shiny paint.
Another common way that flashing occurs is when there isn’t a feathered smooth integration between where a surface was rolled out and cut in with a brush. Instead, all the “cut in” brushwork should be done first and then rolled out to create a proper transition.
Uneven porosity on the surface being painted can cause more pigment to absorb in some places than others, resulting in flashing. Not to mention, something as simple as poor-quality rollers and paint may create an uneven application with some areas that are thick and others that are thin.
- Temperature fluctuations during drying.
- Paint applied over a porous surface.
- Using interior paint for outdoor applications.
- Moisture, condensations, or heavy dew getting onto the paint application while drying.
- Using oil-based/ gloss alkyd paint or a solvent-based epoxy in areas of direct sunlight.
- Inadequate film build – like applying coats too thin.
Regardless of the cause, there are ways that paint flashing can be fixed and prevented in the first place.
How to Fix Paint Flashing
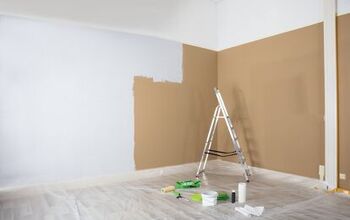
When a paint flashing problem occurs during a touch-up or full-scale paint job, the best solution is to apply a second coat of paint – applying it from one break to another. This method helps to diminish the noticeable distinction between the new finish and the old. A break in a wall is typically at the corner, but may also occur when trim molding extends from the baseboard to the crown molding
In this case, the molding is breaking the wall into isolated areas and an isolated area can be easily repainted with a paint color that matches as close as possible and the slight color difference won’t be as apparent. Regardless of the extent of the paint flashing, follow these steps to fix the problem:
- Start by sanding the surface with extra-fine grain block sandpaper. Sand just enough to even out any areas of thick paint and level out the texture.
- Using a damp cloth, wipe down the surface to remove any remaining dust from the sanding.
- Then, clean up the work area using a shop vacuum. Dust particles are very small and easily airborne, which means that are highly susceptible to landing in finish coats. If you don’t have a vacuum, you can sweep, then allow the dust to settle for 15 minutes and sweep a second time.
- Prepare a new batch of paint by pouring it into a paint tray. Use a high-quality type of paint and don’t dilute it. Diluted or low-quality paint typically goes on unevenly. Also, different pigment concentrations can create flashing.
- Start applying a fresh coat of paint on the surface. First, dip the roller into the paint and roll it on the tray to get rid of the excess. By doing this, you are preventing the presence of thick and thin layers that create flashing in your finished coat.
As you are painting, work fast and always lead with a wet edge. Paint from one edge of the wall all the way to other and do not join dried sections. Painting over areas that are partially dried will create uneven layers.
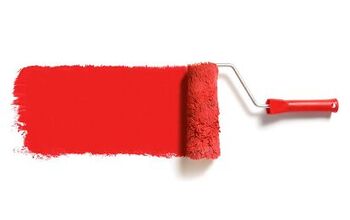
Pro Tip: Quality latex satin paint is the least likely to result in flashing. In addition to paint, always invest in quality products – a high-quality roller is less likely to apply uneven coats and case flashing.
Touching Up Shiny Paint
Shiny paints are often the most difficult to touch up, including high-gloss, semi-gloss, eggshell, alkyd-based, and oil-based paints. Even alkyd and flat oil paints will cause flashing if you attempt to do touch-ups in the middle of a ceiling or wall.
For these finishes, use the “break to break” method to achieve the desired finish. Whether you’re using the original paint or not, the only way to avoid any sort of flashing issue is to paint the entire wall.
Touching Up Flat Paint
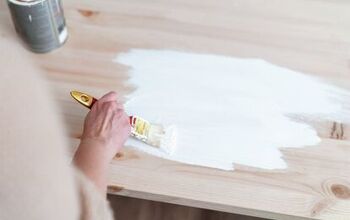
Before applying paint to your walls, it’s important that it is mixed well. Stir or shake the paint can prior to using and always retouch using a brush on previously brushed areas and a roller on previously rolled sections. If, after the new paint application has dried, you notice that the touch-up job is not blending well with the original paint, trying using the “break to break” method outlined above.
Touching Up Trim Molding
Touching up trim in a way that avoids flashing should be done in the same way as shiny finishes – painting from one break to the other. With trim, the breakpoints are where two separate molding pieces come together at the corners of a window or door frame. Find out what flashing cement is for other DIY projects.
How to Prevent Paint Flashing
Follow these tips for preventing paint flashing from the get-go:
- Always follow the label and data page instructions to achieve the proper environmental condition for the paint application.
- To ensure a uniform surface, bare substrates must be properly primed and sealed prior to applying the topcoat.
- Spot prime patched sections to attempt to level of the surface’s porosity.
- In some cases, thinning a touch-up coating may help it apply better.
- Consult the label and data page directions for the proper applicator and film build.
- Exterior alkyd/ oil-based paints and solvent-based epoxies chalk, which gives the appearance of loss of gloss failure. Washing the chalk off the surface can return much of the original finish. Though, it will chalk again. If necessary, recoat the surface with an acrylic.
- Oftentimes, applying an extra coat will level out irregularities in sheen.
Do You Need to Hire a Paint Contractor?
Get free, zero-commitment quotes from pro contractors near you.
Related Questions
Why is my paint drying patchy?
A patchy paint finish may occur when you don’t apply enough layers of paint, as small sections of color from the old finish become visible.
Why are there bubbles in my paint job?
Bubbles or blisters in paint typically occur when the topcoat doesn’t properly adhere to the bottom coat. It’s often caused by a heat or moisture issue.

Jessica considers herself a home improvement and design enthusiast. She grew up surrounded by constant home improvement projects and owes most of what she knows to helping her dad renovate her childhood home. Being a Los Angeles resident, Jessica spends a lot of her time looking for her next DIY project and sharing her love for home design.
More by Jessica Stone


![Cost To Drill A Well [Pricing Per Foot & Cost By State]](https://cdn-fastly.upgradedhome.com/media/2023/07/31/9074980/cost-to-drill-a-well-pricing-per-foot-cost-by-state.jpg?size=350x220)


