What Is A Furring Strip? (Types, Uses & Installation)
For amateur craftsmen, learning is part of the process. That means running into terminology or materials that you are unfamiliar with. One such term that you may have heard of before is a furring strip.
Unless you have the experience of a seasoned professional, there’s a good chance you won’t what it is. A furring strip is a long strip that is typically made from either metal or wood. They are generally about 1”x 2” or 1”x 3” and can be applied both vertically and horizontally.
But where do we use furring strips for? Understanding the different types and the reasons for using them can wind up providing a valuable tool for future projects.
Do You Need Wall and Ceiling Contractors?
Get free, zero-commitment quotes from pro contractors near you.

The Two Types of Furring Strips
There are two different types of furring strip (also referred to as a furring channel): hat channel-shaped and z-channel shaped. Knowing the difference between the two is important. No one wants to use the wrong pieces on their projects, after all.
1. Hat Channel Shaped Furring Strip
These strips get their name because they look like a hat (kind of). Hat channel furring strips are actually the most common kind when it comes to metal furring strips. You will see these used primarily when it comes to large real estate projects.
The reason that these kinds of furring strips are used is due to heat-resistance qualities. It provides a layer of protection from the heat of the sun and solar heat.
2. Z-Channel Shaped Furring Strip
Do you know how z-channel shaped furring strips get their name? You guessed it: they are in the shape of a Z. These make for a popular choice in residential projects and home improvements because they are highly versatile in the number of fastening methods that it can support.
Metal tends to provide a bit more heat insulation than wood, but you may find that you are preferential to the wood which is okay.
What are Furring Strips Used for?
The good thing about furring strips is that they actually have numerous uses. The first is that metal and wood strips create a solid, level frame for carpenters. This allows them to attach paneling, wood, or plaster to a ceiling or wall in a more effective manner. In any type of project, you need to be certain to that you accurately install these materials to prevent uneven wear and tear, cracking, or breaking.
The second thing they are used for is to create space between the wall and the plaster. It is important to establish that air space in order to prevent additional wear and tear from happening. This will lead to the quicker need for replacing either.
Lastly, the furring strips are useful when it comes to installing insulation and tubs or showers. They are versatile tools that can make even the largest of projects smoother and provide an extra layer of security.
Furring Strips for Structure Support
Perhaps the most important trait that furring strips offer is a supportive and level structure when it comes to applying the finish. This can be useful whether it is in regards to walls or ceilings. In any event, they are essential to get a smooth, flat surface when the project comes to a close.
During the application process of furring strips to walls, they will need to be directly nailed or screwed into your concrete or wood wall. When this has been completed, it is simply about adding the next layer in the process.
Furring Strips for Creating Space
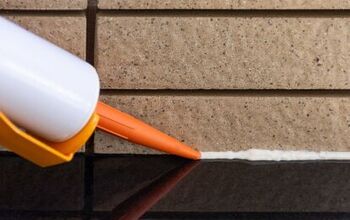
When you are working on a project involving drywall, it is important to keep in mind that you will need to provide air space between the wall itself and the finish. This is where the furring strips come into play. They create that air space between both layers, offering not only space but support at well.
If you plan on using furring strips to finish out a drywall project, you will need to nail them in before you cover them. You can cover them with either a drywall finish or wood panels, whatever you choose to use.
Furring Strips for Installing Insulation
Insulation is a must for many different reasons, primarily keeping your home protected from the extreme temperatures of a given area. When it comes to installing insulation inside of walls, furring strips are usually required.
Generally speaking, the strips can be applied directly to the walls themselves using concrete screws. When this is done, the insulation can be inserted between the wall itself and the furring strips. After the insulation has been inserted, most carpenters will use something known as gypsum bord in order to provide covering for the insulation.
Furring Strips Restrict Moisture
Flat furring strips are usually the choice when it comes to using them for projects that require insulation. These are strips that are specialized in order to help prevent a thermal short. These furring strips are great for keeping moisture from getting inside the wall.
This is crucial because any moisture that gets inside of your walls can lead to the growth of mold. When mold is allowed to fester, it can get out of control. That can be quite bad for your respiratory health and it makes for an expensive fix to fully eliminate the mold from your home.
Furring Strips for Tubs and Showers
Furring strips also are great when installing showers and bathtubs. Both tubs and showers have what is known as an underlining pan. The furring strips actually help to level out that surface that is under the backer board. The uneven surface can be caused by uneven studs. When the surface is level, you can lay your backer board down and then put the rest of the shower together.
Bathrooms with tiles also tend to have furring strips used in the installation. They go in the walls to keep the backer boards from sticking out all the way at the bottom. If your tub base has plastic surrounding it, you won’t need to use furring strips. But if the walls around the tub are going to be tiled, using furring strips is a good idea.
Properly Attaching Furring Strips for Concrete and Insulation
This installation process will work for both concrete and insulation installations. When it comes to insulation, going with rigid foam is a good idea. This is because rigid foam will not absorb any moisture. Keeping moisture out is of the utmost importance due to the aforementioned mold issues.
By using rigid foam, there is no need to create a vapor barrier. But if you use drywall as your finisher following insulation, you should be installing your furring strips every 16 inches or so, starting at the top and moving all the way down to the bottom.
Step One: Your 2×4 Board
Take a 2×4 piece of wood and lay it into the corner where the foam and the flooring will meet. Leave no gaps between the rigid foam and your board. Turn the board over and apply an industrial adhesive. Turn the board back over and place it flush in the corner so that it adheres. Repeat this process with the rest of your boards across the entire length of your room.
Step Two: Drilling Your Holes
The next step is to use a power trill to drill angled holes into both the concrete all and the top of the board; a hammer drill should do. The holes should be around 16 inches apart and need to be around an inch and a half deep.
Drive 3-inch fluted nails into each of the pilot holes. Then, measure the distance from one of your 2×4 boards, writ it down, and measure out two furring strips for that length.
Step Three: Installing the Furring Strips
Make sure to coat your furring strip with that adhesive and cover the full length of the strip. Then, press it into the foam insulation and make sure that you do so in the left corner of the room. From here, you will drill 1/8” pilot holes through your furring strips and into the insulation as well as a 1 ½” hole into the concrete all.
Using those fluted nails, hammer them into the pilot holes. Take your second furring strip, spread adhesive on it, and press it against your insulation as you did with the very first strip. Keep doing this until you make your way across the room.
Providing Stability and Reliability
The crux of any construction or home renovation project is stability and reliability. Using furring strips is meant to provide that structure necessary to ensure a properly completed installation. Furring strips may not be absolutely necessary to achieve this goal, but they can certainly provide an extra layer of security in this regard.
If you aren’t sure whether or not to use a furring strip, there are guidelines online that can provide a little more clarity. Thankfully, installing furring strips is a relatively easy task and can provide an additional peace of mind.
Do You Need Wall and Ceiling Contractors?
Get free, zero-commitment quotes from pro contractors near you.
Related Questions
What kind of wood are furring strips?
In most cases, furring strips are made of pine, or even plywood. However, metal and steel furring strips are very commonly used among builders.
How much do furring strips cost?
The price of furring strips varies depending on the type, finish, material, and store that you buy them from. However, you can expect to spend between $1 and $3 per furring strip.
Can I use furring strips for bed slats?
Although a less common use for furring strips, you can use them to construct an inexpensive slatted bed base. Furring strips cost around $1.99 a piece and you’ll need around 8 strips to construct bed slats for a queen bed – costing you around $16.Whereas, Ikea sells bed slats that are $40 for a queen size bed. Therefore, using furring strips to make bed slats is not only effective, it’s also very budget-friendly.

Heather is a passionate writer who loves anything DIY. Growing up, she learned everything from home repairs to design, and wants to share her tips with you. When she's not writing, she's usually hiking or searching for her next DIY project.
More by Heather Robbins


![10 Best Scroll Saws for 2022 [Ultimate Reviews & Buyer's Guide]](https://cdn-fastly.upgradedhome.com/media/2023/07/31/9070684/10-best-scroll-saws-for-2022-ultimate-reviews-buyer-s-guide.jpg?size=350x220)