Washing Machine Not Draining Completely? (Possible Causes & Fixes)

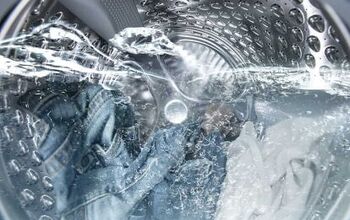
As a homeowner, managing your washing machine is another thing you have to put on that long list of chores. If your washing machine is not draining completely, it could result in gross standing-water situations. That leaves us with the question: how do you fix a washing machine that is not draining completely?
Pull the washing machine out, remove the drain hose, and remove any debris with a brush or drain snake. You can also remove the filter from the washing machine and clean it over a trash can so that it will properly drain. Otherwise, you may need to remove and replace the drain pump.
You may also have a clog or damage in the drain pipe. Below, we will provide some steps that you can use to clean or repair your washing machine.
Do You Need Appliance Repair Services?
Get free, zero-commitment quotes from pro contractors near you.

How To Fix A Clog In The Drain Pipe Of Your Washer
- Turn off your washer and have a bucket ready.
- Pull out the washing machine and remove the drain pipe from the back.
- Check the drain pipe for clogs or abnormal bends.
- Remove the clogs or replace the drain pipe.
Step One: Turn Off Your Washer And Get A Bucket
Start by removing your washer from the wall. Being electrocuted is no way to start a repair process. Pull the washer out from the wall and have a bucket handy. Use a cup and the bucket to remove as much standing water as possible. By doing this early, you don’t have to worry about cleaning mold from your washer.
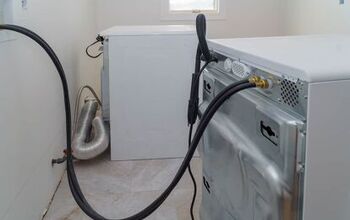
Step Two: Pull Out The Washing Machine And Remove The Drain Pipe From The Back
After you remove the washing machine from the back, ensure that you can access the drain hose. In some cases, drain hoses are short enough, so you might already see that the house is taut. Unless you plan on replacing the drain hose, be sure that you don’t break it while cleaning.
Remove the drain hose, being ready with the bucket to catch excess water. A clamp with a flathead screwdriver will hold these on. Twisting the screw will loosen the clamp, allowing you to remove the hose easily.
Step Three: Check The Pipe For Clogs Or Abnormal Bends
Lift the pipe and look through it to see if you can’t find any apparent blockages. If you can see anything, you can try and push a long brush through there to remove the blockage.
After maneuvering the debris, it may be easier to move around with water. Try and put the garden house to it at first. If there is no sign of the clog letting loose, some drain cleaners are suited for rubber hoses. You may also try a drain snake.
Step Four: Remove Any Clogs Or Replace The Drain Pipe
If there is no apparent clog, the blockage is likely deeper in your pipes. This step is where you can be a bit more aggressive with a drain snake or cleaners like Draino. If you reconnect it and are still having problems, think of how little space you have back there. Kinks in your drain hoses may result in the water not being able to go anywhere.
As a result, you will want to see about getting a smaller or more flexible drain hose. Both options may solve the issue of having too many twists, as gravity helps a drain hose work. Because washing machine hoses are universal, you don’t have to make a specialized purchase.
How To Clean Out A Drain Pump
- Locate and open the filter door
- Unhook and empty the hose
- Remove and clean the filter
Step One: Locate And Open The Filter Door
The access door of your filter is on the bottom half of your machine. If you are still having difficulty finding it, reference your owner’s manual.
The door should have a small latch on it, which you can easily pull forward. Otherwise, you can find out how it opens and proceed. For the next step, you need to have a bucket and a towel handy.
Step Two: Unhook And Empty The Hose
The access panel will contain a filter and a hose. Start by removing the cap from this hose and placing it into the bucket. Remove the bucket when it is full and repeat until this hose stops draining water. If any water leaks out, use your towel to clean up. Do not do this while your washer is running.
Step Three: Remove And Clean The Filter
The filter is a mesh screen that likely contains a large number of clothing fibers. Put some rubber gloves on and start removing the contents of the filter into a trash bag.
The filter should be easily removable. Do that and clean it out in the sink to ensure that there is no gunk left behind. If you find change here, it is a sign that you need to check your pockets more often. This drain cannot handle larger debris.
Washing Machine Drain Pump Test – Finding Out If You Have To Replace The Drain Pump
If cleaning the drain pump doesn’t solve the problem, the pump may be broken. Signs of this are apparent if you see bits of broken plastic in the access panel of your drain pump.
At this point, you will want to remove the entire front panel. Reach out and check to see if the belt of the machine is movable. If not, it is a sign that something is preventing the pump from moving. There are a few rotors that move with the pump. You should be able to move those rotors with your hand. If there is any resistance, you will need to replace your pump.
Front-Load Washer Drain Pump Replacement
If you need to replace the drain pump, there are many steps between you and access to the pump body. Given that every washer is different, you want to consult your owner’s manual. Below are the quick steps:
- Purchase a new drain pump based on the model number of your washing machine
- Remove everything between you and the drain pump.
- Remove the drain pump.
If you plan on making this a DIY process, check your warranty first. Companies typically have five- to ten-year warranties on this.
Step One: Purchase A New Drain Pump Based On Your Model Number
Your first step is to purchase a new drain pump. You can do this by looking for your washer on your company’s website. You can also bring the part down to your local hardware store, but most people don’t typically include this among common DIY repairs, making the part hard to find.
Step Two: Remove Everything Between You And The Drain Pump
The most time-consuming part of this process is getting to the drain pump. That is because the drain pump is connected to many systems in your washing machine. You can expect to remove the following items from the washer:
- Top panel (typically done with a Phillips or flathead screwdriver)
- Front panel (be careful of the wire connections)
- Dispenser drawer (screwdriver)
- Control panel (screwdriver and wires)
- Pump housing (on the bottom with screwdrivers, clamps, hoses, and many electrical components)
- Rubber door (typically requires prying with a flathead)
Given that this is an attempted catch-all list, you may not need to remove everything listed above. However, the drain pump is still connected to many devices, so you will have to remove most of them.
You are also going to want to pay close attention to the location of various screws and bolts. You can make this easier by grouping them by category and giving them each a designated spot. You are also going to remove the entire pump housing. Taking it out gives you access to removing the drain pump.
Step Three: Remove The Drain Pump From The Bottom
The drain pump is part of the pump housing, which should be pulled out by this step. The drain pump should be able to be removed with some simple screwing. There may also be connection tabs that hold the pump to the housing.
Once you make the replacement, it is time to undo everything you just did. While it isn’t incredibly complicated, it can be a time-consuming process that is easy to get lost while doing. If you don’t have a day to devote to this process, it may be best to hire an HVAC technician.
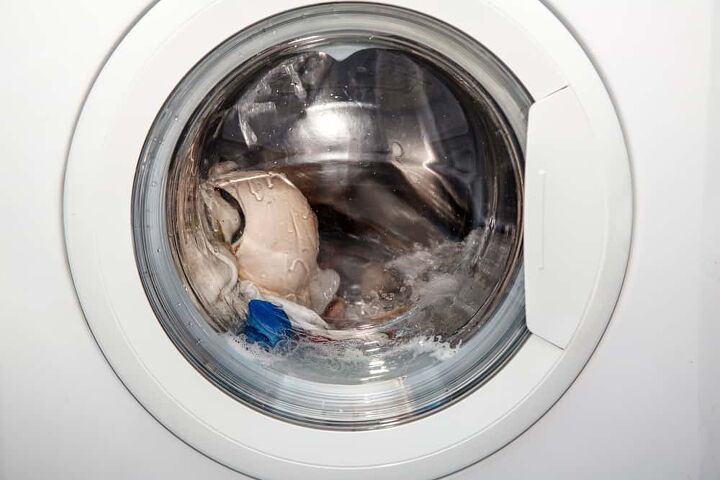
What If I Hear Sloshing, But There Is No Water?
In top-loaded washers, a small amount of water is sometimes at the bottom. This water is part of your balance ring, which stays behind just if the next wash is out of balance. This water provides a bit of extra weight to the washer, making sure it doesn’t fly off the handle.
Do You Need Appliance Repair Services?
Get free, zero-commitment quotes from pro contractors near you.
What If I Have An Older Washer?
Older washers have a dial with a specific “pump out” zone that removes the water from your washer. As a result, forcing the dial forward will cause your washer to skip that pump out mode.
Also, older washers lack the complex sensors that come with newer options. Because of this, an older washer may not be able to tell if there is water in the basin. It is why you will want to have your washer go all the way through its cycle.
I'm a guy who becomes the expert of whatever I stumble upon, writing-wise. I've written tons about cool home products, home improvement, and smart technology in the home. I'm also the proud father of a kiddo born on new years, making my holidays very busy.
More by Eli Smith