


Is Your Toilet Flange Not Level? (We Have A Fix!)
If your toilet is wobbly or loose, this may indicate that your toilet flange is not level. Toilets should be flush against the floor. If you notice that your toilet is rocking back and forth, replace the toilet flange to prevent future damage.
If the toilet flange is not level, you should replace it. First, empty the toilet, remove the toilet tank and bowl, then remove the existing flange. Next, install the new flange and place a wax ring around it to keep it level.
Do You Need to Hire a Plumber?
Get free, zero-commitment quotes from pro contractors near you.

What Is a Toilet Flange?
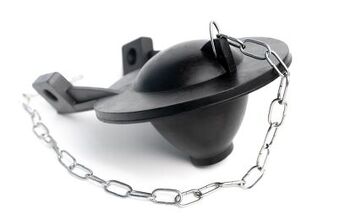
A toilet flange secures the toilet to the floor and connects to the drainpipe. Toilet flanges are circular pieces usually made of PVC, rubber, or metal that secure to the floor with bolts. If the flange is loose or uneven, it can leak or erode the floor around it.
Follow the steps below to replace your toilet flange.
How to Replace a Toilet Flange
Tools You Will Need:
- Towels
- Wrench
- Plunger
- Screwdriver
- Putty knife or paint scraper
- New wax ring
- Toilet flange kit
Step 1: Flush and Empty the Toilet
Turn off the water supply to your toilet by turning the supply knob behind your unit. Then, drain the toilet by flushing it until the tank no longer fills with water. If there’s any remaining water in the bowl, use a plunger to help drain it.
Disconnect the water supply hose from the toilet. Be sure to keep towels near to catch any water that may drain from the hose.
Step 2: Remove the Toilet Tank
First, lay down towels to protect your floors. Using a wrench, remove the nuts from the mounting bolts that hold the tank onto the bowl. There will be one nut on either side of the tank, and there may be one in the middle.
Set the nuts aside to reuse later. Carefully lift the tank off the bowl and place it outside of the working area.
Step 3: Remove the Toilet Bowl
To remove the toilet bowl, pry off the bolt caps at the base of the toilet using a screwdriver. Next, remove the nuts from the floor bolts with a wrench and set them aside.
Between the bottom of the toilet and the toilet flange is a wax ring. Gently rock the toilet bowl side to side to break the wax seal. Have a friend help you lift the toilet bowl and lay it on its side on the towels near you.
Step 4: Remove the Existing Toilet Flange
Using a towel, plug the drain pipe. This will prevent unpleasant odors and prevent you from losing bolts or small parts down the drain.
Clean the wax ring from the bottom of the toilet and the base of the flange. To do this, use a putty knife or paint scraper. Remove the mounting bolts and screws and set them aside if they are in good condition to reuse them again.
If you have a PVC flange, you can lift it from the outflow pipe. If the flange is metal or glued to the drainpipe, a plumber may need to remove it.
Step 5: Install the New Toilet Flange
Using the provided hardware, install the new flange to the floor. If there’s no supplied hardware in the kit, use wood screws or cement screws depending on the subfloor material. Slide the toilet flange bolts into the new flange and secure them with washers and nuts.
Step 6: Install the Wax Ring
After you install the toilet flange, install the new wax ring. The thickness of your floor will indicate the required thickness of the wax ring. You have two options for installing the wax ring.
Option one is to rest the toilet bowl on its side on a towel to protect the floor. Then, attach the replacement wax ring to the bottom of the toilet bowl. This will ensure the wax ring is in the correct position when placing the toilet over the flange.
Option two is to center the wax ring over the flange, then lower the toilet bowl into place.
Step 7: Replace the Toilet
Place the toilet bowl over the new flange and align the bolt holes in the base with the flange bolts. If you hold the bowl by the inside rim, you may have a better grip. Lower the bowl and apply pressure to set the seal.
Make sure not to move the toilet after placing it on the wax ring. Replace the washers and nuts on each bolt and tighten the nuts onto the bolts. Make sure not to over-tighten the nuts to prevent cracking the toilet bowl, then replace the bolt caps.
Replace the toilet tank on the toilet bowl and align the bolts with the holes in the bowl. Secure the tank by tightening each tank bolt until the tank meets the bowl. Reattach the water supply line and test the toilet for leaks by turning the water shut-off valve.
Complete the installation by flushing the toilet and making sure there are no leaks.
How To Fix an Uneven Toilet
A toilet can become uneven over time when caulk hardens or if the floor settles a little. You can fix this by placing a toilet shim under the base of the toilet.
To level the toilet, follow the steps below.
Tools You Will Need:
- Utility knife
- Plastic shims
- Tub and tile chalk
- Paper towels or a rag
Tip: The best type of shim to use is a small, plastic shim that has ridges. You can find them at most home improved stores. Do not use wooden shims because they can compress and are vulnerable to moisture damage.
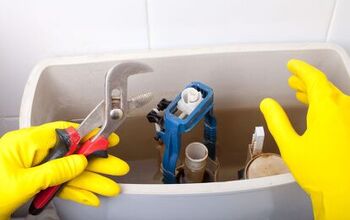
Step 1: Check the Bolts
Sometimes a toilet rocks because the bolts are loose. Tighten the two bolts at the base of the toilet carefully.
Check the flange bolts at each side of the toilet using pliers or a wrench. If a bolt is loose, tighten gently until snug, then check for rocking. If it still rocks, continue to the next step.
Step 2: Look for Leaks
Before beginning the repair, check the toilet for leaks around the base of the toilet. If there’s no water, you can continue to the next step. If there are signs of leaking, this may mean that the wax seal has become compressed, and you should replace it.
Step 3: Locate the Gaps
Examine the base of the toilet to determine where the gaps are between the toilet and the floor. It may help to rock the toilet from side to side. If you can’t see large gaps, try sliding a shim under the base to see how far it goes in.
Step 4: Insert and Trim the Shims
Level the toilet by inserting the shims into any gaps you see. You may have to try several different positions to level the toilet. As you work, sit on the seat to check for stability and rock in all directions.
Step 5: Caulk Around the Base and Let Dry
Apply a thin, even bead of caulk around the base of the toilet. The caulk will cover the gap along the floor and hide the shims. Smooth the caulk with your finger, then wipe clean with a rag.
Caulk can create a finished look and keep any water from getting under the toilet base. However, caulking the entire base can trap water if there is a leak. To prevent this, leave the backside of the base without caulk so you will be aware if there are leaks.
Allow the caulk to dry before using the toilet.
Do You Need to Hire a Plumber?
Get free, zero-commitment quotes from pro contractors near you.
Related Questions
What is the average cost to replace a toilet?
The average cost to replace a toilet depends on several factors. The cost will depend on the type of toilet you have. The cost will also vary based on your location and the difficulty of the installation. Most plumbers charge between $275 to $480 to replace a toilet. The average cost, however, is $375 to replace the toilet. When a plumber replaces the toilet, the cost includes removing and disposing of your old toilet.
Are some toilets more expensive than others?
There are three different toilet designs: a one-piece toilet, a two-piece toilet, and a wall-mount toilet. One-piece toilets are typically more expensive, but they are a sleeker look. Because there are few crevices, they are easier to clean.Two-piece toilets are the most common type of toilet and most competitive in price. When purchasing a toilet, you have the most options with the two-piece type. Wall-mount toilets are not common because they require a specific installation. They are also more expensive, but they have the benefit of being able to sweep or mop under them.
Can plunging a toilet damage the wax ring?
If you are trying to dislodge a clog in the toilet, you may thrust too hard down into the toilet. This can break the wax seal between the toilet and the floor and cause a leak. A hard thrust can also crack the toilet bowl, so follow the steps below to properly plunge the toilet. First, place the plunger in the toilet bowl so that water is covering the lips of the plunger. Next, push down gently to get all the air out of the plunger, then quickly pull the plunger up. Repeat the process until the toilet drains.
Related Guides

Stacy Randall is a wife, mother, and freelance writer from NOLA that has always had a love for DIY projects, home organization, and making spaces beautiful. Together with her husband, she has been spending the last several years lovingly renovating her grandparent's former home, making it their own and learning a lot about life along the way.
More by Stacy Randall


![Standard Dining Room Table Dimensions [for 4, 6, 8, 10 and 12 People]](https://cdn-fastly.upgradedhome.com/media/2023/07/31/9074335/standard-dining-room-table-dimensions-for-4-6-8-10-and-12-people.jpg?size=350x220)

