


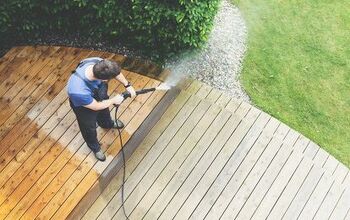
Sump Pump Is Loud When It Shuts Off? (We Have A Fix)

Your sump pump plays a valuable role in your home’s upkeep, helping prevent unwanted water from entering your house. Typically, depending on your location, a sump pump in good operating condition might kick on once or twice a day. You might hear a low humming noise when this happens, which is normal.
Lucky for you, you don’t have to keep enduring this loud thud every time your sump pump shuts off. This problem usually has a simple fix that you can likely handle yourself. You need to replace the check valve.
Do You Need Sump Pump Repair or Replacement?
Get free, zero-commitment quotes from pro contractors near you.

What Causes the Loud Noise When the Sump Pump Shuts Off?
Undoubtedly, hearing loud banging or thudding every time your sump pump turns off can get pretty annoying. This is especially true if the sump pump is near a bedroom.
While you might jump to the conclusion that something is wrong with your sump pump, don’t panic. The loud thud you hear is actually not coming from the sump pump itself. Instead, it’s more than likely the check valve creating the noise.
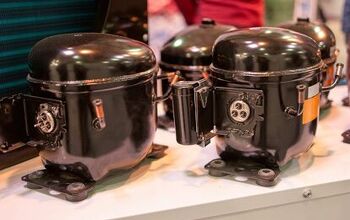
A check valve ensures that the water flowing from your home continues to flow in one direction. This feature prevents groundwater and sewage from reversing their flow and backing up into your home.
As water flows through the pipe, it presses against the check valve, opening it. When the sump pump shuts off, the flow of water reverses suddenly, causing the check valve to close. When the valve closes too quickly, it creates an effect known as a water hammer.
What Is a Water Hammer?
No, a water hammer is not another tool for your toolbox. When the water inside a pipe suddenly stops, this causes a wave of pressure within the line. When this pressure bounces back and forth, it causes a hammering noise; hence the term, water hammer.
How to Replace a Check Valve
When you decide to replace the check valve, opt for a quiet check valve or soft-close check valve. These types of valves feature a design that helps eliminate the thudding noise when your sump pump shuts off.
You can typically purchase these valves between $30 and $50 at home improvement stores, plumbing supply stores, or online.
Tools You Need for the Job:
- Tape measure
- Pair of PVC couplings or adapters, or metal clamps
- PVC nuts (if using couplers)
- Pipe cutter or hacksaw
- PVC cement with applicator (if using couplers)
- Pliers (is using couplers)
- Hairdryer
- Screwdriver (if using clamps)
- Bucket
- 180-grit sandpaper
Step 1: Drain the Sump Pit and Shut Off Power to the Sump Pump
Before working on the pump, you need to deactivate it. First, ensure the water in the pit has drained. Then, shut off the sump pump’s power (simply unplug it). The cap on the top of the pump contains electrical wiring. If you want to be extra cautious, you can detach these wires. However, this typically is not necessary.
Step 2: Locate the Check Valve and Measure the Drainage Pipe
The drainage pipe runs from the sump pump to outside the home to carry water away from the house. You can find the check valve on this pipe, typically about two feet from the pump.
Check the diameter of the drainage pipe. PVC pipe typically has the diameter printed on it. If not, remove the old check valve and measure across the pipe’s open end with a tape measure. (See the next step for how to remove the old check valve).
It’s essential to get the right measurement; if you can’t, cut a small section of the pipe (not too much). Bring this piece with you to the store when you buy your replacement parts. You need to ensure you get the right fittings to install your new check valve into the existing drainage pipe.
Step 3: Remove the Old Check Valve
If metal clamps are holding the check valve in place, turn the screws counterclockwise. Once you loosen the valve, disconnect the lower pipe. Hold the bucket underneath it to catch any water that is still inside the pipe.
If the valve uses PVC couplers, use a hairdryer to soften the pipes. Then, turn the pipes counterclockwise with the pliers to remove the valve.
Step 4: Choose the Right Check Valve
Measure your old check valve’s diameter and length to select the right size for your new valve. To determine the check valve’s length measure between the couplings or metal clamps, depending on the valve’s design.
Find a soft-close valve that will fit your existing drainage pipe; note whether you need PVC couplings or metal clamps.
Step 5: Fit the New Check Valve
Place the new check valve into position. Check if you need to remove any part of the pipe to fit the valve. If you do, do so a little at a time with the PVC cutters or hacksaw.
You don’t want to remove too much. If you measured your old check valve and purchased the correct size, you shouldn’t have to cut the pipe. Although you can install most check valves either horizontally or vertically, vertical is ideal. Test fit your valve before doing any cutting or making any corrections.
Step 6: Prepare the Pipes and Install the New Check Valve
Smooth the pipe edges using sandpaper. If the new valve uses couplers, fit the PVC nuts and couplers onto the upper and lower pipes. Screw the couplers in clockwise to ensure they are secure. Position the valve so the arrow on it points upward. If the valve came with rubber o-rings, slide them onto the ends.
Starting with the valve’s lower end, fit the valve into place. Rotate the couplers by hand to tighten the connections and slide the PVC nuts over them. If your valve has metal clamps, tighten them.
Note: This is a dry fit, so if you’re using couplers, don’t glue anything into place yet. You want to ensure the valve fits perfectly before making anything permanent.
If the new check valve uses metal clamps, proceed to the final step. If it uses PVC couplers, proceed to the next step.
Step 7: Use PVC Cement to Secure the New Check Valve
Once you have verified the correct positioning of the check valve, take apart the PVC fittings. Leave the nuts on the pipes so you can slide them into place once the valve is back in position.
Now, spread PVC cement around the pipes and couplings using the applicator (a cotton swab will do). Coat the outside edges of the pipes and the interior of the couplings. Finally, put all of the parts back together. Check for any gaps in the pipes before the cement dries. Your dry-fit should prevent this issue. Allow the cement to dry for roughly two hours.
Step 8: Test the Check Valve for Your Sump Pump
Pour some water into the sump pit and plug the pump back into the outlet. You should hear water rushing through the drainage pipe and hear the valve open as the pressure increases. When the pump shuts off, if no water remains in the pit, the valve is working correctly. If you notice any leaks, you may have to redo your connections.
Installing a new silent check valve should solve the issue of your sump pump making noise when it shuts off. However, if you are having trouble, or still hearing loud hammering noises, contact a professional. In rare cases, there could be a larger issue at play, or you might need to replace your sump pump.
Do You Need Sump Pump Repair or Replacement?
Get free, zero-commitment quotes from pro contractors near you.
Related Questions
Why is my sump pump so noisy while it’s running?
If your sump pump makes a lot of noise while running, this could be due to vibration in the pipes. It can also be because your pump extends too far beyond the sump pit or there is no cover on the pit. Keep in mind; your sump pump should not run all of the time.Ensure your sump pit has an airtight lid. If vibrating pipes are causing the noise, you can try wrapping them in foam or other appropriate insulating material. You might need to get a new sump pump or have a professional reroute the pipes in some cases.
How long does an average check valve last?
A typical check valve lasts between three to five years, but you should check it at least once a year. On average, a sump pump lasts between 7 to 10 years. Therefore, it is not unlikely to replace your check valve at least once during your sump pump’s lifetime. However, if your check valve has cracks or holes or is leaking, you need to replace it immediately. If there is more than one check valve, sometimes one can mask problems with the other. Therefore, always inspect all of the check valves thoroughly during your inspection. To assess the condition of a check valve, check the center connection for a leak. Pour about five gallons of water slowly into the sump pit. Observe the check valve for any leaks.

Stacy Randall is a wife, mother, and freelance writer from NOLA that has always had a love for DIY projects, home organization, and making spaces beautiful. Together with her husband, she has been spending the last several years lovingly renovating her grandparent's former home, making it their own and learning a lot about life along the way.
More by Stacy Randall


![10 Most Dangerous Neighborhoods in Baltimore [Updated]](https://cdn-fastly.upgradedhome.com/media/2023/07/31/9075655/10-most-dangerous-neighborhoods-in-baltimore-updated.jpg?size=350x220)


