Sprinkler Heads Not Popping Up? (Possible Causes & Fixes)

Gone are the days of standing outside with a hose to water your grass. Automatic sprinkler systems keep your lawn green without ever having to leave your house!
As with any automated system, sometimes, they don’t function the way they should. If your sprinkler heads aren’t popping up, we have the answer.
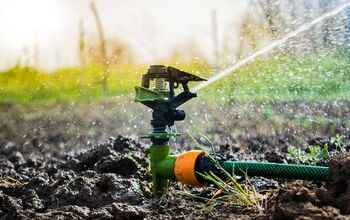
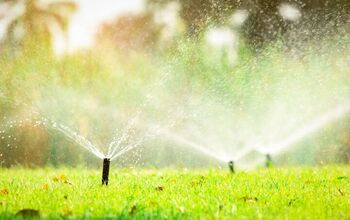
The most common reason a sprinkler head won’t pop up is that it’s broken. A broken sprinkler head can be easily replaced. If your sprinkler head is clogged or dirty, it will eventually get stuck in the ground and not pop up. Low water pressure and leaks in the water line keep the sprinkler head buried, too.
Do You Need to Hire a Sprinkler System Contractor?
Get free, zero-commitment quotes from pro contractors near you.

All about Pop-up Sprinklers
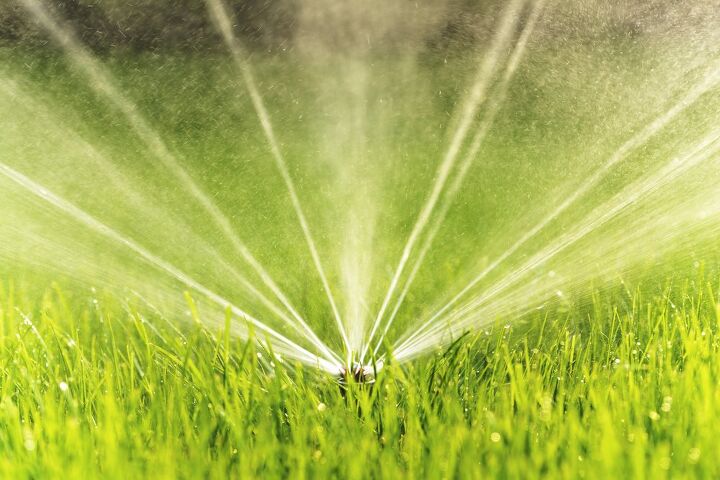
Because they hide away when not in use, pop-up sprinklers are the most common type of sprinkler in residential areas. They keep the lawn looking lush without detracting from the home’s curb appeal.
When the system is on, a piston pops the sprinkler head up from the ground, and the head retracts when the system shuts off. These actions happen automatically as part of the proper functions of the system. If the system is on and one or more sprinkler head isn’t popping up, it’s likely there’s a problem.
Broken Sprinkler Heads
If a sprinkler head is broken, it’s not going to pop up, even if the water is turned on at the highest pressure. A broken sprinkler head is the most common reason for a malfunction. Thankfully, they can be easily identified and just as easily fixed.
Know the Specifications
Your sprinkler head may be broken if you notice a cracked casing or missing pieces of plastic. Once located, the head should be replaced with a compatible model. The top of the sprinkler head should indicate all the important replacement information.
You’ll need to know whether the model is stationary, rotary-driven, or gear-driven. The replacement doesn’t need to be the same brand. It only needs to have the same mechanics.
You’ll also need to determine the following specifications:
- inches-per-hour (iph) or gallons-per-minute (gpm) delivery rate
- spray pattern
- throwing distance
If you can’t find any specifications on the top of the sprinkler head, you can most likely find it on the side once the head is removed. You can also check the brand and part number on the manufacturer’s website. If all else fails, your last guess is to bring the head to a local home improvement store for advice.
Steps to Replace a Sprinkler Head
- Dig up the sprinkler head. The head should be flush with or just below the ground. Use a sturdy trowel to carefully dig a hole 6×12 inches deep and wide.
- Unscrew the old sprinkler head. The sprinkler head is connected to the waterline by a small pipe called the riser. Twist the sprinkler head counterclockwise to separate it from the riser. If the riser comes off with the sprinkler head, carefully separate them. Inspect the riser for deformities and replace if necessary.
- Attach a replacement sprinkler head. At this point, the riser should be in place with seal tape around its threads. Flush out the system by turning on the water. Make sure to turn it off before replacing the head. Screw the replacement sprinkler head counterclockwise onto the riser. Tighten by hand and ensure the head is pointing in the preferred direction.
- Test the sprinkler head. Turn the system on and observe the newly replaced sprinkler head. Check for leaks and spray direction. Compare the height of the replacement to that of the other sprinkler heads.
- Fill in the hole. Shovel the dirt back into the hole, tamping it down as you go. You may need to reseed the area around the sprinkler head if the sod was too damaged to replace.
Clogged or Dirty Sprinkler Heads
If the sprinkler head becomes clogged with dirt or other debris, it won’t pop up as it should. The obvious solution is to clean the sprinkler head. Doing so often will prevent clogs from occurring and keep the sprinkler heads functioning properly.
Steps to Clean a Sprinkler Head
- Pull the sprinkler head up. The sprinkler head needs to be up in the position it would be if the system was on. When the head is down, it sits inside of a sleeve. Make sure to pull the sprinkler head out of the sleeve.
- Remove the sprinkler head. Unscrew the sprinkler head from the sleeve. If you have trouble, you can turn the system on. The water pressure may help pop the head up farther. Just be aware that it’ll get messy.
- Soak the sprinkler head. Put the sprinkler head to soak in lukewarm water. This will loosen the debris.
- Clean the sleeve. While the head is soaking, remove the sleeve and wipe it clean of any dirt or debris.
- Scrape the sprinkler head. After it’s soaked for a while, take a wire brush to the head and further loosen any hard-to-remove dirt.
- Reattach and test. Reattach the sleeve and sprinkler head and test the system, checking for leaks and functionality.
Low Water Pressure
Another source for un-popped sprinklers heads is low water pressure. If there isn’t enough water pressure in one of the zones, the sprinkler head might not pop up. The pressure of the water is what forces the sprinkler head to pop.
It’s possible the low pressure is because one of the system valves is partially or completely closed. A fully open valve releases the highest water pressure. The more closed the valve is the lower the water pressure.
Check all of the valves, including the main shut-off valve and valves on the backflow device if you have one. Turn each valve counterclockwise to make sure they’re all in the open position.
Leaks in the Water Line
If all the valves appear to be open, the system’s water pressure might be low because of a leaky water line. A leak affects how much water makes it to the sprinkler head. If it’s not enough, it won’t pop.
Aside from an un-popped sprinkler head, additional signs of a leaky line include the following:
- Unusually low areas in the lawn
- Muddy or wet spots that remain so even in dry weather
- A patch of grass that’s greener than the rest
- An increased monthly water bill
By the time you notice it in your water bill, chances are the leak has been occurring for a long time.
Steps to Fix a Leaky Line
- Once you find the spot of the leak, carefully dig until the pipe is exposed. Carefully is the operative word. You don’t want to make the problem worse.
- Using a hand saw, cut out the broken section of the pipe.
- Replace the broken section with a new PVC pipe. Fit with couplers on either end and glue everything into place.
Keep in mind that locating the source of the leak may be difficult because most of the sprinkler system is buried underground. It might be worth it to have an expert take care of it. Otherwise, you may end up with a yard full of holes and nothing to show for it.
Do You Need to Hire a Sprinkler System Contractor?
Get free, zero-commitment quotes from pro contractors near you.
Related Questions
How do I find a sprinkler head that won’t pop up?
I’m not sure many people remember exactly where their sprinkler heads are located. If you know the general location of an un-popped sprinkler head, you can carefully scrape the area with a shovel. Either you’ll dislodge some dirt that was in the way or hear the shovel hit the sprinkler head.You can also use a metal detector. Many valves use metal parts that would be picked up by a detector, and the valves are located right beneath the sprinkler heads.
Can sprinkler heads be adjusted?
It’s possible to adjust the water spray and spray direction on a sprinkler head. On the spray head, you’ll notice a small screw. Turning the screw is what adjusts the head itself. By turning the screw clockwise, you reduce the radius of the water spray so it covers a smaller area. A counterclockwise turn does the opposite. This screw also allows you to adjust the direction of the water spray.
How much is a sprinkler head replacement?
When replacing a sprinkler head with the help of a professional, the cost can range from $65 to $90. It costs between $2 and $12 per sprinkler head should you choose to replace them yourself.Adding additional sprinkler heads is between $94 and $103 while replacing or relocating every sprinkler head on your lawn is around $400. And an initial installation comes at a hefty price tag.
How often do lawn sprinkler heads need to be replaced?
Quality is key here. A low-quality sprinkler head will need to be replaced every 2-3 years. A sprinkler head of good quality may last you 10-15 years. Nozzles should be replaced more often—preferably every 2 years, depending on your water quality and climate.
Conclusion
Replace it if it’s broken. Clean it if it’s dirty. You can test the water pressure on your own by opening the valves completely. If it’s a leak, though, you may want to call in the professionals!
Brigid Levi is a wife, mother, and freelance writer who enjoys a good DIY project and creating beautiful spaces within her home. From cleaning and organization hacks to home decor ideas, she loves helping people in their quest to turn a house into a home. Her hobbies include pretending to be Joanna Gaines while updating her home with her husband and performing in local theater productions.
More by Brigid Levi