


SharkBite Vs. Compression Fittings (Here Are The Differences)

Leaks are a way of life when it comes to plumbing. Anywhere there is liquid, there will eventually be a leak. Even the best plumbing construction will eventually breakdown in some way and need to be repaired.
SharkBite fittings are new to the market and offer an easy installation. Compression fittings, when applied to a pipe with minimal movement, are a great choice for a tight hold.
When it comes to which is better, popular opinion is that they are both a good choice for quick repairs. As long as you secure the pipe from movement and apply the fitting correctly, they both offer long term solutions for permanent connections.
Most leaks occur in a place where one piece of plumbing connects to another. This can happen at valve unions, connections to pumps and filters, and from a pipe to a valve.
This can happen due to damaged materials, faulty O-rings, or pipes that were not cleaned or cut correctly.
This is why it is important to use the right tool to cut your pipe before installing any fitting. Checking the fitting for any damage prior to installation and checking all O-rings for degradation.
Welding is the most secure route to go when it comes to connecting pieces together, but if you have space constraints or lack the experience, there are easier installation options.
Do You Need to Hire a Plumber?
Get free, zero-commitment quotes from pro contractors near you.

SharkBite Fittings
SharkBite fittings are made out of lead-free brass. This gives them a higher temperature and pressure tolerance than plastic quick-connect fittings, allowing them to be used in more situations.
Lead-free brass also prevents a SharkBite fitting from cracking in freezing temperatures and makes them ideal for copper pipes.
Installing SharkBite Fittings
Installing SharkBite fittings is as easy as pushing the fitting onto a pipe. To remove you will need to use the special removal tool.
A SharkBite fitting has a ring of sharp teeth around a collet that dig in, gripping the pipe or tubing and holding it securely in place.
Step 1: Preparing the Pipe
Cut the pipe that you are installing with a pipe cutter. Clean the ends and make sure the pipe is flush and square to ensure a tight seal.
Step 2: Check the SharkBite Fitting
Look over the SharkBite fitting for any damage or obstructions. Make sure that the O-ring is clean and free of any damage.
Step 3: Removing the Collar
Remove the PEX support collar from the SharkBite fitting. Press the release ring with the release tool and pull the collar out of the fitting using needle-nose pliers.
Step 4: Installing the SharkBite Fitting
Holding the SharkBite fitting, push the pipe into the fitting with a twisting motion until you hear a click. Turn on the water and check the lines and fittings for leaks.
Where to use SharkBite Fittings
SharkBite fittings have a strong ability to withstand high temperatures, which makes them the perfect choice for hot water heaters. These fittings, with their higher-pressure tolerance, will work better than plastic quick-connects on copper pipes.
SharkBite fittings are quickly becoming the go-to for copper pipe repairs because of these reasons, as well as the rigid structure of their brass body which is similar to copper piping.
A SharkBite fitting contains a rubber O-ring, which happens to the main concern regarding their use. Rubber O-rings degrade over time, especially in certain situations.
Using SharkBite fittings for outdoor plumbing is not recommended as sunlight can dry out the rubber O-ring and shorten the life span of the fitting.
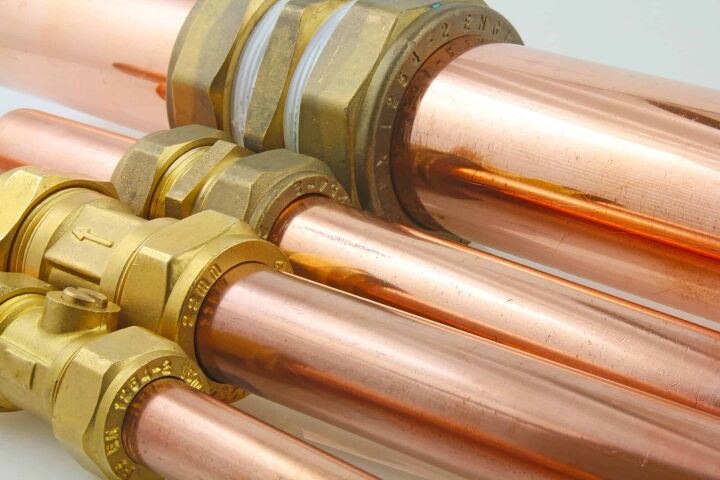
Compression Fittings
A compression fitting is a type of coupling that connects two pipes together, or a pipe to a fixture or valve. Consisting of three parts, a compression nut, compression ring, and a compression seat, to create a connection and seal.
When a pipe is slid into the fitting, the nut is tightened down. As it is tightened, the compression ring is pressed into the seat which causes it to compress against the pipe. With the compression nut providing a watertight seal, the connection is complete.
Compression fittings can be used in high-pressure applications and become more reliable as pressure is increased within a pipe, as this tends to expand against the ferrule creating a tight seal.
You can apply compression fittings to a variety of materials, including plastic, rubber, and metal. It is important to buy compression fittings that are made for the material that you are using them on, as they may include additional inserts for supporting the fitting.
Compression Fitting Leaks
It is important to follow installation procedures correctly as this is a common reason for leaks happening. The other way that leaks will occur is by the movement of the pipe, separating the seal between fitting and tube.
Compression fittings do a poor job at keeping a pipe in place, therefore if your pipe turns, twists, or pulls, it can work free the compression fitting. If the tubing is not solidly clamped down, this can cause a leak where the compression fitting was installed.
Compression fittings are not as resistant to vibration as soldered or welded fittings. Repeated bending can cause the fitting to loosen its grip on the tube and need to be readjusted. In order to create a tight seal, the pipe that is being joined must also be round and free of any exterior damage and grooves.
Installing Compression Fittings
Before installing a compression fitting make sure that your pipe is clean and cut properly. This will allow for a tight seal and stop any leaks before they start.
There should be no kinks, debris or dirt on your pipe. If there is a kink, cut the pipe before this point otherwise it could affect the seal.
Step 1: Slipping On the Compression Fitting
When your pipe is ready, slip on the retainer nut, the sleeve, and then the fitting. The next step is to tighten the retainer nut.
Step 2: Tightening the Fitting
Once you encounter resistance in turning. At that point, tighten one-half turn more and then test the connection by turning on the water slightly.
Step 3: Checking for Leaks
If there is a leak, turn the water off and tighten a quarter turn. Repeat this process of testing the fitting, turning off the water, and tightening a quarter turn, until the leaking stops.
One thing to be aware of is the importance of not over-tightening the fitting when using a plastic pipe. Doing so could cut into the pipe, damaging it and creating a leak.
You must also use a plastic compression ring with a plastic pipe and not a metal ring.
Do You Need to Hire a Plumber?
Get free, zero-commitment quotes from pro contractors near you.
Related Questions
Is it OK to reuse compression fittings?
Compression fittings are meant to be installed once and left alone. Once compressed, there are parts of the compression fitting that will not work the same if removed and reapplied.
Are SharkBite Fittings Reusable?
Yes, you can reuse SharkBite fittings for testing purposes only. Any fitting that is used repeatedly should not be used for normal installation, due to the wear and tear from installation and removal.
Can I Use SharkBite Fittings Underground?
Yes, SharkBite push fittings are approved for underground use by IAPMP. You need to protect the fitting by wrapping it with silicone tape after installing the fitting to your pipe.
Related Guides
Sean Jarvis is an interior decorator, writer, and expert handyman. Well versed in everything home improvement, he is a savant at manipulating words and spaces and upgrading everything around him. Sean specializes in writing concise guides about appliance repair and installation, home and lifestyle, and other residential projects.
More by Sean Jarvis


![The 5 Best Angle Grinders – [2022 Reviews & Buyer's Guide]](https://cdn-fastly.upgradedhome.com/media/2023/07/31/9071326/the-5-best-angle-grinders-2022-reviews-buyer-s-guide.jpg?size=350x220)

![10 Best Electric Lawn Mowers - [2022 Reviews & Top Rated Models]](https://cdn-fastly.upgradedhome.com/media/2023/07/31/9070486/10-best-electric-lawn-mowers-2022-reviews-top-rated-models.jpg?size=350x220)


