


Samsung Dryer Thermal Fuse Keeps Blowing? (Fix It Now!)
Don’t you just hate when you start the dryer and walk away, only to find later the dryer turned itself off mid-cycle? Now, your Samsung dryer won’t start at all. There is a 10% chance your Samsung dryer has a blown thermal fuse.
When a Samsung dryer thermal fuse keeps blowing, it will cause your dryer to run without heat or not to run at all. This is most likely caused by restricted airflow from a clogged exhaust vent. The fuse breaking could also be caused by a shorted heating element, a bad control board, or something else entirely.
Blowing out a thermal fuse is your dryer’s way of letting you know there is an issue. A busted thermal fuse means your dryer is overheating. Diagnosing what is causing the dryer to overheat is the only way to prevent the thermal fuse from busting again.
Do You Need Appliance Repair Services?
Get free, zero-commitment quotes from pro contractors near you.

What Is A Thermal Fuse?
A thermal fuse, or thermal cutoff, is an electrical safety device. This device will disrupt electrical currents when heated to a specific temperature. There are several thermal fuses placed in dryers to prevent them from overheating.
In the case of a dryer, the thermal fuse is a 2 inch by ½ inch, white, plastic piece. This part is considered a sacrificial safety piece. Its function is to break when the dryer’s heat reaches a dangerous level, cutting off power to the dryer.
If this fuse is missing or broken, in most cases, the dryer will not start. Some models will allow the drum to spin, but without a thermal fuse, the dryer will not produce heat. If your dryer is running, here are some other possible reasons your Samsung dryer isn’t heating up.
How Do I Know The Thermal Fuse Is The Problem?
When your Samsung dryer fails to start, you know there is a problem. It could be from a loose power cord or a tripped breaker. Diagnosing the problem correctly is the first step to fixing it.
If you think the problem could be the thermal fuse, here’s how to test a dryer thermal fuse.
Once you’ve confirmed your Samsung dryer has a blown thermal fuse, you need to replace it. Then troubleshoot the reason it happened in the first place to prevent it from happening again.
If the problem was a clogged vent, clearing the vent and replacing the fuse will fix the problem. However, if your problem was something else. You may need to replace other parts on the dryer.
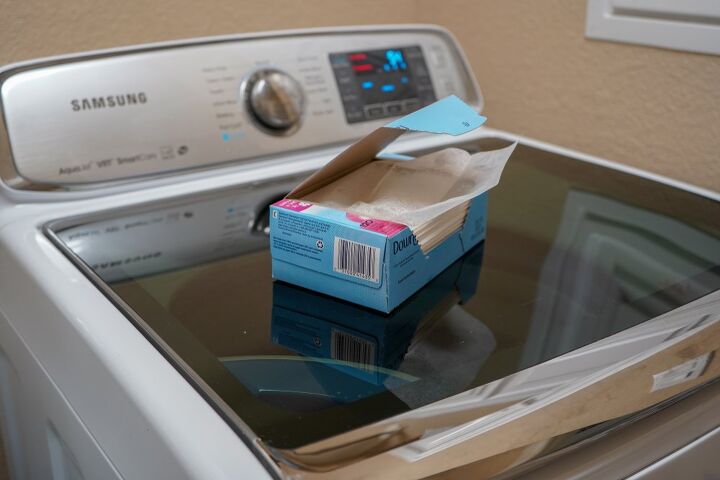
Ensure The Dryer Has Proper Airflow
The most common cause of a thermal fuse blowing is a clogged vent limiting airflow to the dryer. The thermal fuse’s basic operating function is to shut off the dryer if it is overheating. Blocked airflow to the dryer can cause a spike in temperature, tripping the thermal fuse.
Often a buildup of lint or debris will cause restricted airflow in the vent and duct. Checking the screen for lint and clearing it of any debris will help improve airflow in the dryer.
You can also clear out the duct leading outside. If you have never cleaned the duct out before, there may be more lint backed up than you think. Cleaning this will prevent the replacement thermal fuse from blowing out.
It is recommended to have the exhaust duct cleaned in your home once or twice a year.
Run Vent Blockage Tests
Some Samsung models have something called a vent blockage test. You can run this test to self-diagnose if there is a blockage in the exhaust vent.
If you still think the vent might be what’s causing this issue for your Samsung dryer, run this test. This will tell you if the dryer’s sensor is detecting a backup.
Running this test periodically is in the best interest of your appliance’s health. It can also help reduce dry time and save on energy costs.
Even if the test comes back good, the recommendation is to clean your vents still. Samsung recommends that you clean exhaust vents once or twice a year.
Can I Repair a Samsung Dryer Thermal Fuse Myself?
Replacing a thermal fuse can seem nerve-wracking, but it’s simpler than you think. Using a few basic tools, most dryer repairs can be done by homeowners themselves.
Paying a handyman or repair technician can cost hundreds of dollars. On average, the cost of paying for a dryer repair is between $100 and $400.
The cost for a replacement fuse is around $10. Doing the repairs yourself could save you some serious money.
How To ReplaceThe Thermal Fuse In A Samsung Dryer
This set of instructions covers how to replace part #DC47-00016A.
Tools You Need For The Job
- Flathead screwdriver
- Philips head screwdriver
Step 1: Disassembling The Dryer
As with any repair done on an electrical appliance, you should always unplug the dryer before doing any work to it.
Step 2: Removing The Top and Front Panels
On the back of the dryer, you will need to unscrew the top panel. You should then be able to slide the dryer’s top panel to remove it from the unit altogether. Then carefully remove the control panel from the front of the dryer. Unfasten the wire harnesses and place the control panel aside.
Removing the control panel will expose screws at the top of the front panel. You will need to remove these and the screws on the inside of the dryer door. Now you want to remove the front panel of the dryer. Use a flat head screwdriver to unfasten locking tabs.
Pull the panel forward and unplug the door switch wire. Then lift to remove it from the unit.
Step 3: Removing the Front Bulkhead
Next, you will need to remove the support bracket screw. This is the metal plate under where the control panel belongs. Carefully remove the bracket from the frame, detaching the bracket from the twist retainers.
Detach the light bulb wire and remove the wires from the twist retainers. Remove screws securing the front bulkhead, as well as the blower housing mounting screw.
Disconnect the moisture sensing wire harness at the bottom of the drum. You should now be able to remove the bulkhead from the drum. Careful, this piece is heavy!
Step 4: Disassembling The Belt and Pulley
Reach under the drum and push the idler pulley up to release the tension on the belt. Unwrap the belt from the pulley and motor shaft.
Lift the drum and remove it from the cabinet. You can use the belt to help lift the drum.
Step 5: Replacing The Thermal Fuse
Disconnect the wire harness from the thermal limit. Remove the mounting screw and remove the old thermal limit. Place with the new thermal limit and replace the mounting screw. Then reconnect the wire harness.
Once you’ve completed this step, you have successfully replaced the thermal fuse.
Step 6: Putting The Dryer Back Together
The remaining steps will cover how to put the unit back together. Read along while putting the dryer back together to ensure you don’t accidentally overlook a step. Missing a step while putting the dryer back together could cause a failure to start.
Step 7: Reassembling The Belt And Idler
Return the drum to the cabinet and make sure it aligns with the rollers.
Put the belt back into place by wrapping it around the pulley and motor shaft. Then place the top part of the belt on the underside of the idler pulley. Then push the pulley back into place to return tension to the belt.
Manually rotate the drum, making sure the belt aligns on top.
Step 8: Replacing The Bulkhead And Reconnect Wires
Reposition the front bulkhead and reinstall the mounting screws. Also, reattach the blower housing mounting screw.
Reconnect the moisture sensing wire harness. Reconnect the light bulb wire and fasten it in the twist retainer. Secure the remaining wires with the bulkhead twist retainers.
Now take the support bracket and secure the wires with the support bracket retainers. Realign the support bracket and secure it with screws.
Step 9: Reattaching The Front And Top Panels
Replace the front panel. You can line up the clips on the bottom of the panel to tabs at the base of the dryer. Reinstall all the mounting screws.
When attaching the control panel, line up the tabs on the bottom of the panel with the slots in the trim. Be sure to connect the wire harness before pressing it into place. Line up the top panel, then push forward into place. Secure the screw on the back of the dryer.
With the necessary repair completed, the only thing to do before using your dryer is to plug it in. Make sure you have fixed the original underlying issue before using the dryer. Failure to fix the problem will only cause the new thermal fuse to blow.
Do You Need Appliance Repair Services?
Get free, zero-commitment quotes from pro contractors near you.
Related Questions
Why isn’t my dryer starting?
If your dryer isn’t starting, the most likely culprit is the power supply. Open the door and check to see if the light inside the dryer works. If so, your dryer has power, and you are dealing with a different problem. However, if the light doesn’t come on, check the dryer bulb first to make sure it didn’t just burn out. If not, then try checking the power cord or flipping the breaker.If the dryer has power, it could be a defective door switch, a blown thermal fuse, or a bad start switch.
Can I reset my Samsung dryer?
Some dryers feature a reset button located on the control panel. If the motor refuses to run, let the unit cool off for about ten minutes. Then reset it before trying to run the dryer again.

Stacy Randall is a wife, mother, and freelance writer from NOLA that has always had a love for DIY projects, home organization, and making spaces beautiful. Together with her husband, she has been spending the last several years lovingly renovating her grandparent's former home, making it their own and learning a lot about life along the way.
More by Stacy Randall


![10 Most Dangerous Neighborhoods in Baltimore [Updated]](https://cdn-fastly.upgradedhome.com/media/2023/07/31/9075655/10-most-dangerous-neighborhoods-in-baltimore-updated.jpg?size=350x220)


