Is Your Ryobi 40v Battery Defective? (We Have a Few Fixes)

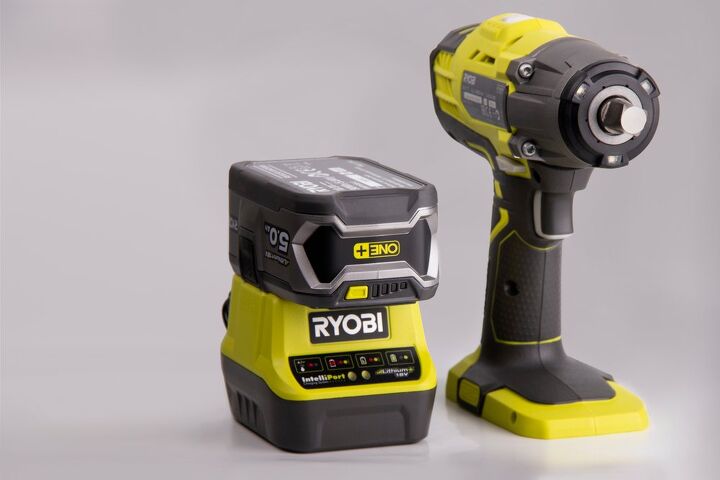
Cordless power tools have made doing just about anything around the house a completely different task. No more having to find an electrical outlet. No more getting tangled up in tool chords. Going wireless is simply better.
If your Ryobi battery is defective you can check to see if your battery is in sleep mode. Or, you can charge your battery for 10 minutes at a time to get the battery working again. This will eventually build up enough power so that you can use it throughout your new project.
Why is My Ryobi Battery Defective?
Even though it may seem like the simple answer is “it is bad”, that may not be the case. As a matter of fact, the most common reason is actually that it gets stuck in “sleep mode” and simply fails to get out of that mode.
There are a few ways to get a Ryobi 40v battery working again. One of the most common ways is to simply jolt it out of sleep mode using mini charges. You will have to do this a few times, but it should be enough to bring the battery back to life.
4 Ways to Fix a Defective Ryobi 40v Battery
1. Change the Charging Temperature
One of the most common issues with batteries of any kind is extreme temperature change. We tend to think of batteries as these invincible little energy machines that bring our favorite tools and equipment to life, making projects far easier than ever before.
Battery charging temperature range. Lithium-ion batteries in particular need to be in a certain temperature range to charge effectively. That range for lithium-ion batteries is between 41 degrees and 113 degrees Fahrenheit.
If a battery gets stored in a place that is either cooler or hotter than that – particularly when temperatures hit extremes in the winter or summer – it may not work.
Change the room temperature. One of the best ways to get your Ryobi battery working again is to bring it back to room temperature. In most cases, that should be enough to get it working again. But if you keep it in extreme temperatures for too long, it can suffer permanent damage and will need to be replaced.
Always store electronics and batteries in temperature-controlled areas to prevent damage. The garage may seem like a great place to store your tools, but batteries may not fare so well.
2. Waking it up from Sleep Mode
Believe it or not, it could just be a simple matter of your lithium-ion Ryobi battery falling into a slumber. Yes, batteries do have “sleep mode” on them. Sleep mode happens when the battery reaches critical levels.
Why sleep mode happens. Generally speaking, sleep mode happens when the battery gets used up but isn’t dead. Instead of going onto a charger, it sits on a shelf where it slowly loses power. The battery is unable to tell whether it is healthy or not, so it puts itself into sleep mode to prevent any further damage and thus will not charge.
Getting it out of sleep mode. Thankfully, you can bring the battery out of sleep mode and get it working functionally once again. This involves giving the battery a series of small charges since it won’t take to charging when it enters sleep mode.
When you connect the battery to a power source, there are a few seconds of charging before it triggers sleep mode again and stops. Implementing enough charges over that couple second interval can be enough to get the battery back up over the minimum threshold. That tells the battery that it is in good condition and charging is safe once again.
It takes time. Keep in mind that this method will take about a half-hour or so. Slowly put the battery onto the charger, count to 2, and disconnect. You don’t want to see either the green or the red light. Eventually, when you leave the battery on the charger, it should give you a green light to indicate that it is charging normally.
3. For Experienced Electricians
If you are an experienced electrician or feel confident in your electrical abilities, you can use alternative power sources to charge the battery once again. You can rig up another battery of the same model or use a separate DC power source.
All that needs to be done is to connect negative to negative and positive to positive. Keep in mind that if you get this wrong, it will damage the battery. When you have your connections in place, leave it be for around 5 to 10 minutes. You want to give it just enough juice to get it charging properly once again.
4. Test Out the Battery
Having a multimeter around the house can make for an extremely handy tool. Checking the voltage on your Ryobi battery can be a sure way to determine whether or not there is a problem or if it has simply just drained to a critical level.
Mini charges. Generally speaking, a battery will require about 7 volts before it is capable of charging fully once again. Test out the battery voltage to see where it is at. If it is below that 7 mark, try a mini charge and then test it again.
If the battery isn’t damaged, the voltage level should rise with each mini charge. It may take a few of those charges to get the battery back into healthy charging territory but should ultimately work. Either way, this will confirm whether or not the battery is healthy enough to eventually sustain a charge.
Does Ryobi Replace Dead Batteries?
In the above examples, the battery isn’t damaged, it is just below the safe threshold for charging. That means it can be brought back to life with a little bit of ingenuity and patience. But not all batteries have that happy ending.
When a battery dies and is still under warranty, you can call Ryobi’s customer service line directly to have it replaced. Batteries that are no longer under warranty will get directed to the Home Depot where a new battery will need to be purchased.
Do Ryobi Batteries Have a Lifetime Warranty?
Having a warranty on your tools can come in handy, particularly if you use them often enough. When under warranty, most manufacturers will replace components or even the entire item depending on the terms of their warranty.
Ryobi does not offer a lifetime warranty on their tools or batteries. All of their 40v lithium-ion outdoor chargers and batteries fall under a 3-year limited warranty. If you are not sure whether or not yours is covered, call the Ryobi customer support line for more information.
How Can I Prevent Issues with my Cordless Power Tool Batteries?
When you find yourself in a position where the battery for your cordless tools isn’t working, it can be immensely frustrating. Thankfully, there are more than a few best practices that you can follow to keep your batteries working and charging just fine.
Sometimes a battery is simply defective and does not work because of manufacturer error. But for the most part, you can prevent issues with your battery through proper care and storage.
How to Care for Your Ryobi Batteries
- Keep it charged. When you are done using your Ryobi batteries, plug them into a charger. Most batteries in general will last the longest if they are recharged when they dip below 70%. Nickel Cadmium (NiCd) batteries will only have to be discharged once a month in order to retain their charge memory.
- Use it regularly. Believe it or not, battery life will actually decrease the less you use it. Keeping your tools in action means keeping the battery healthy. Even if you rarely use a specific tool, recharge the battery before starting up a project to give yourself maximum battery life.
- Charge completely. Make sure that you leave your battery to charge completely. Modern chargers will come with some kind of indicator light on it to let you know that the battery is fully charged.
- Keep it cool and dry. Batteries are not meant to be exposed to extremely warm temperatures or moisture. You can ensure that your Ryobi battery will last longer than ever by keeping in a climate-controlled area that is both cool and dry.
- Proper storage. Speaking of keeping it cool and dry, you should provide proper storage as well. Don’t leave it out in the open wherever you keep it. Put the battery in the carrying case that it came in or in some sort of cushioned bag. If it came with a plastic cap, put that on as it keeps the terminals protected and the battery itself from shorting out.
- Have a backup. Like it or not, batteries don’t work sometimes. Have a backup handy for any projects you have on the horizon.
- Protect it. Cracks and other damage may prevent it from working properly.
How NOT to Care for Your Ryobi Batteries
On the flip side, there are a few things that you definitely do not want to do in order to prolong the life of your Ryobi batteries.
- Don’t run it all the way down. This goes with keeping it charged. Deep draining, the act of letting the battery get all the way down, can actually damage the poles permanently and can shorten the life of the battery. Recharge your batteries when you are done with them or when the tool starts to slow. Do not deep drain on lithium-ion batteries. You can deep drain a NiCd battery if it is showing a decreased capacity as a result of the memory effect.
- Don’t leave it on the charger. While it is good to ensure that your battery is fully charged, don’t leave it on the charger. There are some tool instructions that may indicate otherwise; then it is fine to leave the battery on the charger. Otherwise, overcharging can potentially damage the battery, cutting the life shorter. This is especially true given that some chargers don’t have an automatic shutoff when the battery is fully charged.
- Don’t get it wet. This may sound obvious, but make sure that your batteries and cordless tools aren’t exposed to water. Whenever they get wet, wipe away that moisture before it has a chance to seep into the crevices.
- Don’t overheat it. While extreme cold is also bad for your battery life, heat can be downright deadly. Moreover, if a battery gets hot enough, it can potentially explode. It is bad enough that you have a dead battery on your hands, you don’t want a potential explosive hazard, too. If you notice that the battery is hot to the touch, give it time to cool down before using or recharging.
How Do I Reset My Ryobi 40v Battery?
Sometimes a seemingly defective battery can simply be reset. The process is relatively simple and can get your battery back in working condition in no time.
- Connect the charger. Make sure that your battery charger is plugged into a nearby outlet.
- Place the battery on the charger. When you are certain that you have power going into your charger, put the battery on the charger. Wait until the indicator light turns to a solid green. If it doesn’t, you may have another issue on your hands and resetting the battery won’t do much good.
- Remove the battery. Watch your battery charger. Just before the green and red lights begin to flash, take the battery off of the charger.
- Re-insert. After removing the battery from the charger, put it back onto the charger again. You will want to repeat steps 2-4 again at least 2-3 times.
This should ultimately reset the battery, allowing it to accept a full charge once again. If it doesn’t work, you can try providing mini charges to get the battery back to the minimum threshold before trying to implement a charge again.
When all else fails, your battery may be unfixable. Contact Ryobi support or simply head to the hardware store to get a new one.
Related Guides

Ryan Womeldorf has more than a decade of experience writing. He loves to blog about construction, plumbing, and other home topics. Ryan also loves hockey and a lifelong Buffalo sports fan.
More by Ryan Womeldorf













![Cost To Drill A Well [Pricing Per Foot & Cost By State]](https://cdn-fastly.upgradedhome.com/media/2023/07/31/9074980/cost-to-drill-a-well-pricing-per-foot-cost-by-state.jpg?size=350x220)