How Much Does Radon Inspection Cost?
Radon is a radioactive gas found across America. It is formed by the breaking down of uranium in soil. The gas escapes and enters the air you breathe. Not only is radon the second-highest reason for lung cancer, but it’s also the leading cause of lung cancer for non-smokers.
Conducting a radon test is important when buying a new home or when living in certain parts of the country that are more likely to have radon present.
The cost of a professional radon test for an average home is $200. Homeowners can test their own home with DIY radon testing kits for as low as $20. Costs can be affected by the size of the home, the distance an inspector must travel, the type of test performed, and the area of the country the home is located.
Your basement or ground-level floor is the most likely place where radon gas settles after leaching through foundation cracks. A decrease in barometric pressure contributes to bringing this carcinogenic gas into your house.
Because of radon’s prevalence and serious health concerns with lung cancer, the U.S. EPA (Environmental Protection Agency) recommends everyone tests their home for radon.
Related Guide: Radon Mitigation Cost
Need Radon Gas Testing Services?
Get free, zero-commitment quotes from pro contractors near you.

What Impacts The Cost Of Radon Testing?
The greatest impact on the cost of radon testing is the size of your home. Other considerations for the cost of radon testing include construction materials, complexity of your home, the distance an inspector must travel, and the geographical climate. Each of these items can affect a professional radon test by significant amounts easily doubling or tripling the cost.
Because radon levels change, it’s recommended to retest your home every couple of years and after any renovations are made to the property.
Costs Based On Size Of Your Home
The size of your home will impact the cost of radon testing. Factors such as how many floors you have, the layout of the home, and materials used to build the home can require inspectors to utilize multiple kits to conduct the test. The larger the home and more sprawling the layout, the more complex and time-consuming the test will be. This can result in additional costs.
Average costs based on home size are approximate:
| Home Size | Expected Cost |
| 1500 square feet | $150 |
| 2500 square feet | $200 |
| 3500 square feet | $250 |
| 4500 square feet | $300 |
The price of radon testing per square foot averages between $.01 and $.06 depending on the size of the home, number of test kits required, and the time it takes for a professional to conduct the tests.
Radon Testing Costs By State
Every state has a different cost for professional radon testing. In certain parts of the country, professionals charge as little as $150 for a radon inspection. Radon is particularly prevalent in the midwest and northern United States. The western United States generally has higher levels of radon than the southern states.
No matter where you live, you may have radon passing into your house. Alaska and Hawaii tend to have similar levels as the south. Home testing kits are a great way to go to learn if you need to be concerned about radon levels. No matter where you live, you can start at $20 for a DIY radon testing kit.
In states where real estate is booming, the demand for testing is also increased. The law of supply and demand tends to apply in these types of areas and in turn, inspectors can charge significantly more for their services. Costs for radon testing in active real estate markets can easily double the average cost.
Travel Cost Considerations
If you live in an area outside of a professional radon tester’s normal territory, you may get charged an additional amount per mile for the inspector’s travel. The industry standard is to charge an additional $0.50 per mile for radon testing outside of a given perimeter.
If multiple tests are required for your property, this will further increase your cost. However, because radon is so dangerous, it is worth having a test. To decrease an out-of-area charge, plan strategic times to conduct the test.
The height of winter and summer are the ideal times to conduct a radon test, because these are when radon levels are at their highest. Many times radon inspectors are less busy when real estate sales slow in the winter months. Consider scheduling a test during the winter to avoid paying additional fees you can incur during peak times.
Of course, you can conduct a radon test with a home kit to save money and eliminate travel fees.
Bundling The Radon Test With A Home Inspection
Because radon is prevalent, it is recommended (and required in many states) to always conduct a radon test with your home inspection. Even if a house tests positive for radon, you can make it safe for you and your family. It’s good to know if there are carcinogenic levels of radon in advance of purchasing a home to better plan for radon mitigation.
Bundling the radon inspection with your home inspection can save you up to 25% of the professional test cost. You will eliminate any trip charges and because the inspector is already on-site, you can ask for additional discounts of their standard rates.
Important Facts About Radon In Energy-Efficient Homes
Energy-efficient homes are at a higher risk of retaining radon than older, less-efficient homes. Energy-efficient homes contain air more readily and in turn, don’t allow radon to escape. If you have a highly rated efficient home, it is recommended that you install a DIY test kit or have the home inspected every couple of years by a professional. The cost to perform the test is not based on the efficiency of the home, but the need for a test grows as the home increases in efficiency.
What are the Costs For A DIY Radon Test?
The DIY radon test is the least expensive option, and a great way to gather inexpensive information on radon levels in your home. The size of your home can still affect the cost of a DIY radon test. A larger home may need more than one radon testing kit for accurate results.
Pro Tip: Before testing, fill in any cracks in your foundation or cement flooring for the best results. Since one of the costs associated with radon mitigation is to seal the basement, you might as well complete it in advance.
Short-Term vs. Long-Term Testing For Radon?
A short-term test for radon will give you a ballpark figure to know if you need to conduct further testing. The charcoal-filled canister needs to sit undisturbed in the lowest level of your house for a couple of days. For the most accurate radon test, you need to keep your windows and doors closed as much as possible. Open windows will release the radon gas, making your results inaccurate.
Long-term radon tests are more accurate because it’s time-integrated, meaning the sample is continually monitored instead of using a static canister of charcoal. Professional radon tests can take a couple of days or as long as a year.
Short-Term Test Kit Costs
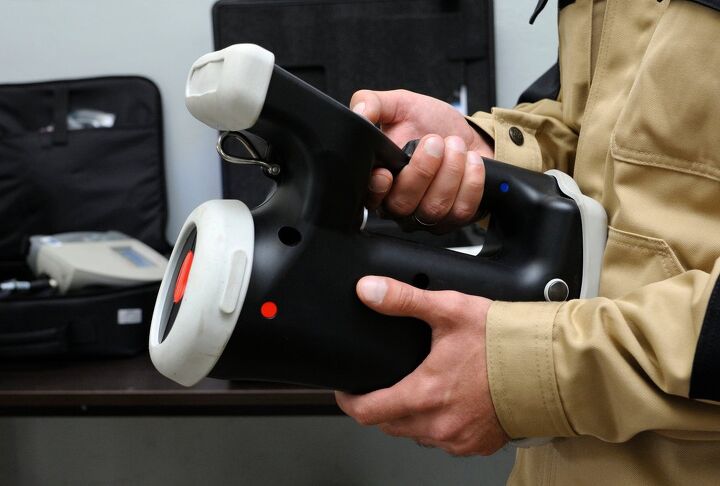
- Electret Monitor: this device is used by many professional radon-testers for both short and long-term testing. The electret monitor works with a charged Teflon disk (the electret) and an ionization chamber where radon passively flows to be measured with the voltage reader. Electret monitors start at $35.
- Liquid Scintillation: is used in a laboratory to measure the level of radon gas where a liquid absorbs the energy into light pulses which are measured, determining the level of radioactivity. An at home liquid scintillation test kit is as low as $38.
- Alpha Track: this device contains a detector—a foil—which collects information about radioactivity of gases. The advantage of an alpha track is that it does not require a closed house and is not affected by weather or delays in shipping. An alpha track kit is $20.
- Charcoal Canister: this canister is filled with activated charcoal which absorbs radon and is measured in a lab. A two-canister charcoal radon test kit is $33.
Each of these tests are viable ways to test for radon. The Alpha Track kit is the least expensive and can be a very resilient way to do initial testing. Each of these types of kits can have an associated lab fee and potential shipping charges, that can add up to an additional $50 or more. Read the fine print before making a final decision on which type is best for your situation.
Long-Term Test Kit Costs
- Continuous Monitor: this radon detector has a digital display and continuously tests your home’s air quality. The advantage of continuous monitoring is that you do not need to send your kit into a lab for the results. A continuous radon detector starts at $100.
- Liquid Scintillation: the liquid absorbing the radon indicates the level of gas. This system is the most accurate to measure for radon in water. A long-term liquid scintillation equipment is expensive, but you can hire a professional for $150 per session.
- Alpha Track: this foil detection system for radioactivity works long-term kits are EPA (Environmental Protection Agency) approved and available for $20. You will need to send the alpha tracking kit into a lab, and results take two weeks.
In-Water Test Kits
After you’ve tested the air quality of your home, the EPA recommends testing your water for radon. If your house is on well water, it’s critical to check that your water source isn’t harboring unhealthy levels of radon. Radon can also enter your home through pipes when you run water. The risk of having radon-contaminated water is less than radon which enters through your home’s foundation.
A complete water analysis test kit can be purchased for $20 plus a lab fee that can total $40. You collect a water sample and send it into a lab for analysis. Results take about one week.
What if Radon Levels Test Positive?
Radon is measured in picocuries per liter (pCi/L). A positive radon level is higher than 4 pCi/L, but even lower amounts of radon still pose a risk. It is best to reduce radon levels to 2 pCi/L.
If radon levels test positive, you will need to hire a professional for radon mitigation. Radon reduction systems can decrease radon levels by 99 percent.
The cost to mitigate radon is similar to other home repairs and start at about $1,200.
If your home tests positive for high levels of radon, there are several DIY steps you can take to reduce the dangerous gas. There are also companies that specialize specifically in radon mitigation.
DIY Radon Mitigation – Sealing The Concrete
The first, and most simple step is to seal your basement from further infiltration from radon. Apply a non-porous epoxy coating within all cracks and edges of the basement floor. The epoxy costs about $130 to purchase. Be generous with the epoxy to ensure you seal the cracks effectively and prevent the gas from seeping in.
There are other Concrete Sealer products on the market that are also effective when it comes to radon. These can be purchased for about $150 and when applied, they absorb into the porous concrete material and strengthen the floor to reduce any gas from moving through it.
DIY Radon Mitigation – Radon Fans
Another common method of radon mitigation is utilizing a fan system. With this method, a fan directs the radon out of your soil and changes the pressure inside the home essentially creating a ventilation system specific to the toxic gas.
Another fan-based method is a passive depressurization system, using airflow in the house to move radon away through a pipe. A newer energy-efficient home can take advantage of pressurization by pumping air into them—this prevents a vacuum while warm air rises.
To reduce radon from entering a home, homeowners will spend approximately $1200 to seal the basement, install a soil depressurization system, and control house pressurization.
Need Radon Gas Testing Services?
Get free, zero-commitment quotes from pro contractors near you.
Related Questions
Can I Test For Radon Myself?
Yes! There are many options for you to test the level of radon in your house. The best radon checking home kits are long-term continuous monitors. The long-term monitoring is more accurate and lets you know if there is a change in radon levels without purchasing multiple kits. These monitors start at $100 from your local home improvement store.The next best long-term system is the alpha track kit. The fastest kit is the charcoal canister, but they are not as accurate because of inconsistencies with shipping that affect the radon absorbed by the charcoal.
Is A Radon Inspection Worth It?
Yes! If you are buying a new property or ready to sell your current home, a radon test is a great idea. Tests start as low as $20 for a DIY kit and can be done for an average of $200 if you hire a professional. If you’re buying a property, you can now decide if you want to renegotiate the price to include the installation of a radon mitigation system.
Are Radon Inspections Necessary?
While not required, a radon inspection is recommended because unhealthy levels of radon severely affect your family’s life. Radon mitigation is a simple solution to avoid lung cancer and improves life quality.Not only is it a good idea to inspect for radon, the EPA (Environmental Protection Agency) recommends retesting your home because radon levels change as uranium decomposes in soil and rock, potentially harming you and your loved ones. So, while not required, yes, you should have a radon test. You and your family will sleep better knowing you’re safe.

We are a team of passionate homeowners, home improvement pros, and DIY enthusiasts who enjoy sharing home improvement, housekeeping, decorating, and more with other homeowners! Whether you're looking for a step-by-step guide on fixing an appliance or the cost of installing a fence, we've here to help.
More by Upgraded Home Team


![How Much Does Roof Inspection Cost? [2022 Rates]](https://cdn-fastly.upgradedhome.com/media/2023/07/31/9092683/how-much-does-roof-inspection-cost-2022-rates.jpg?size=350x220)