Polyseamseal Vs. Silicone: Which Caulk Is Better?
If you enjoy doing DIY home improvement projects, then you’ve probably run into a situation that required caulk. But there are so many different types of caulk, adhesives, and sealants available online and at the hardware store. How do you know which is the best for your project?
Polyseamseal is preferable to silicone for most DIY projects because it acts as both an adhesive and a sealant. It’s water-based, non-toxic, easy to apply and clean, and can be painted shortly after application. Polyseamseal is also more affordable than silicone, and it can be used to bond a variety of surfaces.
Silicone, on the other hand, is more complicated to apply and cannot be painted in most cases. It comes with a strong odor that can be damaging in large quantities. Finally, silicone has low adhesion in comparison to polyseamseal.
Do You Need to Hire a Paint Contractor?
Get free, zero-commitment quotes from pro contractors near you.

What Is Polyseamseal?
Polyseamseal is a premium-grade water-based caulk that does not contain silicone. It’s designed to act as both an adhesive and a sealant. This type of caulk can bond to many different surfaces such as concrete, metal, wood, ceramic, plaster, drywall, and plastic.
Polyseamseal caulk is designed for multiple uses and is suitable for nearly any household remodeling project. It’s great for repairing loose tiles, fixing loose moldings, and repairing small cracks in plaster. It can also be used to set sinks, secure backsplashes, and seal air leaks around doors and windows.
How Do You Apply Polyseamseal?
Step 1: Gather Tools And Prepare The Area
You’ll need a utility knife, tooling device, and masking tape. Make sure the room is well-ventilated, and clean the surfaces where you’ll be applying the polyseamseal. Be sure to wear gloves throughout the preparation and application processes.
Step 2: Mask The Joint
To make sure you have a clean, neat-looking finished product, you’ll need to mask both sides of the joint. Use masking tape to create a straight line where the caulk will go.
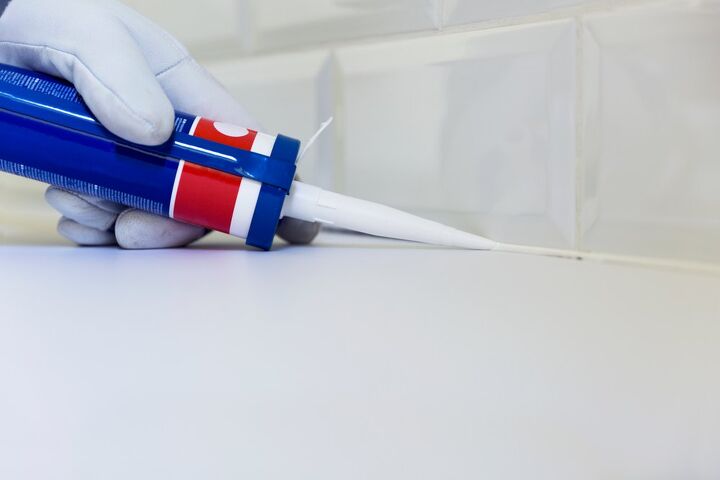
Step 3: Apply The Polyseamseal
Use steady pressure as you apply the polyseamseal into the joint, smoothing the bead with a tool. After tooling, remove the masking tape. Wipe the extra polyseamseal off your hands and tools before it dries.
Step 4: Paint The Polyseamseal
If you wish, you can paint the polyseamseal 40 minutes after application. Be sure to wait a full 24 hours before exposing it to water.
Pros Of Polyseamseal
Polyseamseal caulk has many advantages. Firstly, it’s a two-in-one product with bonding and sealing capabilities. It provides a professional, long-lasting finish without the need for mixing or special equipment.
Water-Based Adhesive
One of the best things about polyseamseal is that it’s water-based. This makes it environmentally friendly and non-toxic. Plus, it has very little odor and isn’t flammable.
Can Be Painted
Unlike most silicone caulk, polyseamseal can be painted. Just 40 minutes after application, you can paint on top of the polyseamseal, and it will remain effective and durable.
Perfect For Bathrooms
Polyseamseal is great for bathrooms because it was created with humid and steamy areas in mind. It’s highly resistant to mold and mildew and inhibits their growth. Polyseamseal is also water-resistant and weather-resistant.
Easy To Apply And Clean
Simple to apply and tool, polyseamseal provides a quick and easy solution to many home improvement projects. When uncured, polyseamseal is easy to clean up with just soap and water.
Affordable
Not only is polyseamseal a two-in-one product that’s permanently flexible and durable, but it’s also affordable. On average, polyseamseal is about half the cost of silicone.
Cons Of Polyseamseal
One downside of polyseamseal is that it doesn’t adhere well to surfaces that were previously sealed with silicone. It’s also not recommended for areas of standing water and cannot be continually immersed in liquid.
In addition, polyseamseal shouldn’t be used for architectural joints or joints measuring larger than ¼” by ¼”. Finally, polyseamseal isn’t recommended for joints that have total movement greater than 7%.
What Is Silicone?
Silicone is a type of sealant that creates a watertight seal. It’s often used in kitchen and bathroom DIY projects, acting as a barrier against water and air. Silicone sealant is flexible and can be applied to nearly any surface, including metal, glass, and plastic.
Silicone is commonly used to fill in the gaps between bathroom tiles. It’s also great for other bathroom fittings, such as sinks and bathtubs.
How Do You Apply Silicone?
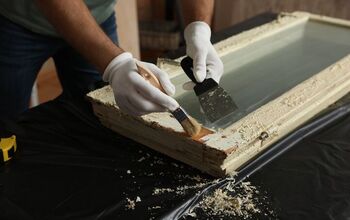
Step 1: Gather Tools And Prepare The Area
You’ll need a silicone gun, cleaning supplies, a tooling device, and a bucket of water. Start by removing any old silicone or caulking and thoroughly cleaning the area. Be sure to wear gloves.
Step 2: Prepare And Test The Silicone
Next, insert the tube of silicone into the silicone gun and snip the tube at a 45-degree angle. Test it on a piece of scrap material to ensure the silicone is flowing as needed.
Step 3: Mask The Joint
Use masking tape to clearly outline where you want to apply the silicone sealant. This will give you a much cleaner finished product.
Step 4: Apply The Silicone
Squeeze the trigger of the silicone gun steadily and evenly as you slowly drag the nozzle along the seam. Use a tool to spread the silicone, or you can wet your finger and spread the silicone that way.
Step 5: Let The Silicone Dry
Give the silicone a full 24 hours to dry. Unless the label says you can, do not paint on top of the silicone sealant. Check out How To Paint Over Non-Paintable Caulk.
Pros Of Silicone
Silicone is a frequently-used sealant that can hold up to extreme temperatures and sunlight. It’s extremely flexible, making it perfect for gaps that expand and contract. For this reason, it’s great for filling in cracks around windows and doors.
Stretchy And Strong
The binding properties of silicone are extremely strong, which is why silicone can be used on nearly any surface. It can be used indoors and outdoors and is ideal for humid, steamy areas. Overall, silicone is stretchy, strong, and flexible.
Extremely Durable
Another benefit of silicone is that it has a very low visual impact, meaning that it’s not very noticeable. It’s also extremely durable and often lasts for years at a time before cracking, peeling, or shrinking.
Cons Of Silicone
There are a few downsides to using silicone sealant. It’s generally more difficult to apply and replace than other types of sealants and caulk. It requires mineral spirits for cleanup, and it comes with a strong odor.
Can’t Be Painted
Another drawback to silicone is that it usually can’t be painted. Some specific brands may be able to be painted, but generally, you can’t paint on top of silicone.
Lower Adhesion
In comparison to other types of sealants and caulk, silicone has low adhesion. Over time, water can get through it. Plus, silicone isn’t always mold- and mildew-resistant, although some specific products may be.
Find out what you can use to dissolve silicone caulk.
Polyseamseal vs. Silicone: Evaluation Criteria
Here we’ll directly compare polyseamseal and silicone in several different areas. This should help you to decide which one is best for your project!
Cost
Generally, silicone is more expensive than polyseamseal. Silicone ranges from about 10% to 50% more than polyseamseal, depending on the specific brand and product.
Effectiveness
Both polyseamseal and silicone are very effective. However, polyseamseal is more of a two-in-one product, acting as an adhesive and a sealant. Meanwhile, silicone is just a sealant and has low adhesion compared to polyseamseal.
Durability
Silicone tends to last longer than polyseamseal, although both are very durable if applied correctly.
Recommended Uses
Polyseamseal and silicone are both recommended for humid, steamy areas like bathrooms and kitchens. Silicone is better for areas that expand and contract, as well as places with changing or extreme temperatures.
Ease Of Application
Between polyseamseal and silicone, polyseamseal is much easier to apply and clean. Polyseamseal doesn’t require you to do any mixing or use complicated equipment. To apply silicone, however, you’ll need to employ various tools.
Safety
Since polyseamseal is water-based, it’s non-toxic, environmentally-friendly, and safer than silicone. While silicone itself isn’t toxic, the chemicals mixed with it to keep it in liquid form are toxic. In addition, the fumes from silicone sealant can be damaging in large quantities.
Related Questions
Is polyseamseal silicone?
No, polyseamseal is not the same as silicone, and it doesn’t contain silicone. It is a water-based two-in-one product that acts as an adhesive and a sealant.
Is silicone caulk paintable?
In most cases, silicone caulk is not paintable. However, there are a few silicone caulk products that can be painted. Be sure to read the label to know for sure whether you can paint on top of it.
Is silicone caulk toxic?
The chemicals that keep the silicone caulk in liquid form are toxic. For the most part, though, silicone is only a mild irritant. If you get any on your skin, be sure to wash it off immediately, and never ingest silicone caulk.
Do You Need to Hire a Paint Contractor?
Get free, zero-commitment quotes from pro contractors near you.
Polyseamseal vs. Silicone: The Final Verdict
Between polyseamseal and silicone, polyseamseal is the best choice for your DIY home improvement projects. It has high adhesion, acts as a sealant, and is water-based and non-toxic. Polyseamseal can be used to bond many different surfaces, and you can paint over it shortly after application.
That’s not to say that silicone sealant should never be used. Although it’s more difficult to apply, has a strong odor, and cannot be painted, silicone is ideal for certain projects. Its flexibility makes it good for sealing gaps that expand and contract, and it’s also very durable.
Related Guides

With a lifelong passion for writing plus strong enthusiasm for home improvement and DIY projects, joining the team at Upgraded Home was an easy choice. Jessica Allen likes to share helpful information with current and aspiring homeowners. Aside from writing, Jessica loves doing yoga, playing the piano, and dabbling in graphic design.
More by Jessica Allen


![10 Best Electric Pressure Washers – [2022 Reviews & Guide]](https://cdn-fastly.upgradedhome.com/media/2023/07/31/9070600/10-best-electric-pressure-washers-2022-reviews-guide.jpg?size=350x220)


![Standard Dining Room Table Dimensions [for 4, 6, 8, 10 and 12 People]](https://cdn-fastly.upgradedhome.com/media/2023/07/31/9074335/standard-dining-room-table-dimensions-for-4-6-8-10-and-12-people.jpg?size=350x220)