KitchenAid Dishwasher Not Draining? (Possible Causes & Fixes)
Your KitchenAid dishwasher finishes its wash cycle. When you open the door, you notice water standing in the bottom of the dishwasher. Your KitchenAid dishwasher hasn’t drained. Something is amiss, and you wonder why your KitchenAid dishwasher isn’t draining.
The most common reason your KitchenAid dishwasher doesn’t drain is food debris clogging the drain intake. A clogged garbage disposal is a likely culprit. In some cases, a faulty pump or pump motor causes the problem. Diagnosing most of the drain problems with KitchenAid dishwashers are simple and can be eliminated with a few easy to follow instructions.
Finding the problem and applying the fix keeps peace in the kitchen. It isn’t hard to diagnose the reason for a Kitchenaid dishwasher that won’t drain. In many instances, the repair is equally easy. Following a few step by step instructions can often get your KitchenAid dishwasher flowing freely.
Do You Need Appliance Repair Services?
Get free, zero-commitment quotes from pro contractors near you.

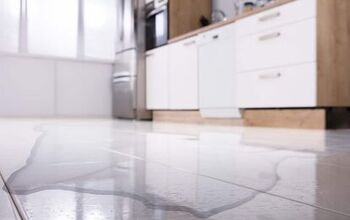
Standing Water in the Dishwasher
If there is a small amount of water standing in the bottom of your KitchenAid dishwasher, your machine there may be nothing wrong. It is normal for a KitchenAid dishwasher to hold a small amount of water in or near the filter area. This bit of water keeps the seals in the filter area moist and supple.
However, if the entire bottom of the washtub holds wastewater and the end of the cleaning cycle, you do have a problem. Follow our instructions to systematically check for the most common problems when a KitchenAid dishwasher won’t drain.
Step 1 – Remove as Much of the Standing Wastewater as Possible
Remove the racks from your KitchenAid dishwasher and remove as much of the standing wastewater as possible. Try to remove enough to see the filter assembly at the bottom of the washtub.
Step 2 – Check the Filter of Obstructions
Your KitchenAid dishwasher has two filters in the drain assembly. The upper filter keeps large items from moving further down into the machine. The lower filter keeps food and other items from being recirculated during the washing cycle.
If food or other debris clogs the upper filter, your KitchenAid dishwasher may not drain properly. Remove any large items or buildup of food debris on the upper filter assembly.
Step 3 – Remove the Upper Filter
Removing the upper filter assembly from your KitchenAid dishwasher is easy. Turn the upper filter assembly one-1uarter turn counterclockwise and lift the assembly from the bottom of the dishwasher.
Wash and rinse the upper filter under running water and set the assembly aside.
Step 4 – Remove the Lower Filter
To remove the lower filter from your KitchenAid dishwasher, grab the filter assembly in the circular opening and pull forward gently as you lift slightly. The lower filter assembly should slide easily out of the opening.
Wash and rinse the lower filter assembly under running water. Never use a brush or scouring pad on the filters. Brushing or hard scrubbing can damage the mesh. If there are hard water buildup on the filters, soaking in a vinegar solution can help remove the mineral deposits.
Step 5 – Re-install the Filters
To re-install the filters in your KitchenAid dishwasher, reverse the procedure above. Replace the lower filter unit making sure that it fits under the locating tabs. Insert the upper filter assembly into the circular opening and slowly rotate clockwise. The lower filter unit should drop into place and then lock securely.
Step 6 – Check the Dishwasher Drain
Run your KitchenAid dishwasher through a short cleaning cycle. In most instances, cleaning the filter assemblies will solve the problem of water not draining from the dishwasher.
Clean Filters but Still Standing Water
You may find that cleaning the filter assemblies does not solve the standing water problem in your KitchenAid dishwasher. More than likely, the drain line from the dishwasher to the waste pipes is clogged.
Step 1 – Access the Cabinet Under the Kitchen Sink
Clear everything stored under the kitchen sink so you can get a clear view of the dishwasher drain line. A flashlight is helpful at this point.
Step 2 – Is the Garbage Disposal Draining?
If your KitchenAid dishwasher drains into the garbage disposal, a clog in the disposal may restrict the wastewater from your dishwasher. With water running into the garbage disposal, turn on the disposal and let it run for a few seconds. If water drains from the garbage disposal, run your KitchenAid dishwasher through a short cleaning cycle to see if it drains.
Step 3 – Examine the Drain Line
Ensure the drain line from the KitchenAid dishwasher to the waste pipe has no kinks or tight bends. Clogs often occur when the drain line is kinked and restricts the flow of wastewater from the dishwasher.
Straighten any kinks and relieve any tight bends or turns in the drain line. If the drain line won’t straighten or the kink won’t stay open, replace the drain line.
Once you have all the kinks or tight bends fixed, test your KitchenAid dishwasher. Run the dishwasher through a short cleaning cycle and check for standing water at the end.
Step 4 – Plugs or Clogs in the Line
If there are no kinks or bends in the drain line, it is unlikely that there is a clog in the drain line. However, clogs can occur where the drain line attaches to the waste pipe or the garbage disposal. To find a clog in the drain line, you must disconnect the drain line from the connection to the garbage disposal or the waste pipe.
Step 5 – The Waste Pipe or Garbage Disposal Connection
Before you remove the drain line from the connection at the waste pipe or garbage disposal, have a bucket or bowl handy to collect any water that remains in the drain line. Remove the line by loosening any clamps and let any water drain away.
You should easily see any clog at this point in the drain line. A small piece of plastic tubing or a bottle brush is handy for cleaning debris that clogs the line.
Step 6 – Re-Attach the Drain Line and Test
Re-attach the drain line to the connection at the garbage disposal or the waste pipe. Be careful when tightening any clamps or seals. Over tightening can damage the seals or the ring clamps and cause leaks.
Run your KitchenAid dishwasher through a short cleaning cycle to test the drain.
The Not So Obvious Problems
KitchenAid dishwashers can have some not so obvious problems. Most of these problems keep Your Kitchenaid dishwasher from running for safety reasons. However, food debris or other problems may keep the dishwasher from pumping away the wastewater. Before you move on to diagnosing more severe problems, check these less obvious causes for standing water in your Kitchenaid dishwasher.
Is the Door on the KitchenAid Dishwasher securely latched?
Check the door latch on your KitchenAid dishwasher. If the door is not closed well, the safety switch will not allow the dishwasher to operate. If the door isn’t shut well when the machine starts, it may have loosened just enough to disengage the safety switch.
Open and close the door again and make sure it latches properly. Check the door seal to make sure nothing is preventing the door from closing tightly.
Clean Around the Overfill Protection Float
The overfill protection float does just what its name implies. The float is a switch that will stop your KitchenAid dishwasher from operating if the depth of water is too much. If too much water is in the bottom of the KitchenAid dishwasher, the machine will stop.
If food debris or other objects keep the float valve in the up position, the KitchenAid dishwasher may also refuse to start or pump away the wastewater. Make sure this float moves up and down freely, then restart the dishwasher.
Is the Loop at the End of the Drain Hose in the Proper Place?
KitchenAid dishwashers don’t depend on the pump alone to remove the wastewater. The drain hose must be positioned under the sink to create a siphon effect when the drain cycle starts.
The drain hose loop must be at least 20” above the floor to create this siphoning effect. If the drain hose doesn’t have this loop or the loop is too low, your Kitchenaid dishwasher may not drain completely.
Does Your KitchenAid Dishwasher Have Power?
Make sure that the power plug from your KitchenAid dishwasher seats properly into the outlet. It is easy for this plug to be knocked loose and fail to make proper contact.
Checking the breaker that serves the plug for your KitchenAid dishwasher is a good idea as well. Find the electrical service panel for your home. Locate the circuit breaker for your dishwasher, turn it off and on. Check your KitchenAid dishwasher and see if it will start and drain.
Getting Inside Your KitchenAid Dishwasher
If none of these ideas work to get your KitchenAid dishwasher to drain, the problem is probably a mechanical issue inside the dishwasher. Before you pull your KitchenAid dishwasher from under the kitchen cabinet, think about a few things.
Consider the Warranty
If your KitchenAid dishwasher is relatively new and still under warranty, opening the service panel may void that warranty. Your warranty may require a Kitchenaid service technician to open the machine and perform any work that may be covered by the warranty.
Consider your Ability
Unless you are familiar with electricity, plumbing, and appliance repair, it is probably better to rely on a trained KitchenAid service technician to perform any repairs inside your dishwasher.
Consider the Time and Cost
Unless you have the service manuals for your KitchenAid dishwasher and a good deal of understanding, your efforts to repair any faulty or broken parts may be a trial and error affair. A trained service technician has the knowledge, tools, and experience to perform repairs quickly and at less cost.
Into the KitchenAid Dishwasher
If you are willing to delve into the internal workings of your Kitchenaid dishwasher, please work safely. Before you begin moving your KitchenAid dishwasher, unplug the machine from the electrical outlet. Turn off the water supply that feeds the machine and remove all the racks inside the dishwasher.
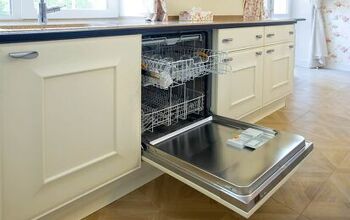
Step 1 – Remove the KitchenAid Dishwasher from the Cabinet.
Typically, your KitchenAid dishwasher attaches to the kitchen counter top’s underside with screws and two brackets. Remove the screws and two brackets. The dishwasher should slide from beneath the counter.
You may need help working the electrical cord, the water supply line, and the drain line through any partitions under the counter. Pull the dishwasher far enough away from the kitchen cabinet to work comfortably behind the machine.
Step 2 – Remove the back of the Dishwasher
The metal back of the dishwasher is usually held in place by several small sheet metal screws. Use a screwdriver or nut driver to free the panel and set it aside. You now have access to the internal parts of your Kitchenaid dishwasher.
Step 3 – The Systematic Checks
The next order of business is to systematically check each component in the drain system for proper operation.
- Plug the dishwasher into the electrical outlet. Be careful. The KitchenAid dishwasher now has the potential to deliver a deadly electrical shock.
- Start the dishwasher on a cleaning cycle. You should be able to hear the water valve click open.
- Move the KitchenAid dishwasher control to the drain setting. You should hear the electrical drain valve click open. If the drain valve will not open or close, it is either not getting a signal from the control panel or the valve is defective.
- The drain pump should start to run. If the drain pump doesn’t start, the motor may be faulty, or the control panel signal may not be getting to the pump.
- If the pump spins, but you hear rattling or other sounds from the pump, the impeller is damaged. The pump requires a replacement impeller or a new pump assembly.
The control panel on the front of the KitchenAid dishwasher may also be defective. Diagnosing an electrical problem requires special tools and training.
Step 4 – Time for Expert Help
If you find any of these problems, your best option is to call a trained KitchenAid service technician. Save yourself time, money, and frustration, and let an expert solve the problem.
Do You Need Appliance Repair Services?
Get free, zero-commitment quotes from pro contractors near you.
The Quest for Clean Dishes
If your KitchenAid dishwasher is not doing its job of cleaning dishes and disposing of the wastewater, frustration can mount quickly. Following our steps and instructions can usually solve the problem with a non-draining KitchenAid dishwasher. However, a trained service technician is a great choice if the problem proves more difficult to find and fix.

Dennis is a retired firefighter with an extensive background in construction, home improvement, and remodeling. He worked in the trades part-time while serving as an active firefighter. On his retirement, he started a remodeling and home repair business, which he ran for several years.
More by Dennis Howard