Kitchen Sink Plumbing Rough-In Dimensions
There comes a stage in the process of building in the plumbing fixtures and pipes where everything is connected but not quite sealed. This is known as the rough-in stage and it can be a little on the tricky side of things.
If you get the rough-in portion of the process right and you are basically 90 percent to completion. There are generally accepted rough-in measurements for plumbing fixtures like toilets, sinks, and showers/tubs. Manufacturers also tend to put rough-in specifications somewhere within their literature. The standard height for a sink is about 20” above the floor, for instance.
What is the Rough-In?
The rough-in is one of the most crucial aspects of renovating and building. It involves fixtures being connected within the proper framing. Before you get to the final step of sealing everything up and closing the wall or finishing the fixture, an inspector will need to come in and take a closer look at those rough-in dimensions.
Plumbing rough-ins, which include sink drains, toilets, and showers/tubs, are just one of a few things that get inspected during the renovation or building process. Drywall and electrical have to be inspected as well based on permits. Getting the right rough-in dimensions can mean the difference between passing the inspection or failing.
Important Rough-In Terminology
There are a few plumbing terms when it comes to dimensions that are of importance to know. One of the most oft-used terms is “centerline”. This is very similar to the term “on-center”, which is used more often in construction. Basically, it is an imaginary vertical line that gets drawn through the key reference point (a drain pipe in this instance).
So, if you have two pipes that are supposed to be 10 inches apart, you will measure 10 inches between the center of each pipe, not the edges. Measuring from the edges will throw your measurements off and play havoc on your rough-in.
Another common term is “base floor height”. This is for the subflooring in new construction or the finish flooring in a remodel. Just keep in mind that none of these dimensions is set in stone. They are guidelines to follow. Dimensions can vary based on your individual bathroom. Check the instructions that came with your fixture to get more accurate dimensions.
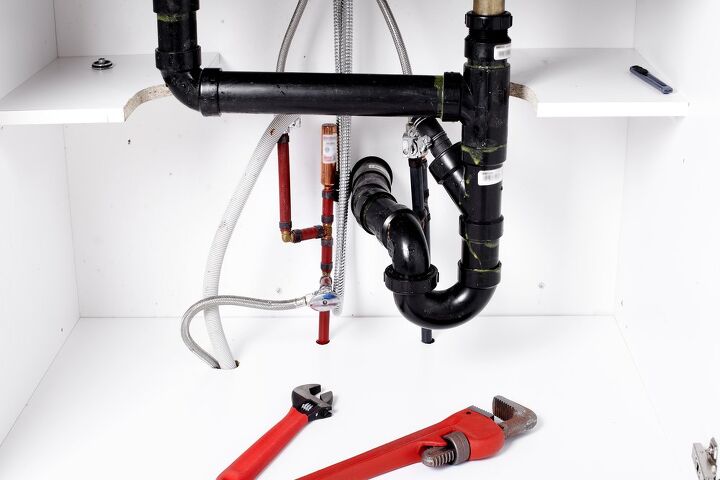
How To Rough-In Kitchen Sink
Average Rough-In Dimensions Based on Fixture
The average rough-in dimensions for fixtures do not come down to a single measurement. You may be looking at not only the vertical and horizontal supply line dimensions, but things like the drain/discharge hole as well as the side to side and front buffer of the fixture.
The table below outlines the various rough-in dimensions that you can expect regardless of what the fixture is.
| Toilet | Sink | Shower/Tub | |
| Supply Line (vertical) | 8 ¼” | 2” to 3” higher than the drain pipe | 80” shower; 20 to 22” tub, spout is 4” above the tub rim |
| Supply Line (horizontal) | 6” max from center | 4” to left and right of center | 8” apart |
| Drain/Discharge Hole (back wall) | 12 ½” | N/A | 14” |
| Drain Discharge Hole (vertical) | 0” | 16” to 20” | 0” |
| Fixture (side to side buffer) | 15” to 18” min. | 15” to 20” min. | 18” min. |
| Fixture (front buffer) | 21” min. | 21” min. | 18” min. |
Toilet Rough-In Details
Let’s start with the supply line. The measurements are both vertical and horizontal. The vertical is ideally at least 8-1/4” above the floor. The cold-water-only pipe should create a single hole that is 5”-10” above the floor. The horizontal measurement runs from the centerline vertically through the center of the toilet and the supply line hole should be about 6” to one side of the centerline. Just check the toilet to confirm the location to the water supply connection.
Next is the discharge hole, vertically and from the back wall. The drain should be located at a distance of zero and should be at floor height. The hole should be offset from the back wall by at least 12-1/2”.
Finally, there is the buffer, both side to side and front. For the side to side, measure from the center of the toilet on either side. Make sure that you have a 15” minimum clearance of any other fixture or wall. If the bathroom layout allows for it, give it 18”. For the front buffer, make sure that the minimum clearance is 21” from the front rim of the toilet to the nearest obstruction. That said, 30” is the recommended buffer.
Shower Rough-In Details
The details are roughly the same for the sink, with one more addition at the end. The supply line should have two holes vertically that are between 2” and 3” above the drain pipe. There should also be two horizontal holes with one being 4” right of center and the other being 4” left of center.
The discharge hole here is only vertical. It should be roughly 16”-20” above the flooring. You can consider the drain pipe as the vertical centerline for a reference point. The buffers should be 15” from the centerline though 20” is recommended with a minimum distance from the front being 21” (with a recommended 30”).
Finally, there is the placement of the sink. No matter where it is in the bathroom, the sink should be at least 31” from the floor. You would measure from the rim of the sink to the floor for this measurement.
Bathtub and Shower Rough-In Details
The vertical shower supply should be about 80” from the floor to where the shower arm will go. For a showerhead, you should be at least 65”-78” above the flooring. For the tub rough-in, the faucet valve would need to be 20”-22” above the floor. Horizontally, the faucet should go 4” to the left and right of the centerline while the tub spout sits 4” above the tub rim.
The discharge hole from the back wall is required here. It should be placed on the drain centerline, with the opening for drain access being between 10” and 14” offset from the framing. It should also be 6”-8” wide. The discharge hole should be located at floor height with a distance of zero.
Finally, the buffers. The side-to-side buffer should be at least 18” minimum with the front buffer being the same 18”.
What Considerations Need to be Taken for Rough-In?
Complicated as this all may seem, there are a few things that can help you to figure out what your rough-in height will be at the very least. Those factors include a vent height if there is any, pipe connections, the P-trap location, and the type of sink in question.
Should the space under the sink fixture be busy (keeping cleaners, for instance), then you might want to lower the height for the rough-in. Most of the time, those with crowded or cramped vanities go with a rough-in height of between 14” and 16”, though the most common rough-in height is 24”
You also need to accommodate for the P-trap. It should be located no more than 24” below the sink drain. The height can also vary depending on the type of fixture that it is. Make sure that you safely remove a kitchen sink that is glued down.
Does a Rough-In Impact Permits?
Depending on what area you live in, you may need permits to perform renovations or new construction. Depending on the condition of your sink drain, the rough-in can help you determine whether you will pass or fail when it comes time for the permit.
The inspector tends to check out plumbing rough-ins and fixtures after the electrical rough-ins have been approved. They check the P-traps, vents, sanitary tees, connections, backwater valves, and sink drains. Should any be improperly installed, you could be facing a fail.
Related Articles

Ryan Womeldorf has more than a decade of experience writing. He loves to blog about construction, plumbing, and other home topics. Ryan also loves hockey and a lifelong Buffalo sports fan.
More by Ryan Womeldorf