Ice Maker Leaking Water Into The Bin? (Possible Causes & Fixes)
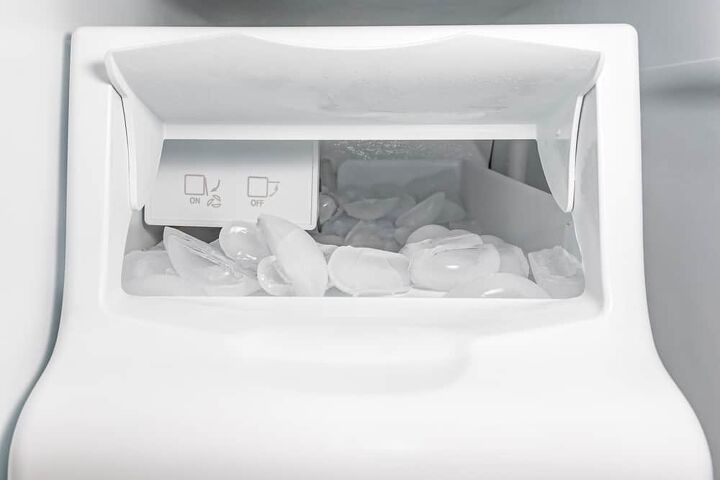
Automatic ice makers are great to have! They take the inconvenience out of making ice. No more waiting for the ice to get done; you can grab a few cubes out of the bucket as needed. However, sometimes they will leak water into the bin, causing all the cubes to stick together. You’ll need to take care of this so that your container doesn’t become one big block of ice, but first, you need to know the cause.
If your ice maker is leaking water into the bin, several problems can cause this, including:
- Ice might be jammed.
- The fill valve and cup may not be aligned.
- Your fridge or ice maker might not be level.
- Condensation drains could be backed up.
This article will go through the most common reasons you will find water leaking into your ice maker bin. Also, we will share some tips on how to fix these issues. The best part? Most of these problems you can fix on your own, so no paying for professional help.
Do You Need Appliance Repair Services?
Get free, zero-commitment quotes from pro contractors near you.

Keep Your Ice Bin From Freezing Over
Sometimes, the water leaking into your bin can seem like a small amount. While you might think this is no cause for concern, remember that smaller amounts of water freeze quicker. What that means for you is over time, your bin will become one big sheet of ice.
An ice maker is there for your convenience. You shouldn’t have to take a hammer (or a rolling pin) to the ice in your bin. So, it’s better to deal with the leak now rather than wait.
Note: Before carrying out any DIY repairs, disconnect your fridge from the electricity supply and switch off the water at the saddle join.
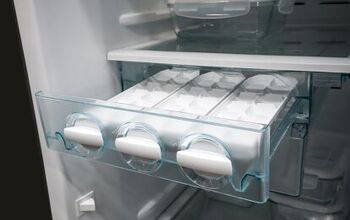
Break Up Ice Jams
All freezer compartments tend to accumulate ice, and icemakers are even more prone to this because of the substantial quantity of cubes they create. The issue can be that the ice already in the chute may have melted then froze into one giant lump.
- Break up any blockages. If the problem is ice blocking the chute or trays, try breaking it up. You can break up ice in the chute of your fridge door, using the handle of a wooden spoon to reach the clogged areas.
- Use only the force necessary. Take care not to damage the unit. An alternative would be to put down a towel over the rest of your ice and pour water over the blockage.
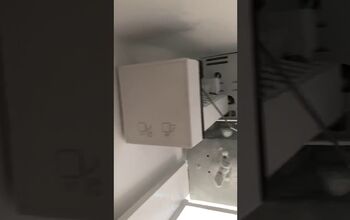
Align The Ice Cube Fill Valve & Cup
The interior of the ice machine houses icetrays that are shaped by the fridge itself. A compact spigot fills the ice fill-cup, which makes the ice into cube shapes. If there’s a malfunction with this water distribution system, it can result in water leaking out of the ice cube maker.
For the water to be collected and made into cubes, the spigot must be aligned correctly with the fill cup. When there’s a misalignment, water the fill valve will allow water to run directly into the icemaker compartment, which leaks out before it is able to freeze.
- Carefully perform any readjustments. If either one seems to be out of place, carefully re-fasten them. Ensure they are firmly aligned, and the leaks should stop.
Need to made adjustments, this video will show you how.
Level The Fridge & Ice Maker
Using your bubble or laser leveling tool can also help you find a simple answer to why your fridge continuously leaks. On the basis that fridges leak when there’s an accumulation of melted ice that can’t access the drain or a misalignment, check whether your refrigerator is level. If it is leaning to one side, this may be the reason for the problem.
- Check to see if your ice machine level. Use your level tool to check if the ice maker was unevenly installed. It is unlikely but possible that a non-symmetrical shape is incorporated into the design: however, don’t let this mislead you.
- Extend the fridge’s feet or use a wooden wedge to level it. The important thing is to ensure that the ice maker compartment floor is absolutely level. This is so the water stays in the place it’s supposed to and doesn’t create pools of water anywhere.
Clear Out The Condensation Drains
The purpose of the condensation drain is to allow any excess water or melted ice from the freezer compartment to drain away, keeping it clean and hygienic. Periodically, the fridge will defrost itself. This is to remove any old ice that has accumulated and to keep the freezer compartment running efficiently.
Should the condensation drain’s interior have a build-up of ice, it cannot drain the freezer correctly. As a result, water will leak.
- Locate the condensation drain in your refrigerator. Inspect the surrounding area. If you notice an ice-layer over the drain, you have identified the source of the problem.
- Pour hot water over the ice layer. The water should not be boiling, but it should be about the same temperature as bathwater.
- Wipe up the excess water. Make sure you wipe up the excess water after the ice has melted. That way, it does not refreeze, creating the same problem again.
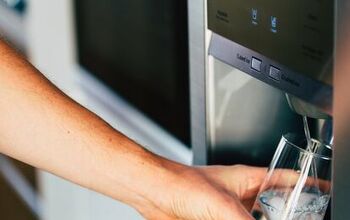
Check The Water Lines And Tighten Connections
Have you ever stopped to consider where the ice and cold water in your fridge come from? Usually, it’s from a slender pipe connected to your home’s cold water supply.
In a typical kitchen, this pipe leads from a connector underneath your kitchen sink to one located at the rear of your fridge. Should this line become loose or damaged in any way, it could be the culprit that is causing your leak.
- Close the supply of water to the fridge. Use a saddle splitter to close off the supply of water to your fridge. This will make it easier for you to inspect the pipes without running the risk of a mess.
- Check the length of the pipe. As you follow the pipe, check the entire length for any damage, drops, or pools of water, or a blockage that may be the source of the issue.
- Inspect every connection. Check each connection to see if it’s loose, and, if so, tighten it.
Check Your Water Filter & Dispenser
The filter needs to be changed after a few months (although hardly anyone does this), so the whole cold fridge water system could be the origin of the leak.
- Inspect the connections of the cold water line. Tighten your connections if needed, and follow it back to the water filter.
- Call a professional. If you see water leaking from the housing, this is abnormal and indicates a problem that needs to be addressed. There is likely a crack in the system which needs repair. A professional can diagnose the issue and tell you what parts you need for replacement.
Related Questions
What causes an ice maker to stop working?
What most commonly causes an ice maker to stop working is frozen water in the line. Or the water filter for your ice maker might be clogged. The water filter for your ice maker is designed to keep the line from freezing. Therefore, replacing the filter should fix the issue.
How long should an ice maker last?
A decent ice maker should last you at least 3 to 5 years, without constant maintenance. However, if you are maintaining it regularly, it can last upward of 8 to 10 years, depending on the brand.
How much does it cost to fix an ice maker?
The cost to fix an ice maker ranges between $90 to $200. Although, most homeowners will pay around $180 for repairs, which includes the cost of hiring a maintenance specialist.
Do You Need Appliance Repair Services?
Get free, zero-commitment quotes from pro contractors near you.
Our Takeaway
Ice makers are incredibly convenient, but that doesn’t mean the convenience doesn’t come without potential issues. Finding the cause of the water leaking into your ice bin is critical to avoid such problems as high repair costs and even mold growth. Ensuring that you provide proper and regular maintenance to your ice maker will help keep it running smoothly and decrease the risk of any leakages, or need for repairs.
Related Guides

Heather is a passionate writer who loves anything DIY. Growing up, she learned everything from home repairs to design, and wants to share her tips with you. When she's not writing, she's usually hiking or searching for her next DIY project.
More by Heather Robbins