


Ice Keeps Getting Stuck In Ice Maker (Possible Causes & Fixes)
The ice maker in your refrigerator is designed for convenience. Having a refrigerator with an automatic ice maker allows you to enjoy ice cold beverages every day without needing to constantly refill ice trays in your sink. Whether you need a larger amount of ice for a family event, birthday party, or the big game, you can rely on your ice maker to give you ice on demand.
For this reason, it is a huge inconvenience when ice keeps getting stuck in your ice maker or potentially fails to produce enough ice at all. When it comes to troubleshooting ice makers and determining the cause of the problem, there are a number of different components you’ll need to inspect, check, and keep an eye out for.
Overall, if ice keeps getting stuck in your ice maker and will not eject, it may be caused by a faulty ice cube ejector gear, ejector motor, ice mold heater, or thermostat. In other situations, ice clumps that form in the bucket, as a result of constantly opening and closing the refrigerator door, can also make it impossible for the ice to be ejected from the ice maker.
Continue reading to learn some easy fixes for when ice keeps getting stuck in your ice maker, along with other common ice maker issues and solutions to help you avoid extensive ice maker repairs.
Do You Need Appliance Repair Services?
Get free, zero-commitment quotes from pro contractors near you.

How Do Refrigerator Ice Makers Work?
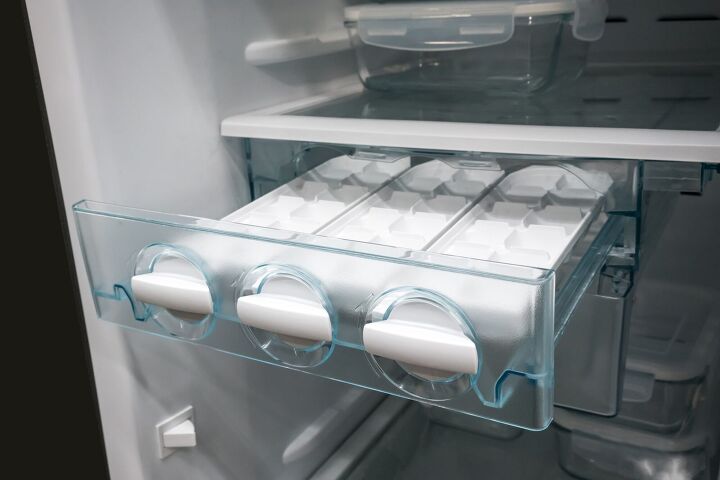
Regardless of the model of your refrigerator, most ice makers function using the same principles. The ice maker receives water through the water supply line that is connected to the external water pipe. Depending on your particular refrigerator, it may also have a water filter which will need to be changed on a regular basis.
The water supply is regulated by a water valve, which is regulated by the ice maker’s thermostat. Ice is produced inside of the ice mold and once the water is frozen, the ice maker heats the mold slightly to dislodge the cubes. A sensor measures the temperature of the water and waits for it to reach a certain temperature. Once the temperature is reached, it knows that the water is frozen and the cubes are ready to be dislodged.
The control arm is what frees the mold and ejects the ice cubes into the collection bucket. Once this bucket is full the ice maker sensor will turn off the unit to prevent the system from overflowing.
Reason Why Ice Keeps Getting Stuck in the Ice Maker
Now that you understand how an ice maker is supposed to function, this should shed some light on what might cause ice to become stuck in the ice maker. Here are some of the most common causes and solutions:
1. Ice Cube Ejector Gear
To locate the ice cube ejector gear on your refrigerator, you’ll want to refer to the instruction manual. The ejector gear is responsible for controlling when the ice is ejected, consisting of two plastic cogs that interlock together. If there are any issues with these two gears or if they have become worn over time, the entire ejector gear assembly will need to be replaced.
During inspection, you should also check that the gearbox isn’t frozen over and that the mold is capable of ejecting ice. Oftentimes, on component models it’s possible to only replace the ejector gear. If you have a modular unit, replacing the individual gears may not be possible and you likely will have to replace the entire control module.
2. Ejector Motor
The ice maker’s ejector motor is designed to control the ice as it is ejected. If you are able to replace individual components, it may be possible to test and replace the ejector motor only, as needed. To do this, start by dismantling your ice maker and locating the ejector motor. Detach the wires and inspect the terminals. If you notice corrosion on the terminals, these will need to be cleaned or possibly replaced.
Then, use a multimeter to check the motor for continuity. To do this, place the multimeter in resistance mode and test to verify that the motor is a complete circuit. If the motor is healthy, it will display resistance between 500 and 600 ohms. If the display shows infinite resistance, you have a faulty motor that needs to be replaced.
3. Ice Mold Heater
One of the most common reasons that ice gets stuck in the ice maker has to do with the ice mold heater. The heater is responsible for heating the mold just enough to allow the ice to slide out. It is usually found right underneath the ice mold trays, connected to two wires.
When you have a problem with the heater it may be caused by a bad connection or simply a faulty heating element. In either case, the ice cubes will be able to form in the tray but will remain there. To diagnose this issue, start by making a note of where the wires should be connected, then disconnect them.
Using the multimeter, you want to measure resistance and verify the continuity of the heater to detect potential problems. For the heater, a normal range should be between 60 and 90 ohms. If the heater is displayed zero or infinite resistance, it is faulty and needs to be replaced.
4. Control Arm
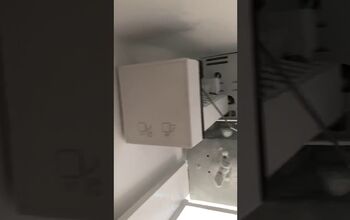
It’s not uncommon to accidentally bump the ice maker’s metal control arm, sometimes called the shut off arm, when you’re moving things in and out of your freezer. If you suspect this may be the case, take a closer look at the control arm to make sure that it is in the proper position and it’s not preventing the ice from being dislodged from the ice mold.
5. Ejector Arm Buildup
Another common reason why cubes may get stuck in your ice maker is if the fingers on the ejector arm have calcium or lime buildup. To fix this problem, you’ll want to remove the whole ice maker from your refrigerator and clean the ice cube mold and ejector arm using vinegar or a product like Lime-Away.
After cleaning the ice maker, you may want to increase the ice cube size to prevent it from getting stuck again in the future. Consult your refrigerator’s instruction manual for specifics on how to do this. In some cases, you may need to use a hair dryer to melt the stuck ice pieces until they get free. Otherwise, you risk breaking one of the “fingers” on the arm by forcing the ice out.
6. Thermostat
Located at the bottom of the support box, the thermostat is responsible for controlling the temperature of the ice maker. Use a multimeter to verify the resistance of the thermostat at room temperature. Because of the open circuit, the thermostat should not give you any reading. After you test this, turn the freezer on for about 20 minutes and test again. At this point the reading should be zero. If it’s not, the reason for your stuck ice cubes may be a faulty thermostat.
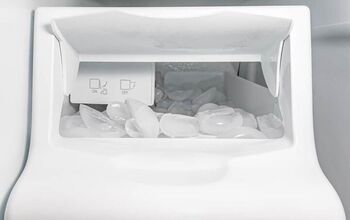
7. Ice Clumps
If the ice storage bucket becomes too full or the ice maker isn’t used on a regular basis, slight melting and refreezing may cause the ice cubes to stick together and form clumps. This makes it impossible for the ice maker to eject more ice and the dispenser to deliver ice out of your refrigerator.
To correct this problem, remove the ice bucket from the freezer and use your hands to break up the ice clumps. Dump and clumps that you cannot break up by hand into the sink to melt. Since inactivity is the major cause of ice clumps, the smartest long-term solution is to start using the ice maker on a more frequent basis.
Do You Need Appliance Repair Services?
Get free, zero-commitment quotes from pro contractors near you.
What If My Ice Maker Is Not Making Ice?
If upon inspection of the ice mold you notice that the ice maker isn’t producing ice at all, the following are the most common reasons for this problem:
1. Temperature Is Too High
Before your ice maker will produce ice, the temperature in your freezer must be at least 16 degrees Fahrenheit. It’s not uncommon for the temperature in the freezer to be too high, which means the ice maker won’t kick on and make ice. You can attempt to adjust the freezer temperature manually using the control panel.
If the temperature is too high in your freezer, it may be caused by an empty freezer. If it’s empty or close to empty the air from your kitchen will fill up the freezer faster every time you open the door and raise the temperature. On the other hand, if you have too many items in your freezer this can obstruct air flow and prevent the items from cooling effectively. As such, this may lead to the temperature rising inside the freezer overall.
Unfortunately, there are a number of other possible reasons why the temperature in your freezer may rise. If you cannot discover the cause on your own, we recommend consulting the help of a professional technician.
2. Obstructed Water Supply
The water filter in your refrigerator should be replaced about every six months. If not, it could get clogged and obstruct the water supply. In some cases, an electrical problem may prevent the solenoid from opening the water valve or you could have other potential issues with your refrigerator’s waterline. Additionally, you’ll want to check that you have water inside of the water pipe that’s connected to the appliance.

Jessica considers herself a home improvement and design enthusiast. She grew up surrounded by constant home improvement projects and owes most of what she knows to helping her dad renovate her childhood home. Being a Los Angeles resident, Jessica spends a lot of her time looking for her next DIY project and sharing her love for home design.
More by Jessica Stone


![Cost To Drill A Well [Pricing Per Foot & Cost By State]](https://cdn-fastly.upgradedhome.com/media/2023/07/31/9074980/cost-to-drill-a-well-pricing-per-foot-cost-by-state.jpg?size=350x220)


![10 Most Dangerous Neighborhoods in Baltimore [Updated]](https://cdn-fastly.upgradedhome.com/media/2023/07/31/9075655/10-most-dangerous-neighborhoods-in-baltimore-updated.jpg?size=350x220)


