How To Winterize A Sprinkler System With A Backflow Preventer

Cold weather is on the way. That means it is time to winterize your sprinkler system and backflow preventer. Forgetting to prepare your sprinkler for the off-season can result in cracked pipes. If you aren’t sure how to do it, follow the guide below. We will give you some general guidelines to follow. Winterizing your sprinkler system ensures it will function properly for many years to come.
To winterize a sprinkler system with a backflow converter, follow these steps. First, shut off the water to the system. Next, drain as much water as possible. Then, you or a professional will blow the pipes clear with an air compressor. Finally, insulate exposed pipes, and set all the valves in the proper position.
We will dig deeper into each of these steps. Be sure to consult your owners manual and look up your system and backflow preventer’s make and model. Each system can function differently; however, the guidelines we provide should point you in the right direction.
Remember, a broken sprinkler system will degrade the value of your home. See our article on how much value a properly functioning sprinkler system will add to your residence.
Let’s begin.
Do You Need to Hire a Sprinkler System Contractor?
Get free, zero-commitment quotes from pro contractors near you.

How to Winterize a Sprinkler System and Backflow Preventer
When you winterize anything, there is one primary concern: water. Freezing water has the power to wreak anything near it. It expands with immense pressure. Freezing ice can exert over 100,000 psi of pressure if it is unable to expand. That much pressure can damage almost everything – and copper pipes are no exception.
To avoid this, follow the steps below to prepare your system for the cold:
- Turn off and drain water supply to the system
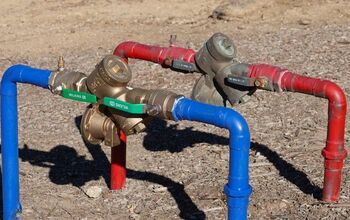
- Drain water from the backflow preventer
- Drain water from sprinkler pipes
- Blow compressed air into the system to further clear the water
- Insulate exposed pipes and properly set the valves
Here is a list of equipment you may need for this process:
- Wrench
- Bucket to catch drips of water inside
- Flathead screwdriver
- Air compressor
- Foam insulation
Depending on your system, there may be specialized tools needed. It’s always wise to research and prepare your tools before you begin working. Having everything ready will save you frustration and allow you to focus on the task at hand.
Before you begin clearing water from the lines, be sure to set your sprinkler system to “rain mode.” Rain mode uses minimal electricity, and it allows your system to stay programmed so you can turn it back on in the spring with no issues.
However, so systems have a mechanical timer. In this case, unplug the system completely. Since there is no programming to begin with, you won’t mess anything up. And you’ll save money on your electric bill.
Now it’s time to winterize your sprinkler system.
Step 1: Turn off Water to the System
Your sprinkler system will have piping branching off your main water line. This pipe will have a valve to shut down all water to the sprinkler system. Close this valve. If you are having trouble finding the valve, follow the piping from the outside, and it should lead you to the right place. This valve is usually located indoors somewhere; however, this varies based on the system.
Once you’ve closed the valve, you need to drain any water between the valve and the backflow converter. There should be a drain near the valve. Sometimes this is just a little screw-on cap. Loosen this and allow the water to flow. Place your bucket below the drain and go back outside.
You’ll need to allow air to enter near your backflow preventer. This will relieve the suction and let all the water to drain into the bucket inside. Now that you have cleared the water between your mainline and the outside, it’s time to move down the line and drain the backflow preventer.
Step 2: Drain Water from Backflow Preventer
Now it’s time to take care of your backflow preventer. There are a few things you can do.
First, if it is simple, you can remove the backflow preventer and store it inside for the winter. Sometimes the unit will have simple couplings that will be unscrewed. If your unit doesn’t have these couplings, you can have them installed by a professional for easy winterizing in the future.
Second, you might not be able to remove the whole unit, but every backflow preventer will have several screws and valves you can loosen to release water from the unit.
Some recommend using a wet shop vac with a narrowed end to dry and clear any areas you can from the backflow preventer. Once you’ve cleared as much water as possible, it’s time to drain the pipes leading to the sprinkler.
Step 3: Drain Water from Sprinkler Pipes
The drain system works differently for every unit. Be sure to consult an owner’s manual if you have trouble finding the drain valves. Usually, they are located outdoors underneath a panel.
After you’ve located the outdoor drain valve, open them up and allow the water to drain passively. Once you’ve let all the water drain and pressure is relieved, you’ll want to blow the lines clear with an air compressor.
Step 4: Blowout the Pipes with Air Compressor
We will start this step with a disclaimer. Many professionals advise you to hire an expert to come and clear your lines. There are several reasons for this.
One, most homeowners air compressors don’t have enough volume to blow out the pipes effectively. This means it can take a lot longer to clear your lines. It also means that you risk leaving residual water in the pipes – which can lead to damage.
Two, blowing out the pipes can be dangerous. If done improperly, you can damage your backflow preventer with too much pressure. And, a faulty connection could cause flying debris.
Blowout Sprinkler System with an Air CompressorIf you’d still like to try this on your own, proceed at your own risk and take all safety precautions. Here’s how you do it.
- Close off the valve to the backflow preventer. Blowing compressed air through the backflow preventer can damage it. Ensure the valves are open down the lines, so there is somewhere for the air to go.
- Attach your air compressor to the pipes. You may need to rig up a valve that will accept your air compressor nozzle. Parts for this can be found at a hardware store. Place the valve after the backflow preventer.
- Blow air through your system. You will need to isolate watering zones, as your air compressor won’t be able to flush the whole system at once. Alternate between the zones until the sprinklers are only blowing a fog. You want to clear as much water as possible.
Most systems recommend you don’t exceed pressures of 80 psi. Some prefer even lower, around 40-60 psi. Again, if you are unsure what your system can handle, consult the owner’s manual or employ professional help. Sometimes, you can watch how a professional clears your system, and then you’ll be able to clear it on your own in seasons to come.
Step 5: Insulate Exposed Pipes and Set the Valves
If you are in an area that will drop below freezing, then it’s good practice to insulate your exposed pipes – this usually includes the backflow preventer. Also, set all valves to half-open, except for the main valve. This will ensure that any residual water can escape.
If you’re having trouble with the valves, read our article here for more information on how to fix a malfunctioning valve.
Insulate your pipes by wrapping them in insulation. You can use foam or fiberglass. Then, cover the system with a thick plastic bag. Secure at the bottom with a snug cord – but not too snug that water can’t escape if needed.
Hopefully, these guidelines gave you a good start. Never be afraid to consult a professional if you are unsure about how to winterize your sprinkler system.
Do You Need to Hire a Sprinkler System Contractor?
Get free, zero-commitment quotes from pro contractors near you.

Related Questions
Do Sprinkler Systems Need a Backflow Preventer?
Generally, yes. You will need to check with your local codes; however, they are a good thing to install regardless of the regulations. Backflow preventers keep contaminated water from mixing with your home’s interior water supply. You don’t want harmful chemicals mixing with your drinking water.
How Do I find my Backflow Preventer?
Your backflow preventer should be located near your house and in the vicinity of your water’s mainline. Sometimes, your backflow preventer is covered by overgrown shrubs. Be sure to look all around the outside of your house if you can’t find it. If you still can’t find it, ask a professional to come out and check. It could be your system wasn’t installed properly.
What Causes a Backflow Preventer to Fail?
Freezing water can undoubtedly damage the seals and valves of a backflow preventer. If you blow high pressured air through a backflow preventer, you can potentially damage the unit. Everything has a lifespan. If your backflow preventer is old, it can eventually wear out. It may be time to have it serviced or replaced.

Gideon is a writer and hobby woodworker. He enjoys working on projects small and large-everything from crafting boxes and benches, to replacing carpet and landscaping a yard.
More by Gideon Zielinski


