How To Weatherstrip A Double Entry Door

Weatherstripping is used to reduce the door and window drafts that change the temperature of your home from what you would like it to be. It also helps with energy-saving and reducing the cost of your heating and AC use.
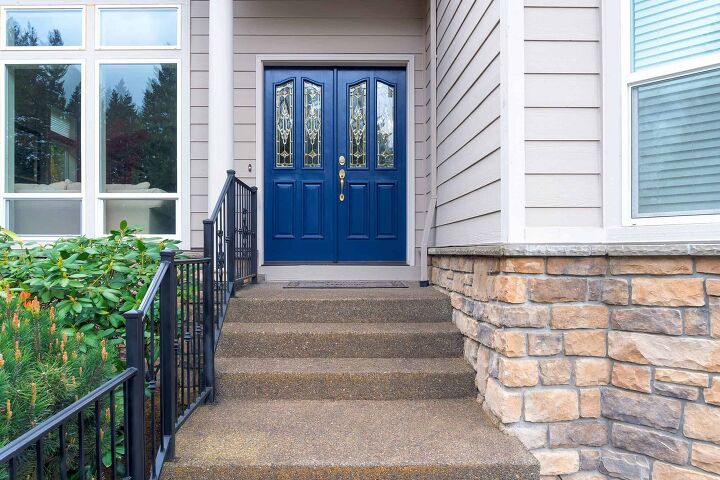
If you notice drafts coming through your double entry door, make sure to install weatherstripping around the entire door. On the top and outside edge of the doors, foam weatherstripping can be mounted to the door stops. Open and close your doors to make sure that the gaps have been covered.
Close the gap between two doors with insulated molding. Nail it to one of the doors so it overlaps the other door. This will stop any air from coming through as the gap is now blocked.
While you are at it, check all your doors and windows for gaps. This is a quick and easy way to lower utility costs and weatherproof your home.
Do You Need Weatherstripping Installation or Replacement?
Get free, zero-commitment quotes from pro contractors near you.

Types of Weather Strip
Weatherstripping is a great way to save money in the winter and summer months. During the freezing winters, the cold air from outside will try to find its way into your house. Using any crack and gap that it can, it will suck the heat out of your warm home. In the summer, when you are trying to make your home a comfortable reprieve from the heat, gaps between doors will allow that cool air to escape.
Because of this, your bills will be higher than they need to be, as you battle the elements. Blocking off all gaps and cracks in your windows and doors is a time-proven way to up the efficiency of your heating and cooling systems. There are many types of different weather stripping that you can use, depending on the circumstance.
Tapes
These are made from different materials, but the commonality is that have a sticky side to them. You peel off the paper backing and adhere it to the surface that you are going to be weather sealing. It’s a very straightforward process and one of the most common, for its ease of use. These are best used where there is little wear to be expected.
The different materials you can choose from are:
- Foam Tape: This is a low coast open-cell material. Perfect for any use that requires compression.
- Neoprene Sponge Tape: This is a closed cell weatherstripping that offers flame and water resistance. It works best where there is little to no compression.
- OVC Foam Tape: Another closed-cell weatherstripping with excellent compression recovery. Also flame resistant and great for outdoor use.
- Felt Tape: This is common for use with glass, as it has a strong cushion and friction reduction. It’s also used decoratively. These do not have as long a durability as the other options and will be worn down by moisture and friction.
With a little research, you can find the weather stripping that works best for your application. In all likelihood you will want to go with a few different varieties, to make sure you cover all the areas around your house that need it. Make sure that when applying these tapes, the surface they will be adhering to is clean, so you get the best grip possible.
V-Strips or V-Seals
V-strips are typically made from vinyl, though there are varieties that are thin, flexible metal. They are easy to install, as one section has tape that self-adheres to the surface. For the metal versions, you will install these using nails. These are effective on the tops and sides of doors, as well as the sides of a double-hung or sliding window.
Gaskets
Gaskets are commonly found on exterior doors and garage doors. They are round in shape and are installed at the bottom of the doors. You will use adhesive, nails, or screws to attach these. They are well known for creating a great seal between the door and the floor, as well as an alternative to a door sweep.
Sweeps
Door sweeps are attached to the bottom of your door and when you open and close your door, act in a sweeping manner, hence the name. They are made of vinyl, rubber, or stainless steel with a strip of rubber or sponge brush at the bottom. Usually applied using a sticker adhesive, you can also get ones that are nailed or screwed to the bottom of your door. These are better if the door gets a lot of use, as you won’t have to worry about it coming off over time.
With door sweeps, you will have to cut them to fit the width of your door. Some go on the interior of the door, some on the exterior, so check the manufacturer’s instructions for where to install. The downside to sweeps is that if you have carpet, they may drag and cause the door to not open or close as freely.
Installing Weather Strip
Installing weather stripping may seem like a complex project involving many moving parts, thanks to all the perks it offers. But it’s really not. It’s a simple, straightforward process that will only take minutes of your time. All you are doing is sealing the gaps in the parts of your house that swing, slide, or lift. These are where the air transference will be occurring and any homeowner can tackle this project themselves.
The best places to install weatherstripping is:
- Exterior doors, including French doors and sliding patio doors
- Windows; Casement, Sliding, Awning and Double-Hung
- Attic Hatchways, as these are known to be drafty
- Garage Doors
If you see sunlight through the cracks of the door or window, then it’s time to install weather stripping. If your windows rattle in the wind, applying weather stripping will not only stop the air leaks, but stop them from moving around.
Step 1: Checking Door Alignment
Make sure the doors are properly aligned. If not, check that the hinges haven’t come loose from the wall. If so, you can use longer screws to secure them again or fill the holes with wood filler and once it dries, screw them back in.
Step 2: Install Weather Stripping Around the Frame
Using adhesive foam weather stripping, apply it around the door frame. Remove any of the old weatherstripping and clean the area where it was applied, so none of the sticky residue remains. This will allow for good adhesion. Cut the weatherstripping to size and apply it, pushing out any air bubbles with your fingers.
Step 3: Checking Seams and Glass Panes for Gaps
If you are weatherstripping French doors or any door with glass panes, check to make sure that air is getting through where the wood meets the glass. If so, you can use clear caulking to seal this area and prevent air leaks.
Step 4: The Gap Between Doors
To close the gap that is between two doors, use insulated molding. Nail this to one of the doors and make sure it overlaps by ½”. Cover the nail heads with putty and sand them smooth, then paint. Giving the entire door a new coat of paint will cover the molding, hiding it, and giving the entire project a fresh upgrade!
Do You Need Weatherstripping Installation or Replacement?
Get free, zero-commitment quotes from pro contractors near you.
Related Questions
How do I Open A Door That Is Painted Shut?
Use a utility knife to cut through the thick areas of paint that is around the door. This will create a clean line and allow you to open and close the door.
Should a Sweep Touch the Floor?
When installing a door sweep, it should only lightly brush the top of the floor. If it is too low, then the friction caused by it rubbing against the floor will make the door harder to open. It will also put unnecessary strain on the door sweep and if it was adhered with an adhesive, could cause it to pop off.
Do Door Swell In Winter or Summer?
Doors will usually stick in the summer, due to the relative humidity. As the moisture builds, it expands the wood and can make the doors too tight in their frames. In the winter, the humidity is lower because cold air cannot hold moisture as well.
Sean Jarvis is an interior decorator, writer, and expert handyman. Well versed in everything home improvement, he is a savant at manipulating words and spaces and upgrading everything around him. Sean specializes in writing concise guides about appliance repair and installation, home and lifestyle, and other residential projects.
More by Sean Jarvis


![Finishing Basement Without Permit [Is It Really Illegal?]](https://cdn-fastly.upgradedhome.com/media/2023/07/31/9070078/finishing-basement-without-permit-is-it-really-illegal.jpg?size=350x220)