How To Tighten A Loose Moen Kitchen Faucet Base (Do This!)

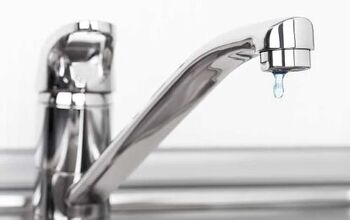
You expect very little of your kitchen faucet. Dispense water without leaking or spraying everything is really all it has to do. From time to time, however, it may not even be able to do that well. For the most part, when you are experiencing light leaking, the reason is due to a loose base.
If you have a Moen faucet, the fix is relatively simple. Besides, it is totally normal for the handle to loosen over time, so you can just implement a quick fix and get back to normal. After turning the water off, it is simply a matter of tightening the loose nut at the base of the faucet and checking to see that it is tight enough. It should take maybe 15 minutes in total to do the job.
If you need to tighten a faucet nut, check out How To Tighten A Kitchen Faucet Nut Under A Sink.
Do You Need a Faucet, Fixture, or Pipe Repair or Replacement?
Get free, zero-commitment quotes from pro contractors near you.

What Happens if My Faucet Base is Loose?
Moen makes a wide array of kitchen faucets, most of them critically successful. After all, Moen specializes in faucets, so it is reasonable to expect them to do a decent job at making reliable kitchen faucets.
But what happens when the base loosens? And why does this happen?
Loose base
Over time, both the base and the handle will become loose with frequent usage. That is totally normal and nothing to worry about. Moen faucets in particular are built to last for quite a while, so a loose handle is nothing to be concerned with.
Leaking
The most common symptom of a loose base or handle is that you notice a little bit of leaking from the faucet. This indicates that the connections are no longer tight, allowing water to seep out in small amounts.
If the problem gets worse, the leaking does as well. It is best to tighten up the base or handle it in short order. That leaking may not lead to anything catastrophic but it is definitely an annoyance that should be handled sooner rather than later.
How to Tighten a Loose Moen Kitchen Faucet Base
Would you rather watch a how-to video? Check out the one below.
Tools Needed
The good news is that tightening up your Moen faucet base is a relatively easy endeavor. Moreover, it doesn’t require anything major in terms of tools. You should find most, if not all, of these in your home toolbox:
- Flashlight
- Adjustable wrench
- Basin wrench
- Hand gloves
- Mini knife
- 3/32” Allen wrench
If they are not readily available, you can grab them from your local hardware or home improvement store for very little. At least then you will have these tools available going forward. Next, we can focus on fixing the issue.
Step 1: Plug the Basin Drain
Before you do anything else, start by plugging up the basin drain. Doing so ensures that none of the components – namely the nuts – will fall down into the drain. That is a nightmare that has happened more often than you would think.
It is also important to prevent these issues because losing critical nuts means needing to replace them. Having to take one of the remaining nuts to the hardware store to find a match is a hassle that you could otherwise avoid. Close the basin drain and you will be grateful should you drop anything.
Step 2: Turn Off the Water Supply
With the basin drain securely plugged, it is time to find and turn off your water supply. For the most part, you are dealing with two water supply types when it comes to a Moen kitchen faucet: the hot water valve and the cold water valve.
On most Moen kitchen faucets, you will find those valves at the back. Have proper lighting available otherwise you may have a little difficulty locating the valves.
When you find the water supply valves, shut them both off by rotating counterclockwise. Turn the faucet on and verify that you have stopped the flow of water. Make sure that the valves are locked in tightly, otherwise you may have to deal with a little bit of leaking as you work.
Release pressure. When you turn the supply valves off, this next part is important. Open the faucet handle. You want to release any pressure that may have built up in the supply lines. Don’t skip this step as it comes into play in later steps.
Step 3: Pry Off Water Lines
Now that water flow has been stifled, it is time to focus on the base area of the faucet. This is where the adjustable wrench will be needed as you have to pry the water lines off.
Simply attach your adjustable wrench to the water supply and inlet lines. Turn the wrench counterclockwise to loosen them up.
Note: wear gloves here. You can probably get by without wearing them, but there are two benefits. One, your hands are better protected. Two, you get a better grip on the wrench, making it easier to loosen the appropriate components.
Step 4: Tighten the Loose Nuts
You are already almost to the finish line. Here, you need the basin wrench to adjust the nuts at the base of the faucet. Over time, those nuts can come loose, allowing water to leak in little by little. Again, if you don’t have a basin wrench, you can get one at just about any hardware or home improvement store.
Grip the nuts with your basin wrench, gradually applying pressure in order to tighten them. You don’t want to overtighten them, but make sure that they are secure. The last thing you want to do is tighten them only for the leaks to come back because they aren’t tight enough.
Step 5: Check Your Work
When you are done tightening the loose nuts, it is time to put everything back together again. Reconnect your water supply valves, making sure they are secure once again. Finally, open up the faucet and see if there is any water coming from the base. If you no longer see water, your job is done.
Do You Need a Faucet, Fixture, or Pipe Repair or Replacement?
Get free, zero-commitment quotes from pro contractors near you.
Related Questions
Unfortunately, there are more issues at play than just a simple loose base. From time to time, you may have to fix other problem areas or you may have other pressing questions. Here are some of the most relevant questions users ask.
How Do I Tighten a Moen Kitchen Faucet Handle?When there is water leaking from your Moen faucet and the base isn’t the reason, the next place to look is the handle. More often than not, a loose handle winds up being the issue. The good news is that the fix is just as easy as it is with the base.
- Turn off the water. Clear the area near the sink and turn off the water supply. It is the same as the process laid out above and will make it so that water isn’t interfering while you work.
- Check the handle. Check the faucet to find out what mechanism is at fault. This is where the style of faucet comes into play.
- Remove the hex nut or screw. If you look into the handle of your faucet, you should notice a screw or hex nut settled just inside. You can use a mini-knife or screwdriver to gently get it out. These screws are typically made of plastic, so use caution. This should take a minute or two at the most.
- Under the cap. If you don’t see the setscrew there, check under the cap. You will need an Allen wrench to get the screw out here. The most common size needed is a 3/32” Allen wrench. Locating the actual screw is probably the hardest part.
- Tighten the screw. When you find the screw, turn your wrench clockwise to tighten it. Make sure that it is snug but don’t torque down on it. You don’t want to overtighten.
- Reconnect the water supply. Reconnect your water supply valves and test them out.
If you think that there is a bigger issue at play, you may need to remove the faucet entirely in order to implement a fix. Thankfully, removing the faucet entirely is actually quite simple and you need even fewer supplies.
- Supplies. To remove your Moen faucet, all you need is a screwdriver, wrench, and a pair of needle-nose pliers. If you don’t have these tools already, it is good to have them for many different routine jobs around the house.
- Turn off the water. Same as you would for tightening the base or the handle. Make sure to turn both lines off.
- Drain the pipes. Open up your faucet as there could be water inside. Let it empty out before disassembling.
- Take off the handle. Using your screwdriver, loosen the handle and then unscrew the setscrew that attaches it to the faucet. When you have loosened it sufficiently, the handle should pull out.
- Remove the dome and plastic sleeve. When the handle is gone, you should see a dome. It slides out easily, then turn the black jacket until it comes out.
- Removing the handle, ring, and washer. It is basically screws and loose parts from here on out. Unscrew the handle, remove the ring and the washer, and then pull off the spout. Finally, pull out the cartridge using your pliers to have completely removed the faucet.
More Related Guides

Ryan Womeldorf has more than a decade of experience writing. He loves to blog about construction, plumbing, and other home topics. Ryan also loves hockey and a lifelong Buffalo sports fan.
More by Ryan Womeldorf


![The 5 Best Angle Grinders – [2022 Reviews & Buyer's Guide]](https://cdn-fastly.upgradedhome.com/media/2023/07/31/9071326/the-5-best-angle-grinders-2022-reviews-buyer-s-guide.jpg?size=350x220)