How To Stagger Deck Boards (In 10 Easy Steps)
Every home needs a beautiful deck. A place to cookout with friends or just sit outside and relax. If you want to build your own deck, you need to do it right. The best way to make a perfect deck is to stagger the deck boards.
Install a full plank in the first row and cut 1/3 off of the next row’s first board at the end. Cut another 1/3 of a board on the row behind the first two. Repeat the process for each board and leave 1/8” of space between them for drainage.
In this article, we will guide you on how to stack deck boards so that you can have a beautiful place to invite your friends and family. While it seems hard, it’s not. You just have to have the correct measurements, tools, and materials to get the job done.
Do You Need Deck, Porch, or Gazebo Installers?
Get free, zero-commitment quotes from pro contractors near you.

Tools Needed
- Deck Boards
- Nails or Screws
- Joists
Factors To Consider Before Starting
Nails vs. Screws
Whether you use nails or screws in your deck is a personal choice. There are some things to consider when selecting one versus the other. Screws hold things flush better than nails. And they have a better tensile strength than nails, which will keep boards from popping up. Screws are easy to remove if needed, while nails are much more difficult to remove.
However, screws are more likely to split deck boards than nails. Never place a screw within ¼ inch of an edge. Screws stay attached as the boards expand and contract, making them more secure than nails. If you choose to use screws, make sure to use deck screws.
Why Would Someone Choose Nails Instead?
Nails are better for structural joining. They are more flexible under pressure than screws. Screws can snap under too much pressure. For these reasons, people generally use a combination of screws and nails versus one or the other. Screws are preferred for laying down the decking. Nails are chosen for the structural elements and joists.
Joist Splitting
A joist is an upright piece that supports deck boards. Joists lay horizontal on the vertical beams, which provide a steady, level surface. And deck boards should be fastened on top of a double joist. This will allow for enough nailing edge per board.
When a board must go past the joist, it has to be cut to share the top of the joist with the next board in the row. When staggering joints, the joint needs to connect on top of a joist so both pieces will mount to the support.
Spacing
Spacing on a deck is the small gap between decking boards. This is essential because you need to take into consideration the properties of wood. Wood expands in the heat and when it is wet. If your wood is wet or green, spacing is not necessary.
Spacing is also crucial because water will need to drain from your deck. The improper spacing could lead to an unwanted deck pond. Spacing also makes it easier to clean your deck. These small gaps allow debris to be easily swept away.
However, it is better to install your deck boards when the boards are dry. Leave at least a 1/8 inch gap between pieces. If this gap is not left, the deck will warp or buckle when the wood gets wet or as the weather gets warmer. It can also cause pieces to pop out and additional damage to the deck.
Place The Boards Bark Side Up
Whether you use nails or screws, be sure to place the board’s bark side up. Boards will cup away from the bark side. This will allow water to run off the boards and prevent it from pooling or damaging the wood.
Steps For Staggering Deck Boards
Step 1: Do A Dry Run
Before you start attaching boards, do a dry run. Lay the boards out before starting to attach them to the frame. Staggering the joints when laying the boards is essential if your deck dimensions are longer than your boards. This will help you to see where exactly you need to apply the boards and where you’ll need to cut them.
Step 2: Select Your First Board
Choose your first board by selecting the straightest board. This board will go against your house. Cut the board to the proper length. Slide the board against the house. Leave 1/8” between the board and siding to allow for drainage.
Step 3: Secure the Board
Secure the board by driving nails or screws through the board and into the support beam beneath. Make sure you do this right in the middle of the support beam rather than through the side where the nail or screw can pop out of. This will help make sure that the board is appropriately secure.
Step 4: Cut
Lengthwise, take a board and cut it in half.
Step 5: Position The Boards
Position the board in Step 4 parallel to the first board. Be sure to leave 1/8” space between the boards. And with the ends of the boards even, nail or screw into place.
Step 6: Lay Them Out
Lay down a full board. This should be in the same row as the half board. Leave a 1/8″ space from the first board, as well as between the short end of this board and the short end of the second board.
Step 7: Add Another Full Board
A second full board should be laid in the first row. The same spacing will need to be applied. You’ll need to do this until you have the length of two rows fully completed.
Step 8: Repeat Steps 2 Through 8
Repeat Steps 2-8 until complete. If you have an odd number of rows, follow the pattern for the first-row foregoing laying any second-row boards. You may feel like you want to rush at this point but don’t. Take your time so that you can do a good job, and you won’t have to go back through and fix any mistakes.
Step 9: Make A Clean Edge
Once all boards are in place, it is time to make a clean edge. You will need to cut any ends that extend over the edge of the deck. This can be done by marking the boards with chalk and using a circular saw to cut them all at once. Once they’re cut, you can sand them down to resolve any sharp edges that may be sticking out.
Step 10: Check Your Work
Sometimes, you won’t know whether a job is well done until it’s completely finished. But as long as you took the time to really measure, and cut the boards correctly, everything should check out great. If not, then take the time to mark down any problems so that you can go back later and fix them.
Related Questions
Why Should I Stagger My Deck Boards?
Staggering planks will improve the stability of the deck since the seams will be spread across more joists. It will enhance the appearance as well.
Staggering a deck board will also decrease the number of screws or nails that go into a joist. Increased numbers of screws or nails going into one joist can weaken or rot it quicker.
What Length Boards Should I Use?
While many decks are built using 16 and 20-foot boards, it is better to use the smaller 8-foot boards. These boards, unlike their longer counterparts, are easier to transport.
The shorter boards will also save you money. You can save up to $2.35 per square foot. And while that may not seem like much, it can quickly add up to a lot of green.
What Type of Boards Should I Use?
It is really up to you. Natural wood is beautiful in both color and appearance. It also resists rot and insects. However, at $3.75 to $20+ per square foot, it can be expensive and can fade or crack.
Pressure-treated lumber at $1.50 to $2.50 per square foot is the least expensive option. It’s durable and visually similar to natural wood. However, it can emit toxic fumes without proper sealing.
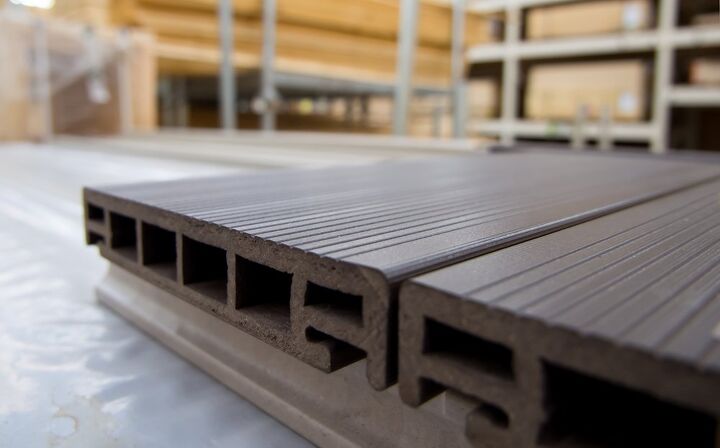
Composite decking costs $4 to $10 per square foot. It is resistant to rot and insect infestations and requires minimum maintenance. It also resists warping (read here to learn how to fix a warped composite deck). But it does get extremely hot and can grow mold and mildew.
How Far Apart Should Joists Be Spaced?
This will depend on the size of the joist. Joists should be larger for larger sized decks. Generally speaking, though, joists spaced 16 inches on center can have a span 1.5 times their depth in inches. For example, a 2×8 joist can span up to 12 feet, and a 2×10 can span 15 feet.
Do You Need Deck, Porch, or Gazebo Installers?
Get free, zero-commitment quotes from pro contractors near you.
Wrapping It Up
You can stagger deck boards relatively easily; all it takes is some dry fitting, cutting, and securing. It’s essential to dry-fit the boards so you don’t make any mistakes early on. Once you’ve got everything dry fit, you can start cutting and securing the boards to create your beautiful handmade deck space. However, just be careful not rush the project so that you can get everything done the right way the first time.

We are a team of passionate homeowners, home improvement pros, and DIY enthusiasts who enjoy sharing home improvement, housekeeping, decorating, and more with other homeowners! Whether you're looking for a step-by-step guide on fixing an appliance or the cost of installing a fence, we've here to help.
More by Upgraded Home Team


![How Much Weight Can a 4×4 Support Horizontally? [It Depends!]](https://cdn-fastly.upgradedhome.com/media/2023/07/31/9070333/how-much-weight-can-a-44-support-horizontally-it-depends.jpg?size=350x220)