How To Soften Grout For Removal

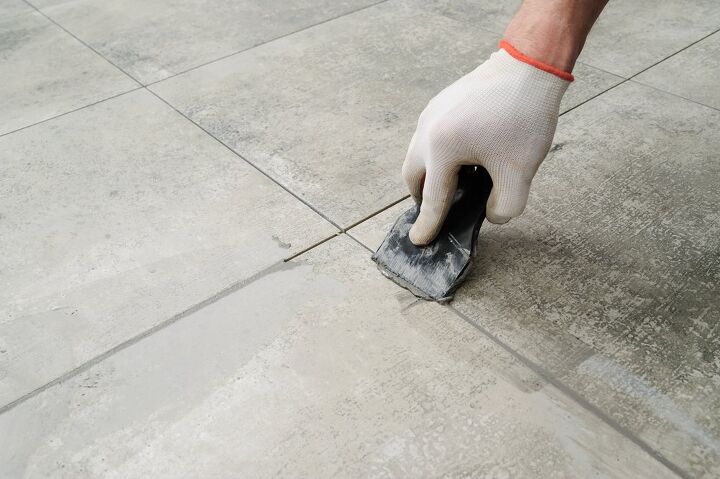
Grout is a fantastic mortar used for tiling. The downside? It can be frustrating to remove! Are you remodeling your shower? Maybe you’re merely replacing stained grout. Either way, one thing is for sure: You’re met with the task of pulling up hardened grout. How do you soften it to make things easier?
Set a heat gun to 300 degrees and hold it 6”-8” away from the grout until it softens. Apply a layer of sulfamic acid on the grout and let it sit for 3 minutes to melt the grout. You can also soften and remove grout with household items like a scraper and vinegar.
Removing hardened grout can be a time-consuming task. The tactics in this article will cut your labor time in half, and make the process easier! That way, you won’t spend endless hours chiseling it away and possibly ruining your floor’s underlayment or any reusable tiles.
Do You Need Grout Replacement or Repair?
Get free, zero-commitment quotes from pro contractors near you.

How Often Should You Remove Grout?
Well taken care of grout needs to be replaced every 12 to 15 years. Often, people don’t think to care for this as much as their tiled floors. In turn, the grout needs to be replaced more often than 12 to 15 years. Since it’s been sitting there for multiple years, it can be hard to remove! That’s okay, though! There are many methods you can use.
These methods consist of using heat or dissolving the grout altogether. Either way, it gets the job done. You’ll just have to make sure that you have the correct tools on hand.
Softening Grout With Heat For Removal
There are a few tools that you will need to have on hand for this method:
- Heat Gun or a blow dryer
Your heat gun should at least reach a temperature of 300 degrees Fahrenheit. This is the ideal temperature used to soften it.If you’re using a hairdryer, you should have this on the lowest setting. This is important especially if you are coming into contact with plastic tile instead of ceramic tile. The higher setting will melt the plastic.
- Grout Removal Tool
The removal tool best to use is a Dremel, but of course, you can use whatever you prefer. Make sure that it is of decent quality.
- Trash or Bucket for old grout
Any old trash or bucket will do. It’s a good idea to have this lined with something so that the grout does not stick to it.
The process is relatively easy, but it takes a little bit of patience to do this properly.
Step 1: Heat Up The Grout
You want to take your heat gun and set the temperature to 300 degrees Fahrenheit. Or, take your blow dryer and set it on the lowest setting. You then aim your tool of choice in the area you want to be softened. Make sure you aim it more in between the tiles rather than on the tiles. This will help the heat to concentrate directly onto the grout.
Your heating tool should be about 6 to 8 inches away from the tile. This is to ensure you do not damage the flooring. It will also prevent any liquefication of the grout. You will know that the heat is working when the edges begin to peel away from the tile. When that happens you are ready for step two.
Step 2: Peel Up The Grout
This is the point where you need two free hands. You need to be able to hold your heat source and your grout tool. It is essential not to remove the heat source at this point in the project. Keep your heat 6-8 inches away while you begin to dig the grout out.
Once you make the initial opening it will be easier from there. You can turn your heat source at an angle and warm up the underside of the mortar. This will make it easier to scrape up from the bottom. Make sure you take care not to break the tile during the process. If you break the tile, you’ll have to remove it and replace it, which can be costly and time-consuming.
Alternative Method To Remove Grout: Dissolving
If you find the first process to be difficult, you can dissolve the grout as well. There are a few different ways that you can do this:
- Vinegar
- Sulfamic Acid
- Brick Cleaner
These are three ways you can dissolve this without ruining your tile if carefully done. They will also serve as a great cleanser to prep for new grout placement. These are a couple of great ways to remove any application mistakes too! If you find you have a bit on your tile, dissolve it. This helps to keep from the cost of having to replace your tile.
If you are not wanting to dissolve the grout but rather soften it, you can dilute the acids. That way, it softens up but does not entirely dissolve.
Using Vinegar For Removal
Vinegar is an acid, therefore it should not sit on your tile.
For this method, here are the tools you will need:
- Gloves
- Vinegar
- Water
- Scraper
- A well-ventilated area
You want to ensure you apply the vinegar directly to the grout. As you’re doing that, scrape at the grout. This will allow the vinegar into the base, where it will eat it away. Make sure you have water handy so that you can wash away any vinegar that touches your tile. This is very important as it will keep the vinegar from running your beautiful tiled floors.
Using Sulfamic Acid To Remove Grout
The tools for this method are the same as with the vinegar. Except, since you are using more vital acid, you need goggles. Any surface the acid splashes on needs to be washed with water immediately.
It’s a good idea to test an inconspicuous piece of tile. This is to reassure you that it will not damage your floors. If you have plastic tile, this is not a suitable method for you. Sulfamic Acid will eat through plastic. This is ideal for ceramic floors and walls.
- Spray the acid on the area
- Let it sit for 3 minutes
- Ensure that it is not on any surface it isn’t supposed to be on
- Scrape and apply the acid as needed
Brick Cleaner To Remove Grout
The brick cleaner is another acid-based cleaning agent. The process is the same:
- Apply where needed
- Keep it off of other surfaces
- Wear protective gear including goggles and gloves
- Keep the area well-ventilated
This is the best product to use when removing grout. It will loosen the mortar, as well as dissolve it. Once it’s dissolved, you can use a toothbrush to scrub it into the crevices even more. That way, you’re sure to get it all so that you can replace the old grout with the new.
Make sure before you replace the grout that you’ve washed off all the brick cleaner. The brick cleaner will keep the adhesive component of the grout from bonding, causing issues.
Can You Put New Grout On Top Of Old?
Yes, you can put new grout on told of old grout. Although, this is not ideal. You would need to clean the existing grout to do so. Although, this does not guarantee that the grouts will bond. Many things could go wrong with this method.
Keep in mind if you choose to go this route, it will be harder to remove. There will be two layers of this mortar to remove when the time comes.
Not to mention, you will need to have the space to do so. If you have 1/6th of an inch of depth, that would be fine. Anything less than that may not be adequate. Although, you could use a latex type of grout. Again, the old layer would need to be cleaned to allow bonding.
A Few More Tips For Removal
- Match the grout line. Be sure you match your previous grout line for the best results! A great grout line will be appealing to the eyes and give character to your home.
- Don’t make it more complicated than it has to be. You do not need thousands of dollars in equipment to remove hardened grout.
- Choose the best method that works for you! You should be comfortable with pursuing your project. If this means chipping out the grout, then, by all means, do it!
Related Questions
How much grout do I need to remove before Regrouting?
Is it better to Regrout or retile?
If your grout becomes discolored, then you will most likely need to retile. But, you could also deep clean the floors so that you can regrout instead. Make sure the entire floor is clean; otherwise, the dirt will get into the new grout, and you’ll find yourself replacing it yet again.
Do You Need Grout Replacement or Repair?
Get free, zero-commitment quotes from pro contractors near you.

Our Takeaway
Softening grout isn’t a hard job; in fact, it’s relatively easy, although tedious. By either applying heat and scraping or dissolving it all together, you can remove the grout so you can redo your floors. What you choose depends on the state your floor is in. If the tiles are discolored, deep clean the floors before choosing to retile or regrout.
Related Guides

Heather is a passionate writer who loves anything DIY. Growing up, she learned everything from home repairs to design, and wants to share her tips with you. When she's not writing, she's usually hiking or searching for her next DIY project.
More by Heather Robbins


![10 Best Scroll Saws for 2022 [Ultimate Reviews & Buyer's Guide]](https://cdn-fastly.upgradedhome.com/media/2023/07/31/9070684/10-best-scroll-saws-for-2022-ultimate-reviews-buyer-s-guide.jpg?size=350x220)


![How To Reset A Whirlpool Cabrio Washer [In 5 Easy Steps!]](https://cdn-fastly.upgradedhome.com/media/2023/07/31/9076531/how-to-reset-a-whirlpool-cabrio-washer-in-5-easy-steps.jpg?size=350x220)


