How To Shim A Toilet (Quickly & Easily!)

The last thing you want to deal with when you have to use the bathroom is a wobbly toilet. You end up feeling like you’re doing some strange balancing act, hoping you don’t go tumbling to the ground. You certainly don’t want to hurt yourself in a fall, taking the toilet down with you.
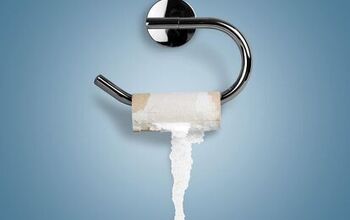
Luckily, a wobbly toilet isn’t an immediate cause for alarm as long as there isn’t a leak involved. It could just be that your toilet’s become unlevel over time, or the floor could be uneven. Either way, you can shim the toilet relatively quickly using some simple plastic shims and a little DIY effort.
Before you jump into shimming your toilet, it’s essential to ensure there are no leaks present. Investigate around the base of the toilet, as a rocking toilet can sometimes loosen or damage the wax ring. If you notice water, you likely need to replace the wax ring before moving forward with your shimming.
Do You Need Handyman Services?
Get free, zero-commitment quotes from pro contractors near you.

What Causes a Wobbly Toilet?
A few things can make a toilet do the wobble.
Loose Bolts
A simple explanation for a slightly wobbly toilet is loose flange bolts. Check the bolts that secure your toilet to the floor and ensure they are tight. But be careful not to over-tighten them.
A Raised Toilet Flange
One of the most likely scenarios is the toilet doesn’t sit flush to the floor. A common reason for this is a toilet flange that sits above the floor. You’ll find the toilet flange underneath the toilet, connecting it to the drain pipe.
Typically, when you install a toilet flange, it should rest right on top of the finished floor. However, if you have a raised flange, it raises the toilet, causing it to rock.
Settling Over Time
Other times, the toilet can start off level but get wobbly over time as the floor settles. Alternatively, as the caulk around the bottom of the toilet hardens, it can also cause leveling issues.
No matter what the reason for your wiggly toilet, it’s essential to fix it ASAP. If you opt to ignore the issue, you’ll likely end up with bigger problems in the future.
What Happens If You Don’t Fix a Rocking Toilet?
Besides being rather uncomfortable to use a rocking toilet, it can be a little nerve-wracking, too, at times. It’s literally unsettling to feel like you’re going to break something or fall whenever you use the bathroom.
But, the potential issues go beyond your feelings.
A Loose or Damaged Wax Ring
When you’re dealing with an unlevel toilet, the continual rocking can loosen or damage the wax seal.
The wax ring is responsible for maintaining a seal between the hard surface of the toilet and the drain pipe. It might seem like a minor piece to the toilet puzzle, but it’s actually one of the most important. Its primary purposes are to prevent leaks and keep dangerous sewer gasses from entering your home via the drainpipe.
Leaks and Sewer Gas
Therefore, if you don’t shim your toilet, you increase the likelihood of a damaged wax ring, leaks, and sewer gasses. Plus, that water leaking from the toilet base isn’t just water; it likely contains waste as well. Also, exposure to sewer gasses can lead to issues with allergies, mold, bacterial infections, and other health problems.
Damage to Floors and Ceilings
Then, with water leaks comes the potential damage to your floor area around the toilet. Furthermore, if your bathroom’s on an upper floor, you could end up with ceiling damage too.
How to Shim a Toilet
If you need to shim your toilet, so it’s level, you can do so in a few simple steps. However, before you start shimming, don’t forget to check for leaks. If you notice leaks, you have other issues to address.
After confirming your toilet isn’t leaking at the base, check the flange bolts. You might just need to tighten them. Use a pair of pliers to check the bolts. If they’re loose, tighten them a little at a time until snug. Use caution to not over-tighten the bolts and crack the porcelain. If this happens, you’ll be shopping for a new toilet.
Once you’ve tightened the flange bolts, test out the toilet. If the wobble is gone, you’ve solved your problem. If your toilet is still a rockstar (and not in a good way), then it’s time to shim it.
Tools You Need for the Job:
- Small plastic shims with ridges (You can purchase a 30-pack for about $12 online or at a hardware store)
- Utility knife
- Rag or paper towels
- Tub and tile caulk (look for the same color as your flooring)
Step 1: Inspect the Toilet Base for Gaps
Before placing the shims, it’s best to determine where you need to put them. Therefore, inspect around the entire base of the toilet, looking for potential gaps between the floor and the toilet.
Try rocking the toilet if you’re having trouble finding the gaps. The rocking will make it easier for you to see the spaces. You can also test the area with the shims to see how far they fit under the toilet’s base.
Step 2: Place the Plastic Shims
Once you’ve found the gaps, it’s time to place the shims and level the toilet. Start inserting the shims under the toilet, placing them in the spaces you found in step one. Typically, you’ll place shims about 1 ½ to 2 inches apart.
This step might take a bit of trial and error on your part. Place the shims, then sit on the toilet and rock it from side to side. You might have to move shims around a bit and keep testing until you get the toilet level.
Step 3: Trim the Toilet Shims
After positioning all of the shims and ensuring the toilet is level, you need to trim the shims. After all, you don’t want small plastic bits protruding from around the base of your toilet. You want to hide them.
Trim the shims using the utility knife, going as close to the toilet’s base as possible. Be careful not to slice into your flooring.
Step 4: Caulk Around the Toilet Base (but not all the way) to Hide the Shims
Again, you want to ultimately hide the shims. Sure your toilet’s level, but you’d also like your repair job to look good too. After cutting the shims, run a thin bead of caulk around the base of the toilet.
Ensure you hide all of the shims with the caulk and use your finger to smooth it out. Use the rag or paper towels to clean your finger each time you use it to smooth out the caulk.
Caulking helps hide the shims, as well as potentially protecting the wax seal. However, don’t caulk around the entire base of the toilet. Leave a small space toward the back of the base.
This space gives potential leaking water a place to go, which serves a double purpose. First, it helps you detect a leak sooner. Next, it prevents water from pooling up under your toilet, causing a more significant problem.
Step 5: Let Everything Set, Then Test for Wobbles
Follow the instructions on the caulk regarding the dry time. Typically, no one should use the toilet until the caulk has had the entire required time to set. Once this time has passed, then you should be back in business.
Sit on the toilet and check for any wobbles. If there’s no more rocking, then your shims are doing what they’re supposed to do, and all is well.
When Should You Call the Pros for a Wobbly Toilet?
After checking for leaks, tightening flange bolts, and installing shims, hopefully, you’ve solved your wobbly toilet issues. However, if it’s still rocking away, then there’s likely a bigger problem in the works.
Several things can be wrong, mainly concerning issues with your toilet flange. There could be a crack in the plastic or metal ring on the flange where the flange bolts screw into place. Or, the flange itself might have damage.
If this is the case, and you’re confident in your plumbing skills, you could try a DIY repair. You can purchase a flange repair kit on Amazon for about $20 to $30. However, if you’re not sure or don’t want to tackle it on your own, call a pro.
You also might notice that your toilet stays level for a short while, then starts rocking again. This could also signal flange issues or a larger problem. If you’re having trouble diagnosing the cause, call a professional to help get to the root of your dilemma.
Do You Need Handyman Services?
Get free, zero-commitment quotes from pro contractors near you.
Related Questions
Can you use wood shims to fix a rocking toilet?
It’s best to use plastic shims on a toilet. Wood shims tend to compress over time, so you’ll end up with a rocking toilet again. Plus, wood shims are more susceptible to damage from moisture, so they aren’t a good match for a bathroom.
How much does it cost to hire a plumber to shim a toilet?
If you don’t notice any leaks, then simply shimming your toilet is a relatively simple task. You can do it yourself for about $15 worth of materials. However, if DIY plumbing isn’t your thing, you can pay a pro to do it for you. Typically plumbers charge by the hour, and the rate could be $30, $50, $80, or more. One advantage of using a pro is if something more serious is going on. A professional will notice more significant problems and be able to fix them right then.

Stacy Randall is a wife, mother, and freelance writer from NOLA that has always had a love for DIY projects, home organization, and making spaces beautiful. Together with her husband, she has been spending the last several years lovingly renovating her grandparent's former home, making it their own and learning a lot about life along the way.
More by Stacy Randall