How To Sheath A Roof By Yourself (Find Out Now!)
Roofing repair is a headache for any homeowner. It can also be costly as contractors are not cheap. If you have experience doing home repairs, you may be able to save money by sheathing your roof yourself.
First, to sheath your roof by yourself, check that the surface you will be nailing to is level. Next, ventilate the roof and attach the panels. Finally, cover sheathing with shingle underlayment felt and install your shingles.
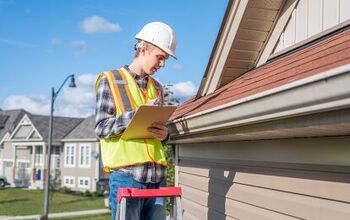
Do You Need Roofing, Siding, or Gutter Installers?
Get free, zero-commitment quotes from pro contractors near you.

What Is Roof Sheathing?
Roof sheathing, or roof decking, is a layer of wood boards attached to the roof’s joints and trusses. Shingles are then attached to the square planks of wood.
Sheathing typically consists of oriented strand board, OSB, or plywood. OSB is lightweight and inexpensive, but plywood is durable, heavier, and tends to cost slightly more. Most roofers prefer OSB unless they work with slate or concrete roofing tiles, where plywood is the better choice.
What Is the Purpose of Roof Sheathing?
The purpose of roof sheathing is to provide extra strength to the roof. Sheathing provides the support system for the oof, going underneath it. In addition to providing extra stability, there are other benefits, too.
Sheathing Helps Stop Leaks
Roof sheathing helps stop leaks and extend the roof’s lifespan and keep the home safe from water damage. In their earlier years, asphalt shingle roofs didn’t use sheathing, so the roof was more likely to leak. Today’s asphalt shingles have weatherproofing treatments in addition to sheathing underneath them for an added layer of protection.
Sheathing Adds Support to the Roof
Roof sheathing helps distribute weight evenly across the entire roof, adding support and strength to the roof. Because the sheathing boards are attached to the roof’s strongest support beams, they prevent sagging or bowing. Shingles are much heavier than we think, so sheathing helps evenly distribute the extra weight from precipitation or snow.
Sheathing Helps Prevent Fires
Sheathing can help prevent fires. While not completely fireproof, many materials used for sheathing come with a fire retardant treatment. This treatment can resist fires on the roof or in the attic.
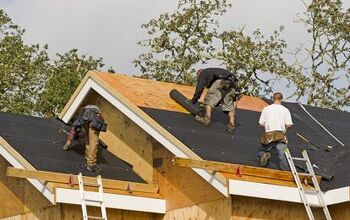
How to Install Roof Sheathing by Yourself
Roof maintenance is inevitable for most homeowners, but these projects can be expensive. Sheathing your roof yourself can save you money.
Plywood, particle board, or wafer-board are most commonly used for roof sheathing as they are inexpensive and easy to apply. When choosing the material, choose an exterior C/D grade. The thickness will range from ⅜ to ¾ of an inch, depending on the local code.
If you have chosen to use rigid roofing like metal, wood, or tile, use 1 x 4 slats instead. When ordering sheathing material, divide the total number of square feet of the roof’s surface by 32 square feet. Add an extra 15 percent for waste.
Materials You Will Need:
- Plywood, particle board, or wafer-board sheathing
- 1 x 4 slats
- Air compressor
- Nail gun
- Table or circular saw
- Chalk box and chalk
- 8d common nails
- Safety goggles and gloves
- Roofer’s harness (safety first!)
Step 1: Check That Rafter Ends Are Level for Nailing Surface
You want to be sure that the rafter ends form a straight line. Therefore, use a straight piece of lumber or a long carpenter’s level to check the line. You may need to shim the trusses to provide a level nailing surface.
If the chords of trusses or rafters are warped or bowed, install blocking to straighten them. This is vital as the building line will be noticeable when viewed from below.
Step 2: Ventilate the Roof
Provide ventilation to the roof according to building codes. The requirement is a minimum net-free ventilation area of 960 square inches for every 1,000 square feet of the ceiling. You can reduce the net-free ventilation area to a minimum of 480 square inches if you meet certain building codes.
Vent exhaust air from kitchens, baths, and laundry to the outdoors with pipes that run through the roof or attic. Don’t vent exhaust air directly into the roof or attic.
Install baffles to provide at least one inch of clear space between the framing and under the roof decking. This is to ensure that the ceiling or roof insulation doesn’t block ventilation paths. If you have a vaulted or cathedral roof, create a ventilation path from the eaves to the ridge between all rafters.
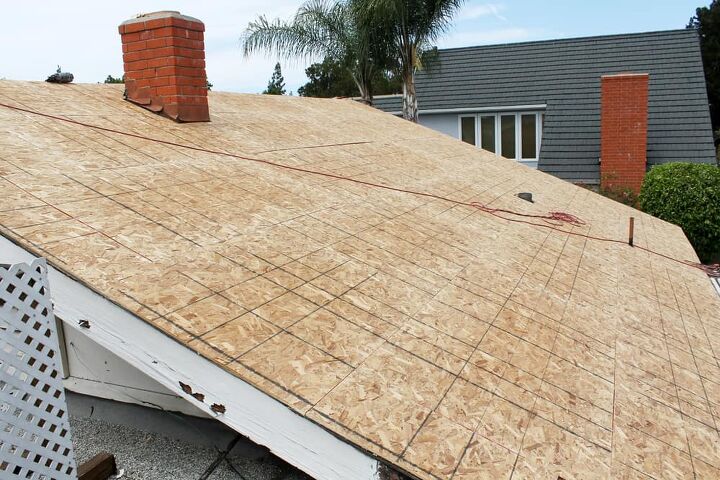
Step 3: Apply the Roof Sheathing Panels
Begin applying the sheets from the eaves, or bottom of the roof, and work your way up to the ridge. You may need to cut the last course at the top of the roof is not in four-foot increments.
It’s essential that the sheathing at the eave line be exactly perpendicular to the rafters. This is to ensure that the sheets will meet at the centers of the rafters. You also want it to be perpendicular so that the sheathing is flush with the rafter tails.
Sheath one slope of the roof at a time. When you’ve completely sheathed one slope, use a chalk line to determine if you need to cut any panels. Do this before nailing them in place. Use 8d common nails to secure the panels and space them a maximum of six inches. At intermediate supports, fasten panels 12 inches on center. In high-wind areas, you might need to use more nails.
Step 4: Cover the Roof Sheathing with Shingle Underlayment Felt
Unless the sheathing manufacturer says otherwise, cover the sheathing with a shingle underlayment felt to minimize weather exposure. Remove wrinkles and flatten the surface of the felt before installing asphalt or fiberglass shingles.
Step 5: Install the Roof Shingles
Install the roof shingles. If you are using asphalt or fiberglass shingles, postpone the installation for as long as possible. This will provide time for the sheathing to adjust to humidity and moisture conditions.
How to Know That Your Roof Needs New Sheathing
If you have old, outdated, or damaged roof sheathing, you’ll want to replace it as soon as possible. The most common reason to replace roof sheathing is when you re-roof your home. However, there are a few other signs to watch for to know if it’s time to replace your roof sheathing.
Broken Sheathing
If you can see broken sheathing boards, it is time to replace them. This happens when a large amount of weight sits in one area of the roof, like broken tree limbs. This can also occur over time if you have an older roof.
It’s not hard to spot broken sheathing. Your roof will probably begin to sag, and you may even notice sawdust or broken parts in your attic.
The Sheathing Has Water Damage
If you notice leaks, puddles, or water stains on your ceiling, it’s time for a replacement. Water damage to sheathing is exceptionally bad because it can affect the roof’s structure. If you notice water damage, replace the damaged boards as soon as possible.
Rotting Sheathing
If you see signs of rotting on your roof’s sheathing, you should replace it as soon as possible. Typically, water damage is what causes most rotten sheathing. The best way to check for rotting sheathing is to look in your attic with a flashlight.
The flashlight will show darkened spots in the wood. You can also gently use a hammer to feel for soft spots in the wood.
Light Is Passing Through Holes In the Roof
If you see light through your roof, it’s not a good sign. Go in the attic during a sunny day to see if there’s any light coming in through the roof. If light can get through, water can too, so call a roofer as soon as possible.
Common Mistakes to Avoid When Sheathing Your Roof
The devil is in the details when it comes to successfully installing roof sheathing. While it may seem simple, it can cost a lot of money if you don’t do it correctly. To prevent having to contact a contractor and spend extra money, check out these do’s and don’ts.
The Dos of Sheathing Your Roof
- Check the rafters or trusses are square and aligned correctly before installing anything.
- If you notice that something isn’t right, correct it immediately.
- Use a 10D nail to quickly and easily create the required ⅛-inch space between sheathing panels at the four-foot edges.
- Install ⅜ inch in from the edges and follow the building code or panel manufacturer’s spacing instructions.
The Don’ts of Sheathing Your Roof
- Never stand between the supports when fastening the panel. Your weight will cause deflection in the panel, and it will stay in that position after you secure it.
- Codes and product instructions change, so make sure you are up to date on new methods and guidelines.
Little mistakes can sometimes be the most expensive, so form good building habits to save time and money.
Do You Need Roofing, Siding, or Gutter Installers?
Get free, zero-commitment quotes from pro contractors near you.
Related Questions
Can you use screws for roof sheathing?
You can use screws sometimes for greater withdrawal strength. However, if you want to use screws instead of nails, they should be sized by the building designer. Staples, on the other hand, are not a good choice for roof sheathing. If you are in a high-wind area, it’s crucial to use the correct materials to fasten the roof sheathing. Furthermore, it’s also essential to have the proper fastener spacing on all of the panels.
What is the average price of a new roof?
The average price of a new roof can vary. The typical range for a roof replacement costs between $5,100 to $10,000. Roof replacement can be as low as $1,200 to as high as $30,000. On average, most contractors charge between $3.50 to $5.50 per square foot or $350 to $550 per square. This is to install or replace an asphalt or shingle roof on a typical house. If your roof is atypical, you can expect to pay more for a custom installation.

Stacy Randall is a wife, mother, and freelance writer from NOLA that has always had a love for DIY projects, home organization, and making spaces beautiful. Together with her husband, she has been spending the last several years lovingly renovating her grandparent's former home, making it their own and learning a lot about life along the way.
More by Stacy Randall