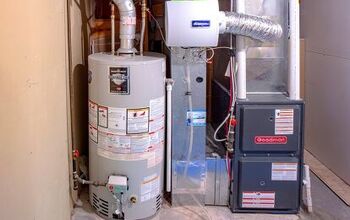
How To Run Cable From The Basement To The First Floor

Cable is a modern convenience we have become accustomed to with everyday life. Not only does it provide entertainment, but it helps us stay connected with the world.
If you have a cable junction box in one location, like the basement, it’s possible to branch off the initial cable connection, creating a second cable junction box on the first floor. This process allows you to run a cable from the basement to the first floor successfully.
The easiest way to get your cable from the basement to the first floor is to run the wire through the basement ceiling and the return duct for the cold air. This will bring it up to the first floor where you can cut a hole in the wall to connect the cable.
Of course, before attempting any cable or electrical move, it is important to consult your local building code. Some local rules and regulations require cable to run through specific notches within the studs in the walls, primarily if the cable is run through an open space.
Do You Need to Hire an Electrician?
Get free, zero-commitment quotes from pro contractors near you.

What Tools Will I Need To Run Cable To The First Floor?
Running cable from the basement to the first floor of your home is simple if you understand how electrical wiring and cabling work. To someone new to the electrical world, this project could turn into a very advanced DIY project. There are several job-specific tools required to run a cable from the basement to the first floor. At a minimum, you will need:
- Stud Finder
- Drill and Drill Bits
- String
- Fishing Weight
- Electrical Tape
- Drywall Keyhole Saw
- Measuring Tape
- Flashlight (optional)
- Metal Hanger or Fish Tape (Optional)
- Wire Strippers (Optional)
Materials Needed
- More than enough cable or wire
- Appropriate junction boxes
- Joint Compound or Spackle to Repair Walls
How Do I Fish Wire?
Running cable from the basement to the first floor involves a process called “fishing,” which feeds the wire or cable from one point to another through the walls and flooring of your home.
Fishing is a time-consuming yet easy process. Remember to stay patient with the process and never force or tug at a wire that is not passing through the walls and ceiling.
To fish a wire, you must:
Step 1: Turn Power Off
For safety, you will want to turn the power off to the circuit you are working with. You will be touching wires and working with electrical connections, so a powered outlet is a shock hazard.
Step 2: Pilot Hole
Start by drilling a small hole where you will want the cable junction box to go. It can help to use a stud finder to ensure you can anchor the box to a stud.
Carefully peek into the hole and check for any unplanned obstacles. If everything looks clear, cut the hole larger to accommodate the junction or outlet box. Do not install the box just yet.
Step 3: Basement Opening
Drill a small hole below the cable junction box in the basement. Attach your fish tape to the wire or cable you need to feed through the floor and up to the first floor.
Sometimes attaching a metal hanger to the end can help you navigate through obstructions within the wall. Continue feeding the cable until you reach the initial hole you drilled where you want the new cable box.
Sometimes this step can take a bit of negotiation and practice. Patience is key to feeding the cable through the wall successfully.
If you are going from a first-floor location down to a basement, attaching a weight to the end of the fish wire can help pull the cable or wire down to the bottom floor.
Step 4: Outlet Box
Feed the end of the cable into the back of the outlet box. Insert the outlet box into the wall and mount it in place.
Be sure to check with your local code for mounting instructions and ensure the outlet box or junction box is firmly affixed to a stud.
Step 5: Finalize Connections
Strip the ends of the cable and attach them to the jack or junction box. Cover the box with the faceplate and screw it into place. Once you restore the power, your cable should be ready to use.
How Do I Choose A New Location For My Cable?
Successfully running your cable from the basement to the first floor largely depends on the new location for your cable junction box. To find a good place, always aim to use an interior wall. Interior walls lack much of the insulation exterior walls contain, simplifying the process.
When selecting a location within the wall, try to stay away from electrical wires. Not only is this for safety, but keeping cables away from electrical wires can reduce interference.
Depending on your local code, you may need to know where the studs are in the wall. Using a stud detector, you can locate each stud. This location may be necessary if you must run cable through a notch or cut out within the stud.
If you have metal studs or beams in your walls, avoid running the cable near these. Not only will metal beams be challenging to navigate, but they can create interference with your cable.
How Much Cable Do I Need?
If you have your planned route for cabling established, the next step is to determine exactly how much cable you will need.
Start by measuring the total distance between the two points. If you have any connections to pass through, add a few feet per connection.
Take your full length and add about 10% additional length to account for any unplanned obstacles you may encounter while fishing the cable through the wall. With excess length, the worst-case scenario is having to cut additional length off your cable to finish your final product.
Does Building Code Impact How You Run Cable?
Building code is intended to help keep you and your neighbors safe. Local code is often in place to dictate requirements surrounding running cable through your home. In many parts of the country, the cable must be run through holes that are cut into joists and studs if your cable will be exposed.
This code is valid for open spaces like attics and basements. Passing cable through specific notches in the studs can make the process of running new cable more labor-intensive.
Keep in mind that running cable through notches within the stud cavities can also apply to individual floor joists if you are working in an open area.
Check Your Local Codes
Before starting a project moving cable or wiring in your home, be sure to check with your local code and ordinances to ensure your modifications are safe and meet code. If you are unsure, a local electrician should be able to help answer questions.
Do You Need to Hire an Electrician?
Get free, zero-commitment quotes from pro contractors near you.

Can You Run Cable Through An Exterior Wall?
When adding a new cable junction box or outlet on the wall, it is always advised to use an interior wall. By using an interior wall, you can avoid running cable through insulation.
However, sometimes moving a junction box to an exterior wall is necessary and cannot be avoided. To run a cable from the basement to the first floor through an exterior wall, be sure to drill your hole for the cable to pass through toward the corner of the wall. This method will help you avoid as much insulation as possible.
Don’t Forget To Waterproof!
If your hole drilled to pass the cable through will be exposed to the exterior, you will need to patch the hole with appropriate waterproofing and fireproofing techniques.
Use a waterproof and fireproof caulk to prevent moisture from getting into your home from the outside. Of course, if any insulation is exposed through the drilling and wire fishing process, properly clean up and dispose of spilled insulation.
How Can I Move A Cable Junction Location?
Sometimes you do not need to fish wire through the ceiling and walls between floors but simply want to relocate a junction box for your cable.
This option also helps if you’re going to add a secondary cable junction box in the room. To quickly add another junction box or relocate a junction box, simply remove the baseboard molding in the room. Where the drywall reaches the floor, drill a small access hole.
Next, fish the cable through the access hole, navigating around any studs. Install the new junction box, connecting the cable to the new location.
Because the drilled access hole is hidden under the baseboard molding, there is no need to patch or repair the drywall, and it will be easily covered once the molding is attached. This method is an easy way to relocate a cable junction box with minimal repair work quickly.
More Related Guides

We are a team of passionate homeowners, home improvement pros, and DIY enthusiasts who enjoy sharing home improvement, housekeeping, decorating, and more with other homeowners! Whether you're looking for a step-by-step guide on fixing an appliance or the cost of installing a fence, we've here to help.
More by Upgraded Home Team







![Finishing Basement Without Permit [Is It Really Illegal?]](https://cdn-fastly.upgradedhome.com/media/2023/07/31/9070078/finishing-basement-without-permit-is-it-really-illegal.jpg?size=350x220)
![10 Best Electric Pressure Washers – [2022 Reviews & Guide]](https://cdn-fastly.upgradedhome.com/media/2023/07/31/9070600/10-best-electric-pressure-washers-2022-reviews-guide.jpg?size=350x220)
![12 Washing Machine Brands to Avoid [with Recall Data]](https://cdn-fastly.upgradedhome.com/media/2023/07/31/9075781/12-washing-machine-brands-to-avoid-with-recall-data.jpg?size=350x220)
