


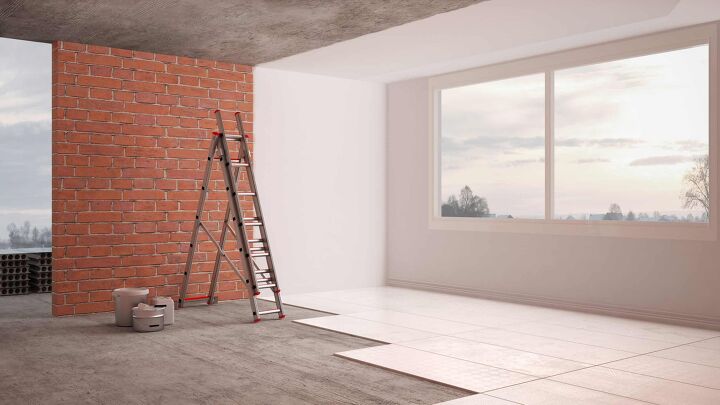
How To Replace Subfloor Under Your Wall
So you own a home, and you’ve noticed a few differences around the house. Maybe it’s a lasting scent of musk. Or, perhaps you’ve seen the floor gives away in certain areas. These are the telltale signs of subfloor damage. Furthermore, the damage to your subfloor can extend to under your wall. What do you do then?
You’re going to have to remove the bottom part of the wall where the subfloor needs replacing. You do this by knocking out the drywall. After that, you will need to attach a ledger to the studs. This will allow you to jack the wall up for support. In turn, you can then remove and replace the subfloor.
The process of replacing the subfloor under your wall is pretty simple. Although, that’s not to say that it isn’t a lot of work. This step-by-step guide will help you to get the job done! As long as you follow these instructions, you will have a job well done.
Do You Need a Framing Contractor?
Get free, zero-commitment quotes from pro contractors near you.

Signs That You Have Damage In Your Subfloors
There are several noticeable signs that your subfloor needs to replacing:
- Uneven floors
- Sunken parts of your floor
- Musty smell
- Your floors shift or bounce when you walk on them
- Your toilet rocks or feels loose
You won’t know whether the damage has gone under your wall until you tear your floor up. But, if your toilet is the issue, then you can assume that it has gone under the wall. In this case, you will need to remove the toilet, as well as cut through the wall to gain access to the other side of the subfloor. But we’ll get to that later on.
Tools You Need To Replace Subfloor Under Your Wall
This is a big job. You will need several tools to be able to do it safely and correctly.
The supplies you will need are:
- A saw to cut your subfloor
- Pry Bar
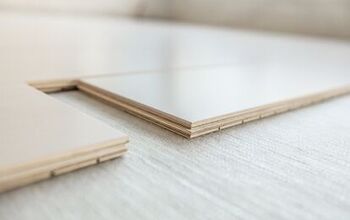
- Plywood
- Tape Measure
- Galvanized 8D nails or deck screws
- Screw gun, or nail gun
- Safety goggles
- Marker
- Drywall Jab Saw
- Hammer
- A wall Jack (If the wall is load-bearing)
- Shopvac
It would be a great idea to have someone help you as well. Even if your helper only fetches tools for you, it will make the process easier. Although, ideally, it would be better if they were also well-versed in DIY projects. Having someone who is experienced in this type of work will help you to get the job done quicker.
Steps To Replace Subfloor Under Your Wall
Step 1: Remove The Flooring
First, you will need to tear up your flooring. Once you do that, take the shop vac and vacuum up the debris. Tear up the underlayment as well. Then, you want to take the circular saw and cut out the damaged subfloor. Make sure that your Shop-Vac isn’t blowing the dust out the back, as this will make the job so much harder.
It’s best to do this in a square shape, so it’s easier to replace. Be sure to cut all the way through until you see the stable structures. Remove any nails that are exposed.
Step 2: Remove The Drywall
If you see the damage has indeed gone under the wall, you will need to remove your drywall. First, measure the width of the damaged subfloor. Then, add 1 inch to each side, and cut your drywall out accordingly. Make sure you also cut up far enough to be able to maneuver your hands with the new plywood for the subfloor.
Step 3: Cut The Plates Out And Mark Your Plywood
Cut a section of the wall plate underneath one stud. If the stud lowers, that means your wall is a load-bearing wall. In that case, you will need your wall jack. If the studs have not dropped, you can safely cut out the rest of the plates in that area.
To mark your plywood, measure from the break-in of your plywood on your floor. The break is the edge of your plyboard. You’ll want to get the measurement from the break to the side of where you cut your subfloor. Now, measure the width of the gap you had cut out. Write these measurements down.
Remember to do all of these steps on both sides of your wall. When you are finished, you should have a perfect square or rectangle cut out of your subfloor.
In The Case That You Need A Jack
Attach a ledger board to your wall studs. Make sure the ledger board is bolted to your studs. From there, you can use the wall jack to raise your wall for support. Make sure you do this before you cut any more of the plate out.
Step 4: Cut The Replacing Plywood
Take your measurements and measure out your new plywood. After you measure and draw, you will want to cut along the lines to ensure a perfect fit.
Step 5: Replace The Subfloor Under Your Wall
Slide the replacement plyboard under the wall to set it in place. Make sure it fits perfectly. You may need to sand off or cut a little bit of the edge to wedge it in. Now you’ll want to nail it to the baseboard. Or screw it, whichever avenue you prefer.
After you have installed the plywood, you want to reinstall the plates. You do this by screwing it to the floor and nailing it to the wall studs as well. You can also use A35 framing angles for added stability. If you used a wall jack, you could slowly release the studs to fit onto the wall plate.
You’re Almost Done: Finish Up The Job!
Now you want to replace the drywall. After you finish fixing your drywall, you can then put a new underlayment down on your subfloor. You don’t need to rush to finish the whole job in one day, though! Take this time to take a break and finish later or tomorrow.
The only thing you have left now is to:
- Finish your wall
- Paint
- Install new flooring
How Long Will This Project Take?
Of course, there is no one answer to this question. The length of your project will depend on several factors. How big is the damaged area? How much do you need to replace? Do you have tile, vinyl, wood, or carpet for your flooring? Is this a loadbearing wall or a non-loadbearing wall?
You can expect to take anywhere from 8 hours to 24 hours, depending. For an easy job, it will take about 8 hours, maybe even less. For the most demanding job, it will take 24 working hours. Working hours means that you’re actively working on it. So you could expect to have a more important job done within 3-4 days if you’re working on it every day.
The Average Cost To Replace Subfloor
The average cost of replacing a subfloor varies depending on supplies and the number of supplies needed.
For an entire room, this price can range from $500 to $700. Therefore, for a smaller project, you can expect to pay much less. If you hire a professional, you can expect to pay up to $40 per hour for labor. That said, you may just want to save that money and do it yourself!
The cost will also depend on the type of plywood you want to use. Plywood ranges anywhere from $4 a sheet to $12 a sheet. Although, since you’re using it for a subfloor, you may want to invest in a higher quality of plywood.
Related Questions
Does the subfloor go under the wall?
Yes! The subfloor goes under the wall. Subflooring is the foundation for your underlayment and your surface floor. The subfloor needs to extend under your wall to provide adequate support for your surface floor.
If you want extra support, you can lay an extra layer of plywood over your subfloor.
Can you replace the subfloor from underneath?
Can I put a new subfloor over the old subfloor?
Do You Need a Framing Contractor?
Get free, zero-commitment quotes from pro contractors near you.
Congratulations! You Nailed It!
While replacing the subfloor under your wall is a bit of a challenge, it’s a pretty straightforward process. By taking accurate measurements and cutting the new plywood to fit, you will ensure that you get the job done a lot quicker. Take your time, and follow these steps so that you don’t need to go back and fix anything later on.
It’s so satisfying when you complete a big project like this on your own. It provides a sense of accomplishment. Besides, a job like this one is important. Now you don’t have to worry about safety, or whether or not you can do it! You did it!

Heather is a passionate writer who loves anything DIY. Growing up, she learned everything from home repairs to design, and wants to share her tips with you. When she's not writing, she's usually hiking or searching for her next DIY project.
More by Heather Robbins


![10 Best Zero Turn Mowers – [2022 Reviews & Ultimate Buyer's Guide]](https://cdn-fastly.upgradedhome.com/media/2023/07/31/9070522/10-best-zero-turn-mowers-2022-reviews-ultimate-buyer-s-guide.jpg?size=350x220)


