How To Remove Window Tint Glue From House Windows
You often associate tinted windows with cars, but they are worth having around your home as well. Homeowners who want to protect their privacy as much as possible will love having tinted windows.
Just as with any other type of installation though, the window tint itself may start to deteriorate in quality. You may have to remove and replace the window tint to maintain your home’s overall appearance. That also means removing the glue used to stick the tint to your windows.
Window tint glue is similar to other adhesives used in and around the home. Once the tint itself is taken down, you can remove the glue by using the cleaning agent of your choice. Special glue removers, isopropyl alcohol, and vigorous scrubbing with soap and water can all help with glue removal.
The processes of removing the tint and the glue it relies upon are relatively easy to handle. Take note of the tips included in this article if you want to finish those jobs on your own.
Do You Need Handyman Services?
Get free, zero-commitment quotes from pro contractors near you.

Why You Need to Remove the Tint on Your Windows
Tinted home windows present many benefits, but there are also reasons why removing the tint may become necessary. Some of those more common reasons for window tint removal are detailed below.
The Window Tint Is Discolored
The tint on your windows won’t last forever. The film used is prone to breaking down just like other forms of window treatment.
You’ll know the tint needs to be removed when it starts to become discolored. The discoloration will prevent the tint from doing its job and your home may be more exposed as a result.
Too Many Bubbles Are Present on the Tint
Discoloration is not the only thing that could happen to your tinted windows after some time has passed. Bubbles could be problematic as well.
Certain types of bubbles grow larger the longer the tint stays on your windows. In order to get rid of those annoying bubbles, you will have to remove the tint first.
You Want to Allow More Sunlight into Your Home
Are you looking to grow more plants indoors? That will be harder to pull off if your windows are tinted.
Natural lighting has its perks too and you may want that inside your home. You may also be looking to simply refresh your home interior and taking down the tint can help with that.
How to Remove the Tint on Your Home Windows
Before you can work on removing the window tint glue, you will have to remove the film first. The steps below will help you complete that task.
Step 1: Get the Items for Tint Removal Ready
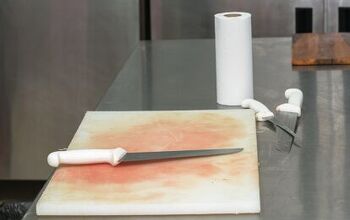
Let’s start by gathering the items we’ll need for window tint removal. Prepare some rags, a razor scraper or a small knife, and a cleaning solution. For the cleaning solution, you can use either an ammonia-based cleaner or a mixture of vinegar, soap, and water.
You will also want to prepare a spray bottle. A hairdryer may also be helpful although it isn’t absolutely necessary.
Step 2: Spray the Tinted Windows with the Cleaning Solution
Next, it’s time to use the cleaning solution. The goal of using it is not really to clean the windows. Instead, what we want to do is soften up the adhesive and make it easier for the tint to come off.
Regardless of which cleaning solution you’re planning to use, make sure that it’s in a spray bottle. Using the spray bottle to apply the cleaning solution will allow for even application. If you’re using an ammonia-based cleaner, remember to keep the room open so the fumes can escape.
Be generous with the application of the cleaning solution. Try to cover as much of the tinted window as you can. Also, take a moment to wipe away any excess cleaning solution so it doesn’t drip on to your floor.
Step 3: Allow the Cleaning Solution to Work
You now need to give the cleaning solution time to soften the glue used. Let it dry for a few hours so that it can work its magic thoroughly.
Step 4: Apply More of the Cleaning Solution
Return to your tinted windows and spray them with the cleaning solution once more. You will again have to let the solution dry after application.
Two applications of the cleaning solution should be enough to dissolve the adhesive. You can also repeat the application process multiple times if you want to make removing the tint easier.
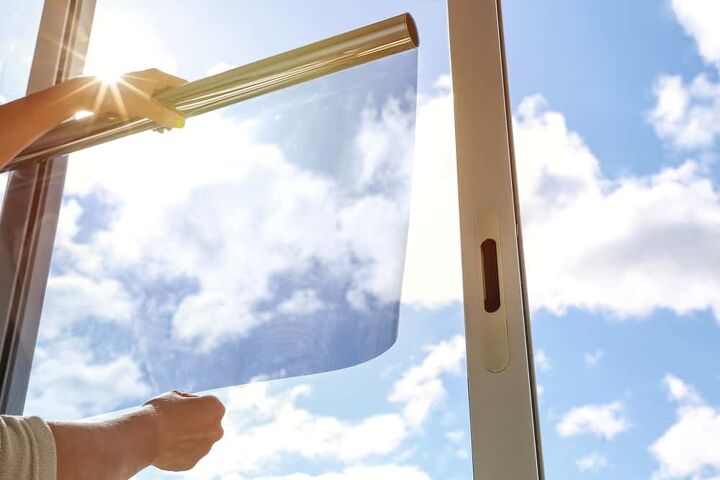
Step 5: Remove the Tint
Grab hold of a corner piece of the tint and start peeling it back. If you used enough of the cleaning solution, the film should peel back with no issue.
You may also find that the tint is not coming off cleanly or in one piece. Should that happen, reach for your scraper or knife and use that to help remove the film. Just be careful not to scratch the glass while you’re removing the tint.
Another thing you can do to further soften up the tint is to use the hairdryer. Use it to blow warm air over the film and dissolve the glue used in the process. Continue with peeling the tint back after using the hairdryer.
How to Remove the Window Tint Glue
It’s best to start removing the window tint glue as soon as you get rid of the film. You can finish removing the window tint glue quickly if you’re using the right tools and techniques.
Step 1: Fetch Your Equipment
This time around, you’ll need to prepare microfiber cloths, a scraper or knife, and a cleaning agent of your choice. The cleaning agent can be a special product such as Goo Gone, isopropyl alcohol, or even soap and water.
Step 2: Apply the Cleaning Agent
Spray the cleaning agent of your choice on to the window now. Specifically, target any spots that still show visible traces of the glue used.
Step 3: Scrub the Glue Residue Away
There’s no need to let the cleaning agent dry before you start scrubbing using the microfiber cloth. Work on those spots with the visible residue until they start to dissolve.
You can use a rag if you don’t have a microfiber cloth, but try to get the latter if you can. Microfiber is a more thorough cleaner and it also works really well on small specks.
Step 4: Scrape Away Any Remaining Residue
Some specks of the glue residue may not dissolve just from using the cleaning agent and the cloth. Those other spots may require more targeted force.
Use either a scraper or a knife to chip away at those small spots. Once again, be careful while using the sharp scraper or knife to avoid damaging the glass.
Step 5: Rinse the Window with Water
To finish up, you can just wipe the window clean with some water and the microfiber cloth. If you’re planning to apply a new coat of tint, take the time to clear the windows of any debris.
When Should You Work on Removing the Tint from Your Windows?
As much as possible, wait until the afternoon before you start removing the tint from your windows. The reason why you want to wait until then is because doing so will aid in smoother film removal.
Aside from the cleaning solution, the heat coming from the sun can also work to dissolve the adhesive. The chances of the tint coming off cleanly will increase if you work during the afternoon.
Do You Need Handyman Services?
Get free, zero-commitment quotes from pro contractors near you.
Related Questions
What Are the Benefits of Having Tinted Windows?
Arguably the most important benefit of having tinted windows is that they protect your privacy. Nosy neighbors and those with security cameras won’t be able to peer inside your home with the tinted windows up.Tinted windows also improve home safety significantly. The film can act as an additional layer of security that nefarious individuals may struggle to get through. It can also help keep the window in one piece if it’s hit with a rock or something similar.Applying tint to your windows also reduces the glare that can get in the way when you’re working or watching TV. You won’t have to look for that specific spot in your home the glare doesn’t reach any longer.
Can All Home Windows Be Tinted?
The answer to that question depends on what kind of warranty you have. The terms of your warranty may indicate that you’re responsible for damages caused by applying window treatments. In that case, applying the tint could void that warranty.Given how costly window repairs can be, voiding their warranty is never a good idea. Ask the manufacturer of your windows first if you are cleared to apply tint before moving ahead with that procedure.
Can You Tint Your Windows by Yourself?
Yes, applying the tint on your own is possible. After getting the film, you can cut it down to size so that it’s just slightly bigger than your window.Before applying the film, clean your windows thoroughly and remove any debris. During application, minimize air bubbles by pressing the film tightly with a squeegee. Try to eliminate as many of those bubbles as you can while gradually sticking the film to the window.Once the film has been applied, you can just wait for it to cure. You may have to wait for a week before the tint is completely cured.

We are a team of passionate homeowners, home improvement pros, and DIY enthusiasts who enjoy sharing home improvement, housekeeping, decorating, and more with other homeowners! Whether you're looking for a step-by-step guide on fixing an appliance or the cost of installing a fence, we've here to help.
More by Upgraded Home Team