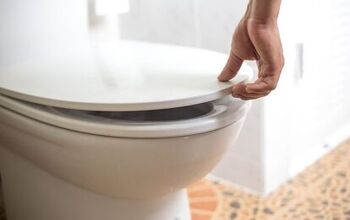
How To Remove Plastic Nut From Toilet Tank (Do This!)


Working with toilets and other plumbing fixtures can be intimidating, difficult, and messy. This is especially true when it comes time to remove the lid from your toilet tank remove any component. With that said, how do you remove the plastic nut from a toilet tank?
Turn off the water supply line through the fill valve and drain the toilet tank by flushing or siphoning the water. Disconnect the small plastic piece from the supply hose using a pair of pliers or an adjustable wrench. Locate the plastic nut at the bottom of the tank, lubricate it with the plumber’s grease, and remove it with a hex wrench.
Use a pair of locking pliers if your plastic locknut is stuck at the bottom of your tank. Make sure that your toilet tank is completely dry so that it is easier to remove the plastic nut. Follow along as we go step-by-step into how you can remove the plastic nut from your toilet tank.
Do You Need Handyman Services?
Get free, zero-commitment quotes from pro contractors near you.

How To Remove Lock Nut From Bottom of Toilet Tank
You can remove your toilet tank’s locknut if you follow the proper steps. Locknuts hold the fill valve in place so that your toilet and tank fill with water properly. You will need a few key items to remove the plastic nut from your toilet tank, such as:
- Rag
- Bucket
- Hex wrench
- Pliers
- Adjustable wrench
- Hose (if you need to siphon water)
The bucket and rags come in handy anytime that you work with water. You run the risk of creating a wet mess when you remove your toilet tank’s locknut. Let’s explore the steps that you need to take to remove the locknut from your toilet tank.
Step 1. Turn off Water
First, you need to turn off the water supply so that the tank isn’t full of water. Look behind the toilet and identify the supply hose that fills your toilet with water. The supply hose has a fill valve against the wall that lets you turn the water on and off.
Carefully turn the fill valve to shut off the water and test it out. Flush the toilet to see if water fills the tank, and if not, the supply is off.
Step 2. Drain the Tank
Now, repeatedly flush the toilet so that the tank drains water completely. The water should go down without refilling the bowl or tank if the water supply is off. It may take 3-5 flushes or more before the water leaves the tank entirely.
You can get by if you leave a small amount of water in the tank, but your hands will get wet. Soak up the rest of the water with a rag if the water doesn’t drop after a certain point. Dry out the bottom of the tank with a towel to make it easier to work with.
However, you can drain the tank several other ways if you are unable to empty it by flushing.
Plunger
You can drain your toilet and tank by using a toilet plunger. First, turn off the water supply line and flush it once or twice. Next, put the plunger directly over the hole in the bottom of the toilet and form a strong suction.
Raise the plunger up and down up to 10 times or more to force the water down the drain and out of the bowl. Give it a rest, then plunge the toilet another few times before you flush it. Flush the toilet after you plunge it until there is no water in the bowl or tank.
Bail Water
This method takes the longest, but you can bail the water out of your toilet tank with a cup or bowl. Shut off the water supply line and flush the toilet a few times to empty as much of it as possible. This method comes in handy when your toilet tank’s water level simply won’t go down.
Remove the lid from your tank and collect water with the bowl or cup. You can either dump the water into the sink or place a bucket beside you to pour the water out and save time. This method takes several minutes but it works when nothing else does.
When you get to the bottom, you may need to use a rag, towel, or sponge to collect the rest of the water. Ring the rag or sponge out into the bucket or sink until the water is empty. Dry out the bottom of the tank with a clean towel, and you are good to move on.
Wet/Dry Vac
Use a wet/dry vacuum to remove the water from the tank if you don’t have the patience for bailing. Set the vacuum up so that it is optimal for water use only to make it safe to work with. Pull the filter out of the wet/dry vacuum before you insert it into the tank.
Shut off the water supply line to the toilet and flush the toilet several times. This method is only necessary if the bowl drains fully, but the tank just won’t go down. Insert the nozzle of the vacuum into the tank and turn it on.
It should only take a few minutes for the toilet tank to drain into the vacuum completely. Dump the water out of the wet/dry vacuum and mop up the remaining water with a towel.
Siphon
You can also siphon the excess water from your toilet tank if you need to. Put on a pair of gloves and grab a clean hose before you do anything else. Place a bucket beside the water to fill the contents of the tank with.
Remove the toilet tank lid and cover both ends of the hose with your fingers or hands. Place one end of the hose in the bucket with your hand covering the other hole. Set the other end of the hose into the toilet tank and uncover the hole.
The bucket should fill up with water until the tank is empty. Water will flow from the tank much slower when you reach the bottom. Dry out the bottom of the tank with a rag, and you can proceed to the next step.
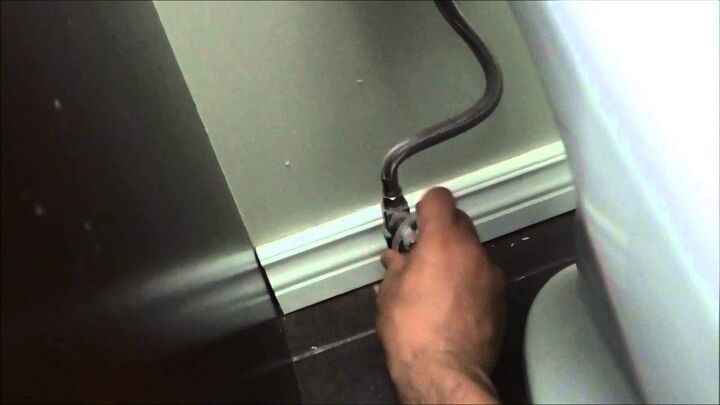
3. Disconnect the Supply Hose
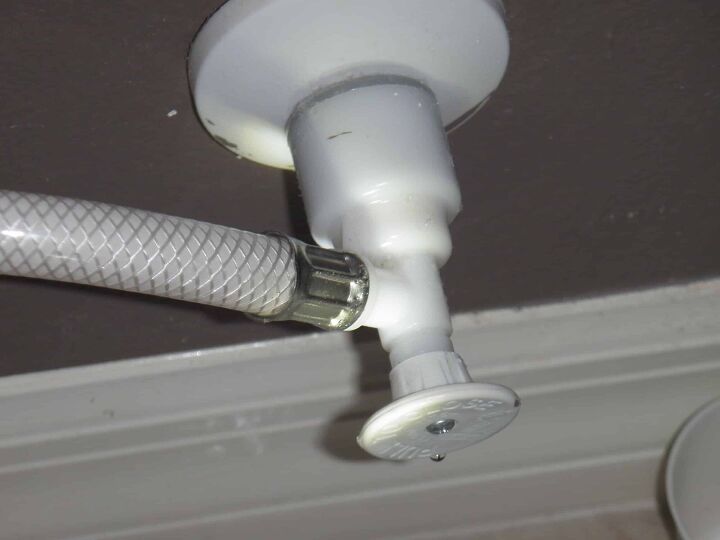
Place a bucket or towel underneath the supply hose to collect any water that may spill out. Look out for where the water supply hose feeds into the bottom of the toilet. You will find a small plastic piece where the supply hose meets the toilet’s underside.
Carefully unscrew this plastic piece and set it to the side because you’ll need it later. You can use an adjustable wrench or pliers to remove the plastic piece if you can’t get it by hand.
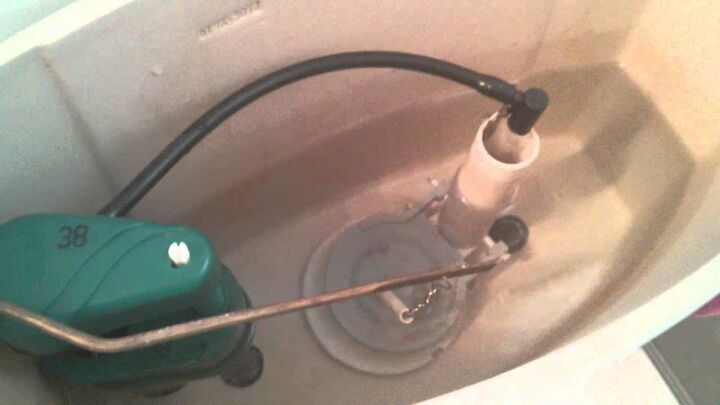
4. Remove Plastic Nut
Look for the plastic nut in the bottom of the toilet tank. Use a hex wrench, adjustable wrench, or pliers to clamp onto the nut. Carefully turn the nut until it comes loose and pull it out of the tank.
The plastic nut may be stuck if you have an older toilet, and you’ll need to lubricate it. Moisten a rag with hot water and place it over the plastic nut. Put the hex wrench over the rag around the nut and twist it until it becomes loose.
Locknut Is Stuck
If your locknut is stuck, there are a few options besides a wet rag that can help you remove it. The best method is to lubricate the plastic nut with the plumber’s grease and let it sit for 10-15 minutes. Never use petroleum jelly to lubricate any component of a plumbing fixture because it can backfire.
Otherwise, you can try to use locking pliers to remove the plastic nut. Locking pliers lock into place to allow you to grip the item in question with more force. Set your locking pliers to the narrowest position to fit around the nut and turn it with force.
If that doesn’t work, you can also try to use an angle grinder to cut the plastic nut enough that you can pull it off. However, that method doesn’t always work because not all angle grinders can fit in a toilet tank. Exercise caution if you have to resort to an angle grinder and wear safety goggles and gloves.
Do You Need Handyman Services?
Get free, zero-commitment quotes from pro contractors near you.
Related Questions
What does the locknut in a toilet tank do?
Locknuts help secure the valves in your toilet tank in place so that they don’t come loose or leak. They are made out of plastic and you will find them at the bottom of the toilet tank. You must drain the water from the toilet bowl and tank so that you can access the plastic locknut.
Do toilet fill valves go bad?
Toilet fill valves can go bad and cause the water to run nonstop and increase water bills. You can replace the fill valve or flapper valve to solve this problem.
What Did We Learn?
You must first turn off your water supply before you remove the plastic locknut from your tank. Empty the water from the bowl and tank by flushing and siphoning the water. Disconnect the plastic piece that holds the supply hose in place with a pair of pliers or a small adjustable wrench.
Next, lubricate the plastic locknut with plumber’s grease or similar lubricant. You can also soak a rag in hot water and place it around the plastic nut. Clasp onto the nut with a pair of pliers, a hex wrench, or a locking wrench.
Twist the plastic nut until it comes loose and removes it. Make sure that your toilet tank is dry to make it easier to grip the plastic nut, and it will come off easily.
Related Guide
Nick Durante is a professional writer with a primary focus on home improvement. When he is not writing about home improvement or taking on projects around the house, he likes to read and create art. He is always looking towards the newest trends in home improvement.
More by Nick Durante