How To Remove Halo Recessed Lighting Trim (Step-by-Step Guide)
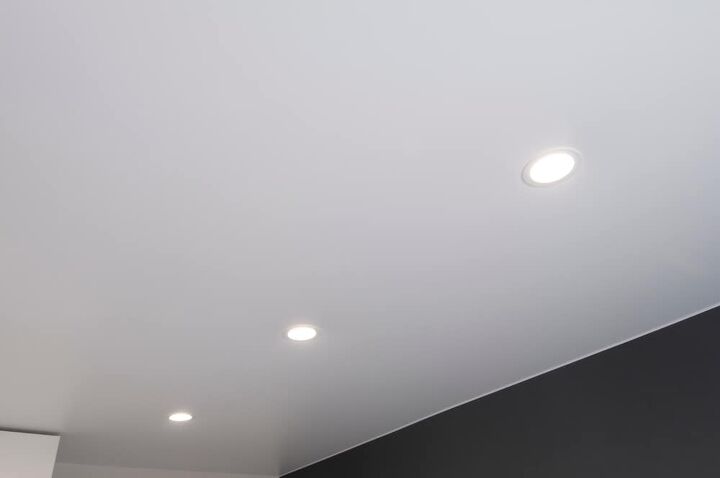
Recessed lighting is a great choice for any homeowner or commercial remodeler. They come in hundreds of sizes, shapes, wattages, and colors so you have a large variety to choose from. The Halo recessed lighting is especially good for both commercial and homes for room lighting, work lighting, ambiance lighting, or just to emphasize a portrait or other piece of art.
Removing the Halo recessed lighting trim depends on whether the trim is the screw-on type or the spring-loaded trim. Just as the name says, one needs to be unscrewed while the other just needs to be released from the spring clips. This is an easy job that anyone can do. All you need is a ladder and maybe a screwdriver.
Do You Need to Hire an Electrician?
Get free, zero-commitment quotes from pro contractors near you.

How to Remove Halo Recessed Lighting Trim with Screw-in Trim
- Turn off the light and let the bulb and housing cool down for about 10 to 15 minutes.
- You always want to turn off the breaker to any light fixture you will be working with too. Even if you turn the light switch off, there may still be current running to the lights. Better to be safe than sorry. You can just turn off the breaker to that room at the breaker or fuse box or you can shut off the main breaker to kill all the power.
- Using a ladder, take the lightbulb out of the housing by turning it counterclockwise (toward the left). Set the bulb aside someplace safe so it does not get damaged while you work.
- Push your finger inside the light as you turn it counterclockwise to loosen the trim.
- Pull the trim free with a gentle but firm tugging motion.
- Sometimes, the trim may be stuck in place by paint or grime. In this case, you will need to twist it a bit when you pull it out.
How to Remove Halo Recessed Lighting Trim with Spring Loaded Trim
- Turn off the light and let everything cool off for at least 15 minutes. You do not want to get burned by a hot bulb.
- It is also important to turn the breaker off to the light fixture. Even though you turned the light switch off, there is often some current flowing into it. Turn the breaker off to that circuit or turn off the main breaker to the whole house if you are not sure which one it is.
- Climb up on a ladder and remove the lightbulb by gently turning it counterclockwise, or to the left. Place the bulb somewhere it will be safe while you work.
- Using a flathead screwdriver, put it under the edge of the trim carefully. Pull down and straight so you do not pry it against the ceiling, which could damage it.
- The trim should pop off easily on that side. If not, reach in and lift the coil spring upward to release it and unhook it from its spot in the light housing. You will need to do this with all the springs.
- Pull down on the trim ring and unhook the springs from their slots on the backside of the trim as well.
- In some cases, the trim may be hard to remove due to paint overlap or just from being up there so long. You may need to turn the trim ring a bit when pulling down on it.
How to Remove Halo Recessed Lighting Trim with Crossbars
- Turn the light off at the switch and wait 15 to 20 minutes for it to cool off.
- Shut off the breaker to that circuit or to the whole house before working on anything. There is typically still electricity running through the fixture even when you turn the switch off.
- Put on your protective clothing (long pants and sleeves) as well as a mask, gloves, and eye protection. You will be working around insulation which can damage your lungs and irritate your eyes and skin.
- From the attic, remove the insulation around the light fixture you want to remove the trim from. Unsecure it by removing the suspension clips on each side that hook to the floor joists in the ceiling.
- Pull the fixture free of the hole and remove the lightbulb by turning it counterclockwise. Set it somewhere safe while you work.
- If the trim is screwed on, just unscrew it by turning it gently counterclockwise.
- If it has clips holding it to the trim, press in on the clips to remove them and the trim should be free.
How to Remove Halo Recessed Lighting Trim with Crossbars and No Attic Access
- Turn the light off at the switch and wait about 15 to 20 minutes to let it all cool off.
- You also need to shut the light off at the source, either the breaker or the fuse box. You can shut down just that one room or the main breaker to the whole house.
- Test the electricity with an ohmmeter just to be sure. There may be other circuits running through the junction box that you are working with.
- Put on long pants and sleeves as well as gloves, a mask, and eye protection. You will be working with insulation and drywall which can damage your lungs and irritate your eyes and skin.
- You may be able to push the can up and out of the way by releasing tabs or unscrewing any screws that may be in the fixture housing. Then you can move the can out of the way to get to the crossbars.
- Unscrew the can light from the crossbars and remove the can and trim by gently pulling it through the hole.
- If the can is too large, you may have to cut away some of the drywall, but you want to avoid this if possible. That just makes extra work for you to fix the holes.
Do You Need to Hire an Electrician?
Get free, zero-commitment quotes from pro contractors near you.
Related Questions
Can I connect two recessed lighting fixtures to each other?
Yes, sometimes just one light is not enough for a larger workspace or to highlight something you want to show off. You will need a multimeter, connecting cable, screwdrivers, wire strippers, wire connectors, a saw, and a tape measurer.
- Turn off the electricity at the circuit breaker or fuse box and then test to make sure the electricity is off with your multimeter.
- Measure the space from the junction box to the light fixture and add about 16 to 20 inches.
- Cut the measured amount of connecting cable like 12/2 insulated cable.
- Remove an extra six inches of the insulation from the ends of the cable to reveal the wires at each end.
- Put metal conduit anti-short bushings at each end of the cable to protect it from shorts.
- Use a flex squeeze connector on the end of the connectors to attach them to the cable.
- Open the junction box on the original can light fixture and remove the cover to get to the junction box.
- Use your slotted screwdriver to knock out the ½-inch hole on the side closest to the new can lighting fixture. Repeat the process with the new junction box.
- Remove the locknuts attaching the squeeze connectors and set them to the side for now.
- Push the connectors and the wires into the knockouts on the junction boxes and secure them with the locknuts, connecting the cable to each junction box.
- Remove ¾ inch from the end of each electrical wire using your wire strippers.
- Remove the wire connectors holding the green, white, and black wires together in the junction box and pull the wires apart.
- Twist a wire connector on the three black wires, then on the three green wires, and finally on the three white wires.
- Do the same with the other junction box. Turn on the breaker and test the lights.
There are many advantages and disadvantages to having recessed lights. It all comes down to the architecture of your home and your preferences. Here are the most common pros and cons.
| Pros of Recessed Lighting | Cons of Recessed Lighting |
| They are sleek and you do not have to see them. | You will typically need a lot of them to provide light because they only point downwards. |
| They are good for small rooms with low ceilings. | You cannot decorate them with charming or pretty shades or decorative bulbs. |
| They are great for wet areas like a tub or shower because they are up in the ceiling. | They are not good for vanity lights. The recessed lights just shine down on top of your head. |
Related Guide

I am a DIYer who loves writing about anything home-related. When I am not writing, you can find me studying for my PhD in Psychology, photographing nature, and swimming at the lake with my grandkids.
More by Patricia Oelze