How To Remove Baseboard Heaters (Step-by-Step Guide)

There are still many homes that have radiant baseboard heating systems. These baseboard heating systems are beginning to age out. Many homeowners face the challenge of replacing their heating systems. Part of that challenge is answering the questions, “How do I remove a baseboard heater from the wall?”
How do I remove a Baseboard Heater from the wall? Radiant baseboard heaters come in two varieties, electric and water. The steps required to remove a radiant baseboard heating system are similar. Removing water radiant heating systems requires the services of a qualified plumber. Electrical radiant baseboard heating systems are much easier to remove.
If you are planning to replace your radiant electric baseboard heaters, you can save a lot of expenses by removing the old heaters yourself. The steps that are required are well within the capability of most do-it-yourself homeowners.
Do You Need Handyman Services?
Get free, zero-commitment quotes from pro contractors near you.

Step 1 – Kill the Power!
For your safety, this is the most crucial part of the whole removal process. You must locate the breakers on your power panel that feed electrical power to the radiant baseboard heaters. Locating the right breakers can be tricky if the breakers are not labeled. If you are not sure, don’t proceed any further. You could endanger yourself or your home.
Tips and Tricks
Several moderately priced tools can help you perform this job. Most of these tools are available at any home improvement or hardware store. Some of them are worth having in your toolkit after your baseboard heating project is complete
- Circuit Tester – A simple circuit tester has two probes that can be touched or inserted into an AC circuit. An LED will light on the probe if there is a live electrical current in the circuit. This simple tool can help you determine the status of the circuit feeing your baseboard heating units.
- Voltage Detector – These devices work by sensing the magnetic field created by an AC circuit. Bringing the probe tip close to an electrical wire that has live AC current will cause the test probe to emit a buzz or squeal. These types of probes are safer since you don’t need to touch wires or expose bare wires for the test.
- Circuit Tracer – At the top of the line is the circuit tracer. These testing instruments allow the probe to detect the wire to which the sending unit is attached. The signal is detectable through walls allowing you to trace the wire back to the breaker box and the individual breaker.
Step 2 – Remove the Heater Cover
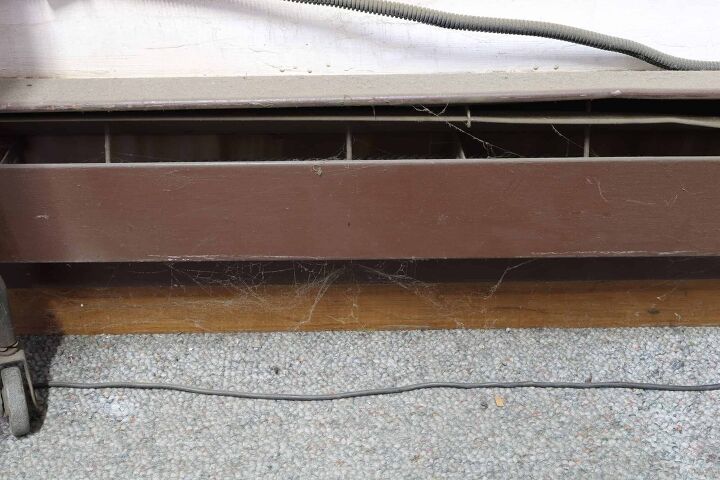
You need to expose the actual baseboard heater. On some baseboard heaters, this is done by simply popping the housing off the mounts. Other baseboard heating units may have screws holding the housing in place. Take care when removing the baseboard heating housing, especially if you intend to remount the baseboard heater.
Step 3 – Check the Power Again
For safety sake, this is an excellent time to make a second check of the power. Locate the box where the wires come out of the wall or floor. Using a tester, confirm that the power is off to the heating unit before you go any further.
Step 4 – Disconnect the Power
Open the protective box where the power lines connect to the baseboard heating unit. With the wires exposed, remove the wire nuts that connect the wires. Some baseboard heating units may have screw terminals. In this case, unscrew the terminals and remove the power wires.
Tips and Tricks
- Protect Yourself and Others – As you remove the wires, cap them to prevent an accident. Place a wire nut on the exposed wire. Wrapping the exposed wire with electrical tape is another idea. Taking a few extra precautions could prevent and accidental short circuit or shock.
Step 5 – Unscrew the mounting Brackets from the Wall
The style of mounting bracket and the method of removing the heating unit vary from manufacturer to manufacturer. In some instances, you can unlatch the baseboard heating unit from the brackets. This style of mount allows the brackets to be removed from the wall separately.
If your baseboard heating unit doesn’t dismount from the brackets, locate the screws holding the baseboard heater to the wall and remove them. Removing the screws should allow you to remove the baseboard heater.
Tips and Tricks
- If you plan to recycle or remount the baseboard heaters, you must keep track of the hardware and screws. Placing the mounting brackets and screws in a plastic bag is a convenient way of keeping everything together. Taping the plastic bag to the heating unit ensures that everything will be in place to remount the baseboard heating unit.
Step 6 – Clean Up the Remains
It is a good idea to eliminate any wires that may remain exposed. If there is an electrical junction box, fold the wire carefully into the box and put a cover on the box face. Any exposed wires must be covered and protected when performing this step.
If the wires come through a hole in the wall or floor, cover the exposed wire ends and wrap the entire end of the wire securely with electrical tape before pushing the wire back into the hole.
Tips and Tricks
- In any event, we suggest that you have a licensed electrician disconnect the wires that provide electricity to the baseboard heaters from the breaker panel. Disconnecting the wires will ensure that these now unused wires don’t get energized. If the wires inadvertently become energized, they could short circuit, posing a danger of fire or electrocution.
What are the Options for Replacing Baseboard Heating Systems?
There are several good options for replacing baseboard heating systems. Depending on your needs and the environment where you live, some of these options may not be practical. We suggest that you consult a competent HVAC technician for the best options for your climate and your home. Some of these options include:
Central Heating
Central heating units deliver heated air to your home through ducts that are installed under the floor or above the ceiling. Most newer homes in the US have central heat systems that also include air conditioning. The downside to retrofitting a central HVAC system is the cost.
Mini-Split Systems
Mini-split systems offer the convenience of a central HVAC system with the economies of no ductwork. Each room in your home receives a wall-mounted air handling unit that can be both a heater and an air conditioner.
A remote condensing unit outside the home powers these remote units. The cost of installing a mini-split is usually less than a conventional central HVAC system since it doesn’t require the installation of ductwork.
Infrared Heating Units
One of the newest innovations in-room heating is the use of what many call camouflage heating. These designs house an infrared heat system in units that conceal behind glass surfaces. The infrared rays pass through the glass and warm the air in the room.
These infrared units are economical and energy-efficient. The concealed infrared heaters are available in several sizes depending on the space you need to heat.
Underfloor Heating
A method of heating your home that is growing in popularity is underfloor heating. These systems place a network of heat strips or tape under the floor coverings of your home. The heat tapes or strips gently heat the floor and the heat rises into space above.
Underfloor heating is as economical and as efficient as any other form of home heating and can be quite reasonably installed. If you are anticipating replacing your floor coverings, adding underfloor heating is a popular option to consider.
Do You Need Handyman Services?
Get free, zero-commitment quotes from pro contractors near you.

Making Those Baseboard Heaters Disappear
If your baseboard heaters are electrical, removing them is not an overly challenging project. The steps in this article should give you the insight and understanding to safely perform this project. We hope that you found this article helpful and enlightening.

We are a team of passionate homeowners, home improvement pros, and DIY enthusiasts who enjoy sharing home improvement, housekeeping, decorating, and more with other homeowners! Whether you're looking for a step-by-step guide on fixing an appliance or the cost of installing a fence, we've here to help.
More by Upgraded Home Team


