How To Remove A Kitchen Sink That Is Glued Down (Do This!)
At Upgraded Home, we are pretty happy about covering every part of the home improvement process. When it comes to installing a new kitchen sink, the obvious thing you’re going to have to do is remove the one that is already there. Usually, this means that you would have to remove the clips. But, what do you do if the kitchen sink has been glued into place?
To remove a sink that’s been glued into place, you will have to work through three different phases. This includes disconnecting all the lines and plumbing from the sink area. Then, you will need to apply heat in the areas where the liquid nails are and scrape it. Once the glue is dissolved and scraped up, lift up the sink.
For the most part, you should expect kitchen sink removal to follow the same protocols. With a glued-in sink, you just have a handful of extra steps. Our guide will give you the step-by-step take.
Need to Hire a Kitchen Remodel Contractor?
Get free, zero-commitment quotes from pro contractors near you.

Before You Begin: What Do You Need?
Prior to removing your sink, you’re going to need a couple of things. After all, every plumber has his tool kit. You will need:
- A Screwdriver
- A Bucket
- Rags
- Goof-Off/Pro-Solve/Epoxy Remover
- Cleaning Solvent
- A Really Good Hairdryer
- Putty Knives
- Wrenches
How Long Does Kitchen Sink Removal Take?
Honestly, it can depend greatly on a number of items. If you have a glued-in sink (which you do, if you’re reading this), then you should give yourself at least 30 minutes to one and a half hours to remove the sink. In some cases, it could take as long as two hours, but that’s usually if you’re dealing with a particularly large or stubborn sink.
Check out what you should do if your sprayer hose gets stuck.
Steps To Remove A Kitchen Sink That’s Been Glued In
Did you take your trip to Lowe’s yet? You did? Great. Now that you have everything you need in your toolkit, it’s time to get stuff unglued.
Begin By Prepping And Cleaning The Area
There are so many things you’re going to have to clear out before you are able to start working on your sink. This is actually going to be the bulk of your work. Here’s how to prep it all up.
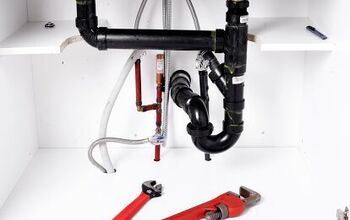
- Start by clearing out and prepping the area immediately surrounding the sink. Remove any stuff you have stored under the sink, and then turn off the water to sink. If you have a garbage disposal, turn it off and unplug it from any power source you have. Place your bucket underneath the sink.
- To prevent spillage on your floor, place rags or a plastic tarp on the floor. Things can get messy here.
- Once the bucket is under the sink, use the wrench to remove the garbage disposal from your sink setup. You will also need to use your wrenches to remove the fixtures and other parts of your sink connected to the area.
- Disconnect the drain line and water supply pipes. Here’s where having the wrenches will make a world of difference. Tighten them until there is no more water flowing to or from them. Once the water lines have been closed off, run the sink to drain the excess water into the bucket below.
- When removing the P-trap and other plumbing piping from the area, gently unscrew them or cut them. Allow the gunk from the P-trap to fall into the bucket. If you want to be persnickety, you can also take this time to clean out your garbage disposal manually.
- Remove all plumbing fixtures, tapware, and similar gear from the area. On a similar note, you may want to get the lighting fixtures in the area out of the way too. Sinks can be remarkably cumbersome. Now is a good time to disconnect your faucet fixtures, too.
- If you have dishwashers or stoves nearby, remove them too. Make sure to turn off and disconnect the gas. You want to make it as easy as possible to reach the sink and move it without harming the fixtures nearby. If you can’t fully make them get out of the kitchen, then you should try to push them to the side.
Work On The Sink
After you’ve prepped the area, it’s time to actually start cracking on the sink. Here’s how you can loosen up the sink from its current base:
- Start by releasing any clips that you find on the sink. You can manually loosen the clips, but most will need to use a screwdriver to unscrew them. You might feel the sink “dip” a little. This is normal, and is nothing to worry about.
- Jam your utility knife between the sink and granite counter. It should act as a lever or spacer. You don’t need to pry it, but you do need to establish some space there.
- Plug in your hairdryer and set it to hot. Get the hottest setting possible. (Think like, 1980s hairstyling hot!)
- Point the hairdryer in one of the areas where you have liquid nails gluing your sink into place. Use the putty knife to scrape away the liquid nails as the glue starts to soften up. Discard the glue pieces.
- If you are having a rough time with the glue, use a chemical dissolver to help loosen it up. ProSolve NE and Goof-Off are good choices. Simply apply the dissolving solution to the area with glue. Wait for a minute, then use the putty knife or a scraper to slowly etch away at the glue.
- Continue working around each area that’s been glued down until all the liquid nails have been removed. If you need extra help, ask a friend.
- Go underneath the sink and check for epoxy around the edges. If you see epoxy, apply epoxy remover to it and wait per the instructions on the can. Then, remove the epoxy with a scraper.
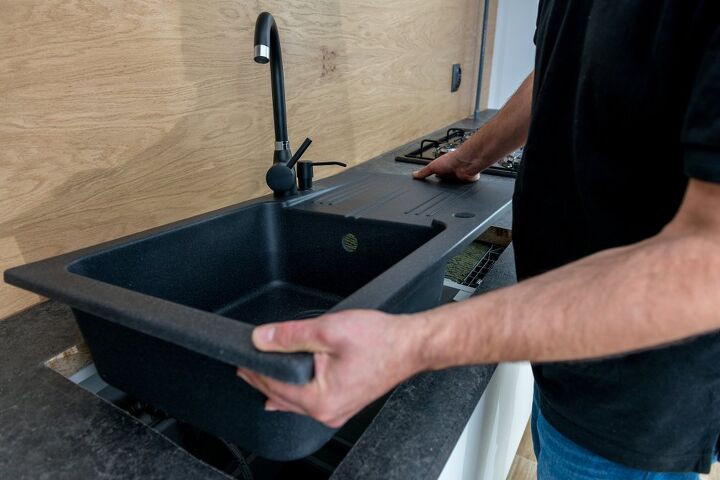
Lift Up The Sink
Once all the glue and epoxy has been removed, your sink is no longer connected to the cabinetry around it. This means that you can push the sink out of its place and remove it manually. Sinks tend to be pretty heavy, so if you can, call a friend to help you lift it out. Carry the sink out of your kitchen. After that, you should be good to go in terms of adding the replacement sink.
Find out why your kitchen sink gurgles.
Clean Up
One thing that tends to strike people who just removed their first sink is how dirty things get when you first remove it. This is not just because the sink is messy, either. You may often notice a lot of glue residue around the area, dust, mold, and other crud. So, before you add your new sink in, we suggest doing the following:
- Wipe down the area around the sink to remove the epoxy as well as any mold in the area. This is a good start to any project, including a new sink installation. You want to start with a clean surface.
- Hand clean all fixtures. You can use wipes for this. It’ll be easier to install them on the new sink if they’re clean.
- Remove the tarp from your kitchen floor and empty out the grime bucket. This is a good way to end this project. If any water or gunk got on the floor from a spill, mop it up before you try to install the new sink.
Note: Installing a new sink is a way cleaner process than removing one. So, that’s why it’s okay to clean up right now.
Need to Hire a Kitchen Remodel Contractor?
Get free, zero-commitment quotes from pro contractors near you.
Related Questions
How long should a sink last?
The vast majority of sinks are meant to last for years and years. Acrylic sinks can last for 50 years or more. Meanwhile, metal and copper sinks should be able to last for at least 20 years with proper maintenance. In some rare cases, sinks can least for as much as 100 years. However, this is the exception rather than the norm. Proper maintenance will keep your sink sparkling for years to come.
When should you replace a sink?
Sinks rarely ever need replacement. However, if you notice that your sink looks outdated, requires constant repair, or has a crack in it, a replacement is in order. If you notice corrosion in or around the sink, then you may want to consider it, though repairs are often the better choice. Not sure that you need to replace it? The best thing that you can do for yourself is to call a plumber to ask whether it’s time.
When should you replace your kitchen faucets?
Kitchen faucets rarely ever need replacement, but when they do, you’ll know. You may notice corrosion around the faucets, issues with leaks coming out of the sides of the faucets, or even difficulty keeping the water connected to the faucet area. If you notice similar issues with the handles of the faucets, it may be a good idea to replace the trio in one single session.Faucets and kitchen faucet handles all tend to be replaced as a group. If you want to replace your faucets, replace your faucet handles as well.
Related Guides

Ossiana Tepfenhart is an expert writer, focusing on interior design and general home tips. Writing is her life, and it's what she does best. Her interests include art and real estate investments.
More by Ossiana Tepfenhart