


How To Remove A Chimney (Find Out The Process Now!)

Chimneys are wonderful as they’re necessary if you’re wanting to use your fireplace for some warmth on a chilly night. They can also add some character to your roof and both the interior and exterior design of your home. However, what if you don’t use your chimney? In the case you don’t use your chimney, it’s better to remove it than allow it to sit.
To remove your chimney, you will need the proper tools and safety equipment. First, start by removing the chimney breast by using a hammer, masonry chisel, and sledgehammer. You will do this brick by brick until you reach the roof level. Then, perform the necessary renovations to close the chimney.
We will provide you with step-by-step instructions on how to remove your chimney and the costs associated with such a project. Also, we discuss whether you should do a full or partial removal and help you with that decision process.
Related Guide: Cost To Remove Chimney And Fireplace
Do You Need Chimney Repair Services?
Get free, zero-commitment quotes from pro contractors near you.

Should I Do A Partial Removal Or Full Removal?
Before you even begin, you will need to know whether you’re going to do a full removal or partial removal. This will change the removal process drastically, which is why you need to know what you’re going to do before you start.
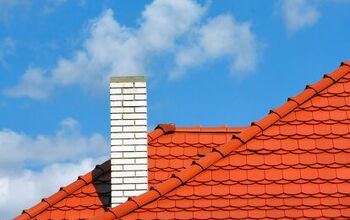
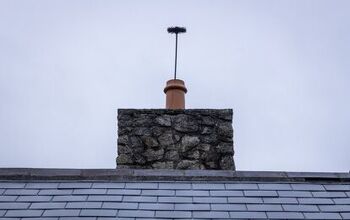
If you’re going with partial removal, you will only be removing the chimney stack, which is the part that’s sticking up on your roof that everyone can see. If you’re doing a full removal, you will remove both the chimney stack and the breast.
Partial Chimney Removal
In the partial removal, you will need to remove the chimney stack. However, some people decide they want to keep the chimney breast for decoration and the fireplace for a nice touch of design. However, this will depend on what you want to do with your home as well as the budget you’re looking at.
People on a lower budget for this type of project will most likely only do a partial removal until they can come up with the money for the additional renovations they will need to do with a full removal.
Full Chimney Removal
Full removals are a lot more complicated than a partial removal, and they take more time since you’ll have to take down the entire structure. You will then need to figure out what you’re going to do to cover the large gap the chimney leaves in your home once it’s removed.
So, with a full removal, you don’t only have the cost of removing the chimney, but also the renovation costs for covering the gaping hole that’s sitting within your roof.
Something else to think about with a full removal is that you’ll need to ensure the walls and structures around the chimney are supported while you do this. You can do support the nearby structures by installing some support beams. Check the areas where your chimney is connected to the wall as these are the areas that are more prone to collapse and a higher risk of causing injury.
Step to Remove a Chimney
First, a word of advice: Chimney removal should only be done by those who are advanced DIYers. You will need to know about your chimney structure and how it’s placed in your home. If you’re a beginner, it’s a good idea to have an advanced DIYer who can help you through this process.
Below, we’ve included the steps for full removal.
Step 1: Prepare And Research
If this is a project that you’re going to do on your own, you will need to make sure you’re adequately prepared. Preparation will often require some research before you begin the removal process. Part of the preparation includes obtaining a building permit. This is vital, as working without one is illegal.
Next, ensure you have the correct safety equipment, which includes:
- Goggles
- Workboots
- Hard hat or helmet
- Dust mask
- Gloves
- Safety harness
- Rent a Scaffold. For this project, you will need a scaffold, but it needs to be one that’s stable and safe. You should also make sure that the scaffold you rent contains safety rails. The scaffold attachments should be installed by someone who knows what they’re doing so that no accidents happen—considering having a friend help you if you’re new to this.
You will then need to cover your working area with some plastic so that you don’t have debris and dust flying out of your chimney and entering your lovely home.
Step 2: Remove The Chimney Breast
The first part of the chimney you’ll want to tackle in a full chimney removal is the chimney breast. Before you do this, though, you will need to ensure that the chimney is adequately supported. A great way to support your chimney is by using a gallows bracket. Check that it’s appropriately positioned before moving on.
To remove the chimney breast, you will begin at the top and work your way down. For this, you will need a hammer, sledgehammer, and a masonry chisel. Work on each brick, one by one, chiseling away at the brick. Set each brick next to you on the scaffold until you get a pile.
When you have a pile of bricks, set them in a 5-gallon bucket and lower the bucket using a rope. Dump the bricks on the ground. Don’t let the bricks pile up too much on the scaffold, or you increase the risk of an accident.
Step 3: Remove The Chimney Stack
You will follow the same process in step two; however, you will be on the roof this time. You will still need to work brick by brick to remove the chimney stack. Check the structure under it to ensure there is no damage once it’s removed. If you discover any damage or problems, this will need to be fixed immediately.
Step 4: Assess The Situation
When you’re finished with the chimney removal, you will need to check to see what type of renovations you’re going to need. After the whole chimney is removed, you will be left with this gaping hole in your ceiling. Therefore, you will need to initiate the renovations to fix this unsightly mess.
When you’re assessing what you need to do to finish, check the structure of the home. The structure should still be completely intact. If it’s not, you will need to fix the problem or call a professional to do so.
Step 5: Clean Up
Before you go on to your renovation project, you will need to clean up the mess that you made. Use a wheelbarrow to haul out the old bricks. You can use these bricks for a nice garden wall or some other type of landscaping. Or you can always give them away for free to get them off your property.
What Are The Costs Of Removing A Chimney?
If you’re a beginner in the DIY world and you would rather hire a professional, there’s no shame in that! We all must start somewhere.
To hire a professional to remove your chimney, you will be looking at about $4,000 to $6,000 for a complete chimney removal. Or, for a partial chimney removal, that will cost between $500 and $2,000. There are different factors that play into the cost of removal, such as:
- Whether it’s a full removal or a partial one
- If the chimney is part of the structure of your home
- The size of your chimney
- Materials that are used
- How much debris needs removed?
- Contractor fees
Cost To Do It Yourself
If you decide that you can do this on your own, that’s great! Not only will you be able to save some money, but you’ll also be able to get some more experience under your belt.
If you’re going for partial removal, this will cost you anywhere between $200 to $400 to do. However, if you want a full removal, this will cost upwards of $1,000 to $2,500. This price covers everything from equipment rental to tools that you will need. If you already own the equipment and tools, then, of course, the cost will be on the lower side.
Can I Remove The Chimney Breast But Keep The Stack?
If you like the way your chimney stack looks and you want to keep that instead of the chimney breast, you can do that! The process for removal is the same, except that you will need to add supports to the inside of the chimney stack. Or, you can always remove it, keep the bricks, patch the roof, and rebuild the stack.
Do You Need Chimney Repair Services?
Get free, zero-commitment quotes from pro contractors near you.
Our Takeaway
Chimney removal is a process that should only be done or supervised by someone who is an advanced DIY enthusiast. However, if you want to hire a professional to do the job for you, that’s always an option as well!
It’s vital that you check the house’s structure before removing the chimney to prevent any potential accidents or injuries. Take the time to add additional support where it’s needed, and be prepared to make any renovations along the way! While you may be inclined to rush this process, it’s crucial that you go slowly, brick by brick. This helps avoid any preventable mistakes and injuries.

Heather is a passionate writer who loves anything DIY. Growing up, she learned everything from home repairs to design, and wants to share her tips with you. When she's not writing, she's usually hiking or searching for her next DIY project.
More by Heather Robbins


![10 Most Dangerous Neighborhoods in Baltimore [Updated]](https://cdn-fastly.upgradedhome.com/media/2023/07/31/9075655/10-most-dangerous-neighborhoods-in-baltimore-updated.jpg?size=350x220)


