How To Paint Baseboards With Carpet (Quickly & Easily!)
A coat of paint can be all that is needed to transform a room, if not a whole house, and give it a fresh look. But it is not just as simple as throwing on a fresh coat of paint. The baseboards in particular can be quite challenging without preparation. When attempting to paint in a room that has carpet, things can get quite a bit more complicated.
The last thing that you want to do is add a new coat of paint only to drip and spill all over the carpet. So, how do you paint baseboards without getting paint on the carpet? You must sand the baseboards, protect the carpet with tape and a covering, and paint in the proper way to avoid spillages.
Do You Need Painting or Staining Services?
Get free, zero-commitment quotes from pro contractors near you.

Know Your Area
Before you start painting, there are a few subtle things that you need to know before starting. For one, know the space that you are working in. Not all carpet is the same. For instance, do you have a Berber or heavy pile carpet? That might impact the materials that you need to do the job.
Also, know what type of baseboard or trim that you have. Some rooms have mopboard which is quite a bit different from the traditional vinyl baseboards that are more commonly found in homes. Most trims are made of some sort of wood, but you also may find PVC trim. Painting wood tends to be easier than painting PVC or vinyl.
How to Paint Baseboards with Carpet
The process is relatively straightforward. It just takes patience and planning to do the job. Moreover, it means having the right tools for the job. Follow these steps and you can paint those baseboards even with carpet surrounding it.
Step 1: Get the Tools
No matter what the job is, you have to have the right tools for the job. Without them, you will likely do something incorrectly along the way. The good news is that most of the things needed are pretty cheap even if you don’t have them laying around the house.
Here is what you need to do the job properly:
- Paintbrushes
- Painter’s tape
- Foam brush
- Plastic drop cloth
- Putty knife
- Paint shield
- Fine sandpaper
- Trim painting tool
- Rags
- Latex paint
- Nail hole filler (if applicable)
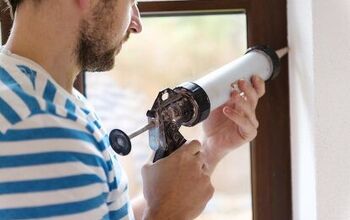
Step 2: Clean and Sand the Baseboards
With your tools in tow, you need to make sure that your baseboards are ready to be painted. If you simply start painting, you will be doing so over dust and dirt. When that happens, you get an uneven paint and the paint will not properly adhere.
You might have to sand depending on the condition of the baseboards. If any of the areas are rough, then you can use sandpaper with a standard grit to smooth them out. Something in the 280-320 grit range should do fine.
Make sure that you properly vacuum the carpet where it meets the trim. Since we are taping these areas, they need to be free of debris and dust. Not only that, but those things can pick up an electrostatic charge and quite literally jump up onto your paint.
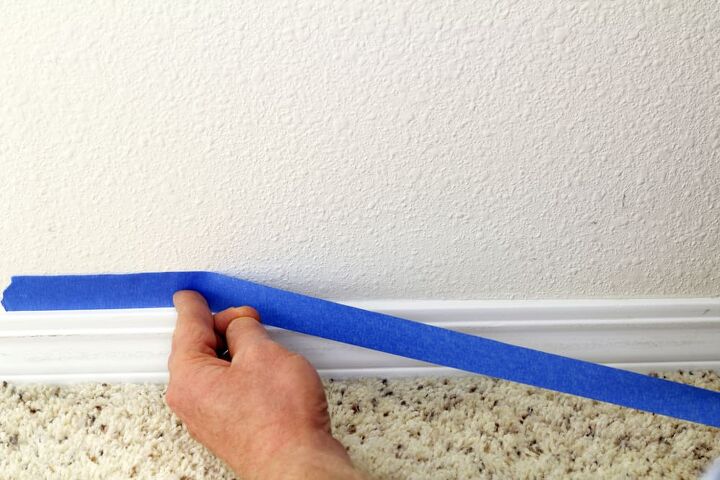
Step 3: Taping the Carpeting and Baseboards
Protection is key when painting. You need to ensure that even if you spill paint, it won’t hit the carpet in any way. That is where the plastic drop cloth and painter’s tape will come in handy.
Peel off a large section of tape so that you can easily tear it and move along. Messing with the roll can be annoying and messy. Line up the edge of your tape with the trim, pushing down into the carpet using the putty knife.
A drop cloth is highly recommended here. You might be able to get away with more of a DIY setup, but the plastic cloth will keep a wider area protected from paint. You can also skip this step by getting a trim guard. You simply push it to the floor and then glide along the edge with your brush. Too much paint accumulation can drip off of the guard, though, so beware.
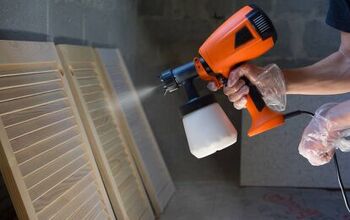
Step 4: Picking the Right Brush
Believe it or not, the brush does matter. You need one that is not so big that it spills off of the trim. You also need to have one that feels comfortable to hold and will give you improved control, resulting in greater stroke accuracy.
A foam brush is a great tool for the job. They come in small sizes and are lightweight, providing maximum comfort and control. Besides, something bigger and bulkier may be more difficult to handle.
A cutting brush, which is also known as an angle sash brush, is probably the best overall tool for the job. The brush can be bent into strokes, providing optimal control and coverage with each stroke.
Step 5: Loading Up the Brush
Again, there is more to this entire process than simply loading up your brush and painting. Get too sloppy and you could be staring down paint on the walls or floors. That is more correction and clean-up than anyone wants.
Make sure to lightly dip your brush into the paint, wiping any of the excess off on the side. This part takes a little bit of time to master. Too much paint can drip all over the place while too little requires you to put more oomph behind your strokes.
Try this example. For righties going left to right, clean the paint off the side that is closest to you. This way, there is no excessive drip and you have more than enough paint for this stroke.
Step 6: Paint
There are two ways to tackle this: you can cover the bulk of the baseboard on the first pass and get the trim later or you can try for total coverage. Total coverage is much trickier to achieve but can be done with a slow, patient stroke.
For this guide, let’s say that you are going with the first option. Start by applying your brush to the baseboard and moving slowly and smoothly in one direction. The coverage depends both on how much pressure you apply and how much paint is on your brush.
Covering the bulk of the baseboard should be quick and easy. You can cover the majority of the baseboard and then come back to do the edges in the next step.
Step 7: The Edges
When you have covered the majority of the baseboard area, it is time to move back to where the trim meets the drywall or flooring. You need to “cut in” with the brush; this part can be a bit tricky and there really is no quick way to do it.
Take your time by using slow, long strokes and keeping a steady hand. Really take your time to work carefully along the edge. With the proper protection – like painter’s tape – you won’t have to be super precise but the more accurate you can be, the better.
Step 8: Repeat (If Necessary)
Depending on what kind of paint that you buy, as well as the thickness of your particular blend, you may need to put a second coat on. Wait for the first coat to dry and give it a once over to look for fading or uneven coverage.
If a second coat is required, just follow the prior steps to apply. Let it dry and check once again. Most baseboards should not take more than 2 coats but checking will give you absolute certainty.
Step 9: Cleaning Up
This part may seem like the easy part, but you need to exercise caution here as well. Whether you use a painter’s guard or painter’s tape, it is possible to pull up paint during the removal. Carefully and slowly pull up the tape or guard, making sure that you are not pulling up paint from the baseboard with it.
Touching up is a pain and can be avoided with a little bit of patience. After all of the tape has been removed, fold the drop cloth up and toss it in the trash. Rinse out your brushes so that they don’t become caked with dry paint, and store everything in a dry place in case you need them again in the future.
Do You Need Painting or Staining Services?
Get free, zero-commitment quotes from pro contractors near you.
Related Questions
How Do You Paint Baseboards without Brush Marks?
While they may not be a big deal, brush marks can take away from the look of the baseboards. The good news is that there are two things that can be done about that.First and foremost, make sure that you sand between coats. It will wear down any brush marks so that they can be corrected on the next coat.Secondly, use a matte or flat to help reduce and conceal brush marks. Style and choice of paint are the biggest factors in making brush marks.
More Related Guides

Ryan Womeldorf has more than a decade of experience writing. He loves to blog about construction, plumbing, and other home topics. Ryan also loves hockey and a lifelong Buffalo sports fan.
More by Ryan Womeldorf