How To Make Roman Shades For French Doors (Quickly & Easily!)
Roman shades are a fashionable way to add window treatments to your home. They’re also a great option for modern covers for your French doors. You can either purchase Roman shades at your local hardware store, or you can make your own.
To make Roman shades, first measure the fabric based on the size of your window. Then, sew rings in rows into the fabric, and weave a cord through. Attach the shades directly to the door frame, so the doors can properly open.
Roman shades are window coverings that stack up when being opened, into an even panel. The best part is… Roman shades can also be made at home!
Do You Need Window Blind and Shade Installers?
Get free, zero-commitment quotes from pro contractors near you.

What Are The Benefits Of Using Roman Shades?
Roman shades are a gorgeous way to cover your windows and offer your home more shade. These shades are affordable, come in many different styles, and are lightweight. They are also easy to use and difficult to break.
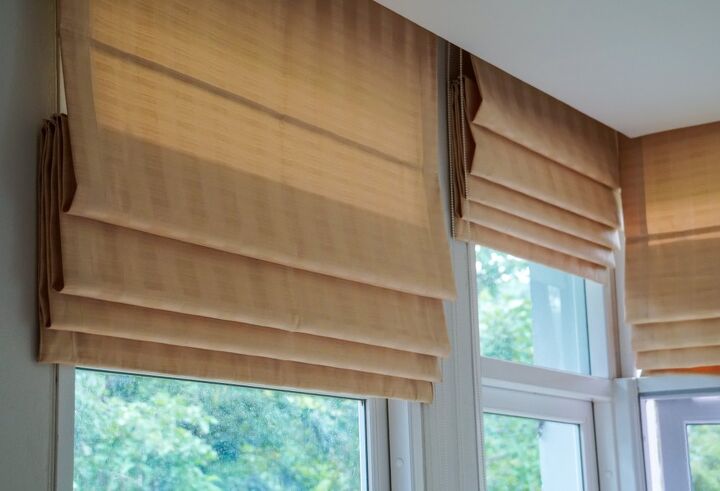
When closed, Roman shades are smooth, giving a room a polished look and plenty of sun coverage.
Are Roman Shades Harder To Hang With French Doors?
When it comes to windows, Roman shades can be hung in the top window header, however, doors are a different story. Since these doors are flush with the wall, hanging curtains can be tricky. French doors are also sometimes made of metal, which means screwing into them can be near impossible.
Despite these challenges, Roman shades are a good choice for French doors because they are long enough to cover them completely.
Can I Hang Roman Shades With Metal French Doors?
Because some French doors are metal, you can purchase strong, magnetic curtain hooks instead of using screw eyes.
These are a great option if you are new to home projects and want the easiest solution. This option is also damage-free, just take care when attaching and pulling off the magnets. It may seem that your curtains won’t be supported with just the strength of two magnets, but they will be. These magnets are so strong, you need two hands and some strength to remove them.
However, check to see if your glass is framed in a wood casting. If so, you can attach your screw eyes there.
Making Roman Shades
Materials You’ll Need
- Staple gun
- 2 1/2 inch screws
- Nylon cording
- Screw eyes
- Plastic rings (use copper if your window is highly exposed to the sun)
- Sewing machine
- Pine board
Step 1: Measuring The Fabric
Pick a fabric you enjoy. The amount you’ll need varies based on the size of your doors. Each door should be measured like so:
- Measure the width of your glass and add 4 inches.
- Measure the length of your glass and add 2 inches.
Cut the fabric and lining to these amounts for each French door. If you want blackout curtains, opt for a piece of thicker lining fabric. For more about curtain length, click here.
Step 2: Clean Up The Seams
Lay your fabric pattern side down on the floor. Sew along the two sides of the fabric and the bottom with a 1/2 inch to 1-inch seam allowance. Push out the seams and iron. Repeat this step with your lining.
Step 3: Sew The Sides Of The Fabric
Pick up the sides and fold them onto the non-pattern side of the fabric for the length of 1 inch. Next, pin them in place and sew. Repeat this step with your lining.
Step 4: Prepare The Bottom Of The Fabric
Lay the lining on top of the fabric. Fold up the bottom 1 inch to create space for the dowel pocket. Hold off on sewing at this point.
Step 5: Mark Where The Rings Will Go
On the lining, mark a grid. Each row represents another panel of your Roman shades. Add multiple columns in your Roman shades as well, and mark them. You may want to leave around 12-18 inches from the top, free of rings. This decision depends on how high you’d like your shades to be able to rise.
Step 6: Sew The Rings And The Top
You will sew rings into the curtain, beginning at the bottom. Make sure you’re sewing on the patterned side for the bottom row. The rest of the ring rows will be sewed with the lining side up.
The sewing of the rings can be done with a sewing machine or by hand. Sew them across the fabric, forming a row. Safety pin your lining to your fabric to ensure that it doesn’t move. Make sure to go slowly; this process is tedious but fragile.
Now, simply sew the top shut with a sewing machine.
Step 7: Preparing The Pine Board
You can get pine board cut to size at your local hardware store. Aim for a 1-inch x 2-inch board that is cut 1 inch shorter in length than your shade.
Staple any leftover fabric around the board for an extra touch. Next, lay the board parallel to the top of your shades. You will drill pilot holes in the board even with the farthest edge ring in the shades. Then, insert screw eyes in the pilot holes.
On the non-patterned side, staple the board to the top of the shades.
Step 8: Inserting The Strings And Dowel
You can choose on which side you’d like your cords to pull the curtains. If you choose the right side, insert all of the cords to the left, and vice versa.
Tie a nylon cord on the bottom right ring of the curtain, lining side up. Bring the cord straight up the shades to the top row. String it through all the rings, from right-hand corner to left-hand corner. Also, string it through the screw eyes.
Repeat this process for every ring at the bottom. Tie to the ring at the bottom, bring it directly upward to the ring at the top, and thread it through all of the screw eyes and rings to the left. Once they’re threaded through to the left and the curtain is hung up, it may be a good idea to knot the cords together.
Now, insert the dowel into the bottom seam.
Hanging Your Roman Shades
Quick note: you can also purchase an assembly kit with everything you’ll need, already compiled. You can find these at Lowe’s or Home Depot.
Materials You’ll Need
- Mounting brackets
- Screws
- Cord cleat
- Drill
- Tape measure
Step 1: Mark Your Spot
Let’s refer to the top of the curtains as the headrail. Hold the headrail up to the French doors and center it. Draw two light pencil marks on either side of the shades when they are centered. Do the same on the other door.
Step 2: Attach The Mounting Brackets
A mounting bracket is two pieces of metal that are attached and perpendicular to each other, with a large anchor screw on one side. You should have two mounting brackets total and they should come with several extra screws.
Attach the side of the mounting bracket without the anchor screw to the headrail of your shades. You’ll need to use a drill and the smaller screws to do so.
The side of the bracket with the larger screws will mount into the wall. Carefully drill this side of the bracket into your French doors, where you previously marked.
Step 3: Add The Cord Cleat
The cord cleat is a metal device that is needed to house the excess cord. You simply wrap the cord around the cord cleat, which controls the current height of the shade.
Attach the cleat with a drill, using the screws that come in the package. It’s important to place it on the doorframe higher than a child or pet could reach.
Related Questions
Can you make cordless Roman sheets?
If you purchase a lining that is cordless, you can cover the lining with a fabric of your choice. Though these aren’t completely DIY, you can still customize the shades with a gorgeous pattern or color.The Argo Cordless Light Filtering Roman Shades is an affordable option, at $31.00 per 22×60 inches. Another inexpensive option is the IKEA Ringblomma Roman Blinds, which go for $24.99 per 34×63 inches.
What if I don’t have a sewing machine?
This project doesn’t require a sewing machine! You can simply lay your chosen fabric over the lining. Pull the fabric a bit higher than the lining and flip it over to the back. Place some hot glue in a line. It’s important to do this slowly, and keep everything pinned down as you glue.Next, glue at every new row of the Roman shade. At the bottom, extend the fabric longer than the lining. Wrap the fabric around the bottom and use hem tape and an iron to keep the bottom sealed.
Do You Need Window Blind and Shade Installers?
Get free, zero-commitment quotes from pro contractors near you.
In Conclusion
Roman shades are an incredible way to make your home look expensive. There are also many positives to making Roman shades yourself. Not only is it a money-saver, but you can customize the pattern of the shades to your liking!
You have many options depending on your available time, comfortability, and the material of your French doors. Whether you make shades from scratch, use magnetic hooks, or up-cycle a cordless lining, your Roman shades will look fantastic.

We are a team of passionate homeowners, home improvement pros, and DIY enthusiasts who enjoy sharing home improvement, housekeeping, decorating, and more with other homeowners! Whether you're looking for a step-by-step guide on fixing an appliance or the cost of installing a fence, we've here to help.
More by Upgraded Home Team