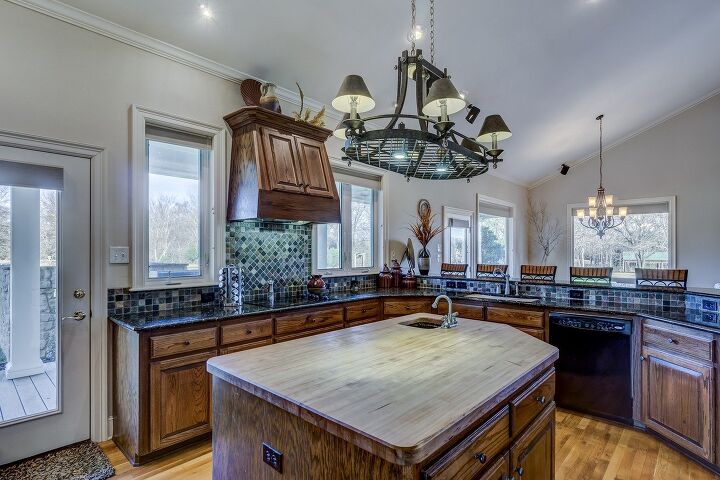
How To Lighten Dark Wood Kitchen Cabinets (Quickly & Easily!)

The current look of your kitchen can grow dull after a while. Changing things up every now and then is worth considering. But, how do you go about reinventing the look of your kitchen?
Thankfully, complete renovation is not required if you simply want to feature a fresh, new look inside your kitchen. Focusing on certain elements can do enough to change the whole dynamic of that space. Lightening your dark wood kitchen cabinets is one idea you should feel to try out.
Homeowners can opt to bleach or stain their dark wood kitchen cabinets in order to lighten them up. Using either bleach or a wood stain lightens up the color of the cabinets while preserving their natural look. Just remember to use the right type of bleach or wood stain to get the results you want.
Altering the appearance of your dark wood kitchen cabinets can be done pretty easily. Learn more about the methods available and pick out the best one for you by reading on.
Do You Need to Hire a Cabinet Refinishing Contractor?
Get free, zero-commitment quotes from pro contractors near you.

The Two Methods of Lightening Your Dark Wood Kitchen Cabinets
You can change up the appearance of your dark wood kitchen cabinets using one of two methods. Those methods are bleaching or staining. So, is there a superior option among those choices?
Bleaching makes a lot of sense if you’re looking for a cost-effective option. It also does a great job of preserving the wood’s natural appearance. The bleach may even be able to remove some stains and spots present on the wood.
The problem with bleaching is that it can be unpredictable. The bleach may be too strong and it could alter the color of the cabinet beyond what you were hoping for. On top of that, certain types of wood don’t respond well to bleach.
Staining is your other option and just like using bleach, it has its pros and cons. On the plus side, staining accentuates the appearance of the wood. Many wood stains will even offer added protection after initial application. Sadly, not all stains work with all kinds of wood. Their effects also tend to fade faster compared to the bleach.
You should be able to make a better decision after learning more about the pros and cons of the two options. Choose wisely because you don’t want to do anything that jeopardizes the appearance and condition of your kitchen cabinets.
How to Bleach Your Dark Wood Kitchen Cabinets
It’s now time to go over the methods of lightening your dark wood kitchen cabinets. We’ll start with the process of bleaching.
Step 1: Prepare Your Tools
The first thing you need to prepare is the bleach and you actually have an important decision to make here. Different kinds of bleach can be used to change the appearance of the wood.
2-part wood bleach is harsh and it can even change the look of the material itself. Only use this if you’re fine with changing the natural appearance of the wood. Bleach with oxalic acid is good to use on wooden surfaces that may be covered in water stains. The acid will help get rid of those stains.
Lastly, you can also use household bleach. Household bleach can remove dyes applied on the wooden surface, but it cannot do much against stains.
Once you’ve settled on the bleach you want to use, prepare a cleaning rag, dish soap, sandpaper, and a screwdriver. Go ahead and wear some goggles, gloves, and articles of clothing that extend over your arms and legs too. Also, consider wearing a mask to steer clear of the strong bleach smell.
Step 2: Remove the Kitchen Cabinets
Grab your screwdriver and start removing the kitchen cabinets. It’s easier to work on the kitchen cabinets after they are detached.
Step 3A: Apply the Bleach with Oxalic Acid or the Household Bleach
You can soak the cleaning rag with either the household bleach or the bleach with oxalic acid. Do not use too much bleach right away because you can add more later on.
Use the bleach-soaked rag now to wipe down the cabinets. Make sure you even out the application to prevent streaks from forming. Apply as much bleach as you need to achieve the look you want, but remember to let each coat dry first.
Step 3B: Apply the 2-Part Wood Bleach
The process of applying 2-part wood bleach tends to differ from how other bleach variants are used. Refer to the instructions the manufacturer provided to apply the 2-part wood bleach properly.
Step 4: Sand Down the Kitchen Cabinets
To finish up, clear the kitchen cabinet by wiping it down with water. After that, you should sand it down to smooth out its appearance. You can also seal the kitchen cabinets to preserve their look better.
DIY Wood Bleaching
How to Stain Your Dark Wood Kitchen Cabinets
Staining your kitchen cabinets is going to take more work than bleaching. The end result is often more than worth it, however.
Step 1: Gather Your Tools
To get things started, you need to pick out a type of wood stain to use. Head over to the hardware store and ask which type of wood stain will be effective on your kitchen cabinets. Mention what type of wood the cabinets are made out of so they can give you some options.
Options that are usually available include gel, lacquer, metalized dye, oil-based, varnish, water-based, and water-soluble stains. The oil-based stains are the ones most commonly used because they have a great look after they dry. Oil-based stains also tend to last longer than the other variants.
After picking out your wood stain, you will also have to prepare sandpaper, a screwdriver, rags, dish soap, and some brushes. Wearing safety gear is a good idea again so go ahead and put on the mask, goggles, and gloves.
Step 2: Detach the Kitchen Cabinets
At this point, you can now remove the kitchen cabinets using your screwdriver. Leaving them in place while you complete the next step is an option, but removing them now will make things easier.
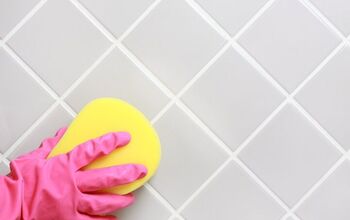
Step 3: Clean the Kitchen Cabinets
The next step involves cleaning your kitchen cabinets. Use dish soap, water, and some rags to clean them up. If the kitchen cabinets have some grease on them, you may have to use some vinegar as well.
You should clean the kitchen cabinets the day before you intend to stain them. That will give the wood ample time to dry and that also prepares them better for the next steps.
Optional Step: Strip Away the Finish over the Kitchen Cabinets
If there’s a thick layer of paint or finish covering the cabinets, you will need to get rid of that. Otherwise, the layer will prevent the stain from penetrating the wood.
Go to your local hardware store and pick up a stripping agent and some wood filler. Look at the manufacturer’s instructions for the stripping agent and follow them accordingly. If any blemishes emerge after stripping the outer layer, you need to address them using the wood filler.
Step 4: Start Sanding the Kitchen Cabinets
The next step involves sanding down your kitchen cabinets. Make it a point to sand down every inch of the wooden surface. You must make it as easy as possible for the wood to absorb the stain and thorough sanding helps with that.
Optional Step: Test the Wood Stain
While at the hardware store, you can also pick up an untreated piece of wood and test the stain on that. Apply the stain in different amounts in separate sections of the wood to see how they appear after drying.
You should be able to determine how much stain you must apply to the cabinets after testing it out. Two to three coats of wood stain are usually enough to create a lighter finish.
Step 5: Stain the Kitchen Cabinets
Grab your brush now and dip that into the wood stain. Work from the top edge of the cabinet and move down with your stroke. Keep the brush in motion so an excess amount of wood stain doesn’t settle in one spot.
Continue coating the wooden surface until you get the finish you want. From there, you just have to let the wood stain dry and put the kitchen cabinets back in place.
Do You Need to Hire a Cabinet Refinishing Contractor?
Get free, zero-commitment quotes from pro contractors near you.
Related Questions
What Should You Do if the Wood Stain Applied Is Darker Than Expected?
If you didn’t test out the wood stain, there’s a chance that the finish will turn out unlike what you expected. The good news is that you can still do something about that.Grab a cleaning rag and soak it with either some solvent or thinner to dilute the finish. Ideally, you’ll be able to use the solvent or thinner before the stain dries completely. Working quickly will make the stain easier to remove.Be wary of using too much solvent or thinner as well. Applying excess amounts of those materials can be bad for the wood so be very careful with them.
Can You Paint over Your Kitchen Cabinets to Lighten Their Appearance?
You can certainly paint your kitchen cabinets to lighten their appearance, but that often means sacrificing their natural look. Many homeowners want to avoid losing the natural appearance of the wood so they avoid using paint as much as possible.
Related Guides
Gary Evans is passionate about home improvement. He loves finding out how to make improvements in the easiest, most practical, and most affordable ways. Upgrading his home kitchen is one of his ongoing hobbies. Gary is also a long-time content creator and enjoys spending his free time tending to his hydroponic vegetable garden.
More by Gary Evans