How To Install Bifold Doors Without A Track (Step-by-Step Guide)
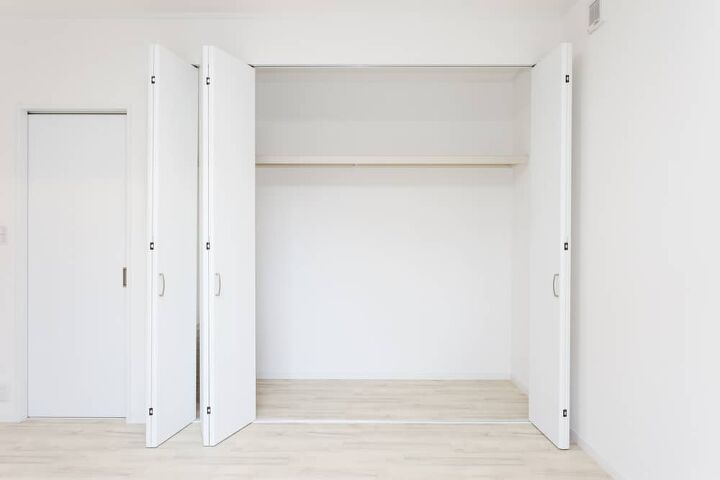
Bifold doors are a great option for small spaces where you do not have room for opening and shutting doors. But what if you have a wood floor or tile that you do not want to put tracks into? No problem. You can use the top-hanging system instead.
You are going to need to measure the door opening, install the top rail that holds the door, and place a pivot pin at the bottom of each wall. This should only be done with doors that are not extremely heavy since they will not have the support of tracks on the bottom.
Do You Need to Hire a Framing Contractor?
Get free, zero-commitment quotes from pro contractors near you.

How to Install Bifold Doors Without Track Using an Upper Rail
- Measure the distance from one side of the doorway to the other. Take off 1/8 of an inch for clearance.
- There should be two holes at the top end of the door. One at the hinge end closest to the door frames.
- Put the hinge pin into the end hole. There are three pins: one metal ridged pin, one roller pin, and one smooth metal pin. You want to use the smooth one first. Put it in the hole and tap it into place with a hammer.
- Push the roller pin in the other hole. This is what goes into the guide. Carefully tap the roller pin into the hole with a hammer.
- With the door on the floor, find the hinge end. Put the ridged metal pin in the hole and gently tap it into place with a hammer.
- Place the door in the frame with the metal hinge part located closest to the door frame.
- Using your drill, make some guide holes and screw the hinge rest into place.
- Find the three holes at the bottom of the door. Fit the L-bracket on the bottom of the frame. Just use the two holes on the side since you do not want a track on the bottom.
- Put the end spring at the top of the frame in the metal guide. Use the clip that is at the end of the guide. Push the spring into place with your hand gently.
- Put the door into the frame, using the smooth pin first, which goes into the top guide.
- The ridged metal pin goes into the L-bracket.
- Fit the roller into the metal guide on the top of the door. You will probably need a ladder for this final step.
How to Install Bifold Doors Without Track Using Pivot Brackets
- Measure the doorway and take off 1/8 of an inch for clearance.
- Unscrew the screws on the brackets.
- Put the brackets into the upper track and pull them together to the middle.
- Attach the rail on the upper support in the middle with a cordless drill.
- Position it across the upper support and then center it between the outside and inside edges of the jambs.
- Attach these using the screws that came with the hardware.
- Move each of the pivot brackets to the other end of the track.
- Put each bracket ¾-inch from the corresponding jamb.
- Place one of the brackets in the middle of the floor with the slider facing forward and the inner part against the support.
- Loosen the screw on the adjuster and slide it to the other end of the lower leg.
- Attach the inner leg to the support with screws. They need to reach all the way into the wood behind the jamb.
- Repeat with the other L-bracket.
- Put one of the doors in the opening with the pins on the jamb side.
- Put the roller of the header of the inner door into the upper rail.
- Push the base of the door toward the support while a partner holds them steady.
- Tighten the screw on the bracket. Repeat on the other set of doors.
How to Install Bifold Doors Without Track Using a Roller
- After measuring the width of the door, take off 1/8 of an inch for clearance.
- Mark the inner edge 11 inches from the base of the door and 7 inches from the top. Then mark another spot in between them.
- Using the lower part of the hinge, line up the bottom with the bottom mark you just made and attach it with the hardware that came with it.
- Do the same with the other two hinges on the other two marks.
- Put the two doors side-by-side and attach the hinges to the other door.
- Do the same to the other set of doors.
- Attach the pins that fit into the track and the hooks to the header and base of each set of doors. The pins go on the jamb-side doors and the hooks go to the other doors.
- Put the upper hardware into the upper rail system with the smaller stops in the middle. On either side, you will put the hangers with the wheels, and the other socket goes on the outside.
- Attach all this to the upper track with the hardware provided about one inch from the front of the head.
- Hang a plumb bob from the center to align the pinhole to make sure the doors are aligned when put into place. Mark it with a pencil.
- Attach the bracket into the spot you marked and then remove it all and set it to the side for now.
- Put the doors into the upper rail system by lifting it into the top and hooking the pin into the socket. Slide the lever on the side to secure it.
- Do the same with the other doors and pull them toward you to catch the bracket on the floor.
- After swinging the doors back, line up the bracket on the floor with a pencil and use a screw to hold the bracket down.
- Put up the other door and tighten up all the sockets and screws.
- Mount the door aligners from behind the doors about six inches from the bottom.
- Install the door handles about 36 inches up from the floor.
Do You Need to Hire a Framing Contractor?
Get free, zero-commitment quotes from pro contractors near you.
Related Questions
What about French doors?
French doors can make any room look unique and modern. And you can turn your bifold doors into French doors easily. It only takes a short time and all you need is some mending braces, magnetic catches, and some scrap wood.
- Remove your door from the track.
- Attach three mending braces to the doors to stop the doors from folding.
- Remove the other door and do the same to it.
- Make a catch with the magnetic catches. You may have to add a piece of wood so your door will have something to hit when it closes.
- Attach a metal plate to the door to meet the magnet catch. Now they will not fold and will close like regular French doors.
You may want to replace your full mortise door hardware with something that locks to keep kids out of your office or to replace the front or back door with locks. Either way, you can do it pretty easily following these steps.
- Begin by taking off the old hardware on the door. This is usually pretty easy and can be done by removing a few screws on the lockset, faceplate, and doorknobs.
- See if you can fit the new lock body onto the old mortise. If it is too tight, you may be able to loosen it with a chisel, so the door does not split.
- Secure the lock body cover into place with a screw and trace the opening with a utility knife.
- Remove the lock body and chisel out the spot you outlined.
- Use a rasp to cut away the extra wood.
- Put on the new hardware and tighten it up with the screws that were provided.
- Make adjustments to the striker if needed.
Related Guides

I am a DIYer who loves writing about anything home-related. When I am not writing, you can find me studying for my PhD in Psychology, photographing nature, and swimming at the lake with my grandkids.
More by Patricia Oelze


![How Much Weight Can a 4×4 Support Horizontally? [It Depends!]](https://cdn-fastly.upgradedhome.com/media/2023/07/31/9070333/how-much-weight-can-a-44-support-horizontally-it-depends.jpg?size=350x220)


![How To Reset A Whirlpool Cabrio Washer [In 5 Easy Steps!]](https://cdn-fastly.upgradedhome.com/media/2023/07/31/9076531/how-to-reset-a-whirlpool-cabrio-washer-in-5-easy-steps.jpg?size=350x220)