How To Install A Water Softener In A Pre-Plumbed House (Do This!)
Regardless of how it gets into our home, we source the water that we use to drink and bathe through groundwater. The thing is that the water picks up soluble bits of the ground as it passes through and into our pipes.
When you have a house that is pre-plumbed, installing a water softener can be a great way to make the water less hard. It can be a complicated process, including the installation of an elbow fitting, attaching pipes, and fixing drainage. This step-by-step guide will tell you all that you need to know about installing that water softener in your pre-plumbed home.
Need a Water Treatment and Purification System Installed or Replaced?
Get free, zero-commitment quotes from pro contractors near you.

Why Would You Install a Water Softener?
In much the same way a water filter works, a water softener can improve groundwater that is particularly hard from mineral buildup. Scale (another name for minerals) can build up on the inside of fixtures, pipes, and in hot water heaters.
Implementing a softener works for a few reasons and can be particularly helpful in areas with high mineral deposits.
- Protect appliances. When there is a large buildup of minerals in your fixtures and appliances, it can shorten the lifespan. A softener can prevent the buildup of minerals that can damage those appliances and fixtures over time.
- Reduce mineral spots. You may notice that your dishwasher is leaving mineral spots on your dishes, particularly the glassware. By implementing a softener, the water will be much better suited for properly cleaning your dishes.
- Reduces soap film. Areas with large quantities of mineral buildup may also cause detergent curds and soap films in bathtubs, washing machines, and sinks. A softener will allow the water to properly break down those soaps so that they don’t build up in your sinks and appliances.
How to Install a Water Softener in Pre-Plumbed House
Step 1: Drain the Pipes
Before you can install your water softener, you will need to turn the water off to your home. This should be done at the mainline to ensure that water isn’t flowing anywhere into the home. The last thing you want is water making a mess while installing the softener.
With the water off, make sure that all of the pipes have been drained. Do this by opening the tap at the lowest level and let the water run out. So, if you have a tap in the basement of your home, that is probably the lowest level to work from.
Step 2: The Water Heater
Now that the water is drained from all of the pipes in your home, it is time to turn your attention to the water heater. Make sure that you cut the power off to the water heater. The best bet is to cut the breaker to that area of your home.
Double-check your work. Ensure that the power is off before moving on to the next step. Your water heater can provide an unnecessary complication when trying to install the softener.
Step 3: Locate your Install Point
You can’t just install the water softener anywhere. Ideally, it should be installed somewhere along your main water line. That mainline is what feeds water into the hot water heater, which then supplies hot water to your home.
If you aren’t sure where to install your softener, check manufacturer instructions. They will generally have advisable installation points that you can follow. Don’t guess randomly as the softener may not be in the proper position to do its job.
Step 4: Cut into the Main Line
Now that you have located your installation point, it is time to cut the mainline. Have a quality pair of pipe cutters to do the job properly. At this point in the process, you don’t want to struggle with making your cuts. They should be clean and consistent.
Place a bucket underneath your cutting point. That will catch any water that may have remained in the pipes. A little bit of water is okay to see as gravity will get most of it out but not necessarily all of it. The bucket will simply prevent mess.
Step 5: Installing an Elbow Fitting
The purpose of the elbow fitting on the mainline is to feed the water softener. Make sure that you have a bypass valve in place so that you can feed water around your water softener if you need to do so. It provides an extra measure of control.
Step 6: Attaching the Pipes
Start out by taking the measurements that you will need for the pipes leading into your bypass valve. Measure twice to ensure accuracy. With your measurements in hand, carefully cut them to fit.
Using a soldering tool, solder all of the fittings and nipples. Then, you will need to connect your piping to the bypass valve. You should have some compression fittings that came with the unit that will then attach to the pipes.
Step 7: Fixing the Drainage
If you want to, you can have the water softener drain into a floor drain, utility sink, or a sump pump. Just clamp the hose of your water softener and then feed it into the drainage option that you select.
Just make sure that the hose is at least 2 inches above your drainage hole. The point is to help the prevention of back siphoning of the water. With all of that in place, you can connect the overflow tube into the brine tank.
Step 8: Ready to Go
With all of that done, you can now start to use your water softener. Turn the valve to bypass, allowing the water to flush through your system. This is ideal for flushing out any sediment or debris that may be sitting in your pipes.
Plug in the water softener and put the valve into the backwash position. Slowly, gradually open the valve to allow water to flow in. It is important that you do so gradually to allow any air trapped in the pipes to flow out.
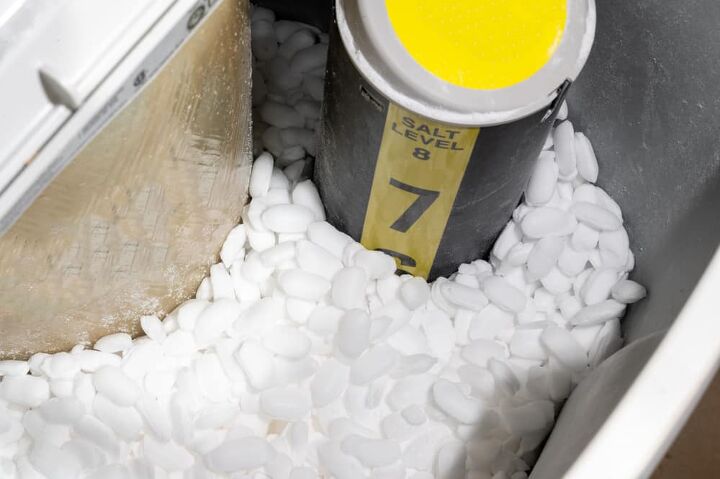
The manufacturer instructions should have a flashing schedule that you will need to follow. You should also add salt into the tanks as specified. If you have any problems, a plumber will be needed to come troubleshoot the issue and provide a fix.
The Pros and Cons of a Water Softener
Before installing a water softener, it is important to know the good and the bad that come along with installing one. We have already covered the pros, but here they are again:
Pros:
- Less film from soaps or detergents
- Less staining, scaling, and spotting
- Savings on energy consumption from water heating
- Only removes the minerals that lead to hardness in water
- Reduced lime and scaling deposits
Cons:
The cons can be quite more comprehensive than you would think. The first is that it leads to increased sodium intake. People that are on low-sodium diets can see a major increase in sodium when drinking the water. A half-gallon of water that has been softened can contain around 480mg more sodium than the unsoftened water coming from the same source.
Softened water also tends to have a distinctly different taste compared to “hard” water. For some, it is better, for others, it is worse. It all depends on personal preference.
Lastly, water softeners can waste as much as 120 gallons of water for every 1,000 that it delivers. That means a serious increase in water bills from the point of installation. That is a lot, especially considering that a softener doesn’t remove lead or other by-products.
Need a Water Treatment and Purification System Installed or Replaced?
Get free, zero-commitment quotes from pro contractors near you.
How Much Does It Cost to Have a Water Softener Installed?
Understandably, not everyone wants to take on something like this on their own. After all, there are quite a few steps and being inexperienced can make the process seem too difficult or complicated to take on.
So, if you plan on bringing in a professional, be prepared to pay. The nationwide average for water softener installation runs between $800 and $2,000. Those prices include materials and labor, and it can vary based on a few factors. Those factors include the type of softener, the capacity and grade of the softener, the size of the home, and the overall complexity of the installation.

Ryan Womeldorf has more than a decade of experience writing. He loves to blog about construction, plumbing, and other home topics. Ryan also loves hockey and a lifelong Buffalo sports fan.
More by Ryan Womeldorf


![10 Best Zero Turn Mowers – [2022 Reviews & Ultimate Buyer's Guide]](https://cdn-fastly.upgradedhome.com/media/2023/07/31/9070522/10-best-zero-turn-mowers-2022-reviews-ultimate-buyer-s-guide.jpg?size=350x220)