How To Install A Toilet Flange In New Construction (Do This!)

When it comes to your bathroom, you don’t want to cut any corners with construction or repairs. Not only can doing so lead to an unsightly appearance, but it also can be a considerable health risk.
Installing a toilet flange in new construction differs from replacing an existing flange and varies based on flooring type. You need to ensure accurate measurements and cuts, so the flange fits securely. Then rotate the flange to find the perfect placement before securing it into place.
If you don’t install the toilet flange properly, you open yourself up to a host of problems. These issues include leaking water, sewer gases entering your home, and unpleasant odors. Therefore, if you’re going to attempt a DIY installation, it’s essential to understand the process.
Do You Need to Hire a Plumber?
Get free, zero-commitment quotes from pro contractors near you.

What Is a Toilet Flange and What Does It Do?
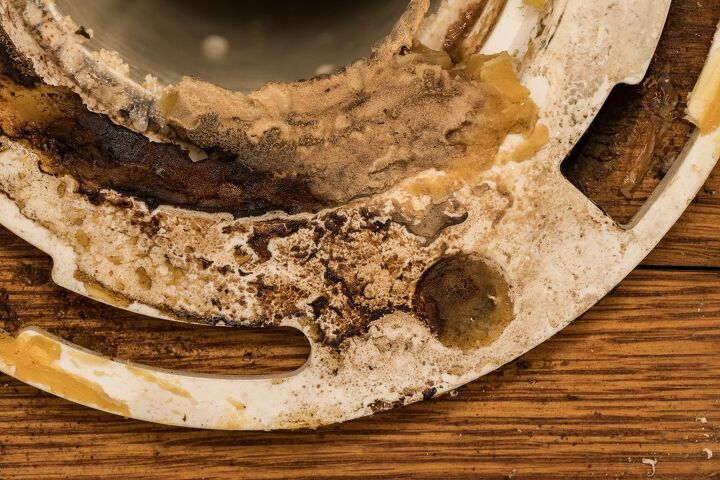
A toilet flange, also called a closet flange, is a pipe fitting connecting the toilet’s bottom to the drainpipe. In new construction, these fittings typically consist of PVC or ABS. You can also find them in brass, stainless steel, aluminum, copper, and cast iron (often found in an older home).
Anywhere you install a toilet, you also need to install a toilet flange. In addition to the toilet flange, you need to install a wax ring between the flange and the toilet. This ring prevents unpleasant leaking and harmful gases by creating an airtight seal.
You also use the toilet flange to secure the toilet to the floor. Typically, the flange attaches to the floor with four screws. Then, two slots on either side allow a place for the long bolts that go up through two holes in the toilet.
How to Install a Standard Toilet Flange in New Construction ( Installing on a Concrete Slab)
If you don’t plan to call in a professional plumber to install your toilet, proceed carefully. Installing the toilet flange is a vital part of the process, and it’s best to take your time.
Tools You Need for the Job:
- Tape Measure
- Pencil and Paper
- Utility Knife
- Camera or phone to take pictures (optional, but can help)
- Hacksaw
- PVC primer
- PVC cement
- Cloth
- New toilet flange (once you know the needed size)
- Concrete screws or anchors
Step 1: Determine the Size Toilet Flange You Need
If you don’t use the correct size flange, you’ll end up with a wobbly, leaking toilet. Therefore, taking careful measurements is key to a successful outcome. First, you need to know the size of the drainpipe.
Typically, drainpipes are three inches in diameter, but always measure to know for sure, as some could be four inches. Take careful notes of all your measurements as you go. Write them down and take pictures of your bathroom and pipes as necessary.
You should also measure from the finished wall to the drainpipe’s center, representing the center of the toilet flange. You should get a measurement of 12” (which is the standard) or 10 or 14 inches. Any of these measurements will work for a standard toilet flange.
Based on your measurements, you’ll either end up with a standard 4×3 toilet flange or possibly a 3-inch flange. If your drainpipe is four inches, then you’ll need a 4-inch flange.
Step 2: Cut the Toilet Flange
It’s important that the drainpipe is flush with the floor. This allows your toilet flange to have the right amount of clearance when you put in the flooring.
This clearance is typically ¼ of an inch. Therefore, wipe down the pipe and use a hacksaw to cut it.
Note: If the pipe is higher than the floor or goes below it, it isn’t correct, so cut with care.
Use the utility knife to cut away any ragged edges from the top and inside of the pipe.
Step 3: Position the Toilet Flange
Place the flange onto the drainpipe, ensuring it rests level on the floor. Rotate and adjust the position as necessary until it fits correctly (it should rotate freely). The flange should be parallel to the back wall, with the two slots parallel to the side walls.
If you’re concerned with sewer gases from the exposed drain pipe, use a rag. Place the rag in the pipe until it’s time to install the toilet (just ensure you can easily remove it).
Step 4: Mark and Drill Holes
Once you have the right position for the flange, mark where the four screws will go. These are the screws you will use to attach the flange to the floor. Set the flange aside and drill pilot holes for the concrete screws.
Step 5: Apply PVC Primer and Cement to Set the Toilet Flange
Once you’ve found the correct positioning and marked the screw holes, it’s time to apply the primer and cement. Ensure the flange and the area where it will rest are clean and clear of any dirt or debris.
Apply some PVC primer to the inside of the drainpipe and the exterior of the flange. Let it dry, then apply the PVC cement carefully to the same areas.
Step 6: Install the Toilet Flange
Carefully place the flange into the proper position, again ensuring the slots are parallel to the wall. Then insert and tighten the four screws to secure the flange to the floor. Stainless steel screws work well because they won’t rust.
Position the closet bolts that come with the flange through the slots, with the threads facing upward. Now, your toilet flange is ready and in place. Your next steps would be to install the wax ring and the toilet.
Installing a Toilet Flange on a Tile Floor
If you are installing the toilet flange over a finished bathroom floor, like tile, installation is fairly similar. However, there are a few minor differences.
Determining the size and position of your flange is the same. However, you want the flange to rest evenly on top of the finished floor; no clearance is necessary.
Be careful when drilling your pilot holes into the tile to avoid cracks and chips. Use a variable-speed drill and don’t apply a lot of force. Install the stainless steel screws with a screwdriver. Then, complete the process as above to finish installing the toilet flange.
Extra Considerations for Installing a Toilet Flange in New Construction
As mentioned above, the right measurements are key to a successful toilet flange installation. When you’re working with new construction, you might be installing a toilet flange where there are no finished walls.
If this is the case, the standard measurement of 12 inches won’t apply. Instead, it will be more like 12-½” since you’re setting the flange’s center out from the wall framing. This accounts for the typical ½” thickness of drywall.
In addition, the flange’s center is typically a minimum of 15-½” from the wall framing of the side wall. However, in an ADA bathroom, this minimum increases to 18 inches.
Do You Need to Hire a Plumber?
Get free, zero-commitment quotes from pro contractors near you.

Related Questions
How much does it cost for a plumber to install a new toilet flange?
If you plan to install a toilet flange yourself, you likely will pay about $20. However, you can purchase flanges for anywhere from $5 to $40, so it depends on what you decide to get.However, if you decide that the DIY route isn’t for you, a plumber will average about $200 to $350. Costs can vary, though, depending on your situation. Plumbers typically charge by the hour, so it all comes down to how long the process takes. For example, with new construction, if there’s an unlevel floor, or similar issues, etc., you could pay more. You could always attempt to do it yourself first and call in the pro if you run into problems.Whatever you do, don’t settle for a mediocre job since proper toilet flange installation is critical. Don’t even think about installing a toilet until the flange is properly in place and secure.
What toilet flanges are the most durable?
There are multiple types of toilet flanges, and some of the most durable are brass and stainless steel. These materials last for a long time. However, they are usually more costly to purchase and install, so many consumers opt for PVC.PVC flanges are certainly the most common among residential plumbing jobs and are also durable. Homeowners often find that they can handle DIY jobs more successfully with PVC flanges. On the flip side, many people aren’t fans of ABS flanges. These more rigid pieces tend to be more susceptible to cracking upon installation. Plus, many often feature metal rings that tend to corrode and rust over time, causing leaks.
How far should the front of the toilet be from the wall?
The minimum distance, as per code, is 21 inches, although 30 inches provides much more comfort. If the toilet is directly across from a shower door, then the minimum distance becomes 30 inches. Although in this situation, 36 inches allows for more comfortable flow and movement.If you’re concerned about spacing and hitting these minimums in your bathroom space, don’t worry. You can always opt for a toilet with a smaller round bowl instead of going with an elongated seat.

Stacy Randall is a wife, mother, and freelance writer from NOLA that has always had a love for DIY projects, home organization, and making spaces beautiful. Together with her husband, she has been spending the last several years lovingly renovating her grandparent's former home, making it their own and learning a lot about life along the way.
More by Stacy Randall


![10 Best Electric Pressure Washers – [2022 Reviews & Guide]](https://cdn-fastly.upgradedhome.com/media/2023/07/31/9070600/10-best-electric-pressure-washers-2022-reviews-guide.jpg?size=350x220)


![Cost To Drill A Well [Pricing Per Foot & Cost By State]](https://cdn-fastly.upgradedhome.com/media/2023/07/31/9074980/cost-to-drill-a-well-pricing-per-foot-cost-by-state.jpg?size=350x220)
