


How to Get Rid of Mold on Floor Joists in a Crawl Space
Have you ever gone into the crawl space under your house and smelled the mildew and musk? This scent indicates that there’s a lot of moisture, which is a universal issue in crawl spaces. But this moisture leads to mold which causes lots of damage, so you need to know how to get rid of mold on floor joists in a crawl space.
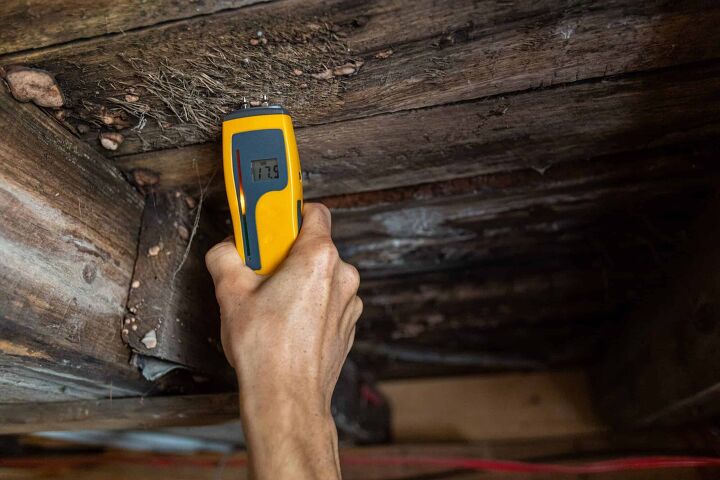
Here’s how to get rid of mold on floor joists in a crawlspace — use a 1:10 solution of white vinegar to water. Spray the mold and wipe down the area, then apply a second application and let it sit for 24 hours. Use a drop light to make sure you can see, and a dehumidifier to keep the crawlspace at 30%-50% humidity.
Removing mold is a dangerous task, which is why most professionals say not to do it on your own. However, the cost of hiring a professional is expensive. This guide will tell you everything you need to know about the process.
Do You Need Mold Removal Services?
Get free, zero-commitment quotes from pro contractors near you.

What Damage Can Mold Do To Floor Joists In A Crawl Space?
If you don’t address your mold issue promptly, it can cause severe damage to your floor joists and the overall support structure of your home. When wood holds onto moisture, it becomes weaker over time. Then, add mold into the mix, and the wood becomes even more damaged.
Your floorboards and other joists will begin to crack as the mold works its way through the beams. The scary part is, this is all happening underneath your house. So, you might not even notice how bad the problem is until it’s too late — and someone gets injured.
Products To Get Rid Of Mold On Floor Joists In A Crawl Space
Before you do anything, you need to have a few products on hand.
- White vinegar or bleach
- Mold remover
For mold remover, there are several options from which you can choose. Regardless of what you decide, you need to take care to read the instructions carefully. This will prevent any potential dangers or mistakes.
Below is a table with several different mold removers you can purchase:
| Concrobium | Mold Armor- Rapid Remediation | Wet & Forget | |
| Lowes | $34.99 1 gallon | $34.38 1 gallon | $19.98 43 fl oz |
| Home Depot | $34.97 1 gallon | $34.97 1 gallon | $29.94 – 1 gal |
| Amazon | $33.88 1 gallon | XX | $49.98 – 1 gal |
| Walmart | $48.31 1 gallon | XX | $26.98 – 1 gal |
Concrobium
Concrobium is ideal for crawl spaces, as well as a variety of other places. It has no harmful chemicals and is the least toxic out of the three products.
The great thing about this item, in particular, is that you can use it on all surfaces:
- Brick
- Wood
- Cement
- Upholstery
- Grout and more
To use it, you simply spray and let it dry. After it dries, you scrub it with a brush or wipe it with a cloth soaked in Concrobium. If you want to prevent further mold growth, simply reapply.
Mold Armor — Rapid Remediation
Mold Armor is a professional-grade mold removing agent. However, it is also the most toxic of the three products.
This product is ideal for:
- Wood
- Vinyl
- Dry Wall
To use it, you spray it on the surface where there is mold. Check the packaging to see how long you should wait for your particular problem.
Once your wait time is over, you need to rinse where you applied it thoroughly. This single application kills and prevents mold and mildew regrowth.
Wet and Forget
Wet and Forget is the most versatile of the three products. It is bleach-free and non-acidic.
This product is ideal for virtually any surface:
- Asphalt
- Wood
- Brick
- Turf
- Marble and more
While this is mainly used for mold and mildew stains, it does have mold fighting agents. However, it would be wise to pick a different product if the fungus has penetrated the wood.
To use it, you simply spray the mold and walk away. Again, it’s not as strong as the other two. So, assess your mold issue first before deciding to purchase Wet and Forget.
How To Get Rid Of Mold On Floor Joists In A Crawl Space
Step 1: Put On Your Safety Gear
Before you start tackling the mold problem, gear up. Put on safety goggles, gloves, a mask, and wear long sleeves and pants. It’s important to keep yourself as protected as possible as you work.
It’s also a good idea to set up a fan in the crawlspace area and have it blow away from you to create some ventilation in the area. This will help keep you breathing easier and allow moisture to dry more quickly.
As an extra precaution, cover any windows, exterior doors, and air vents in your house to prevent any mold spores from entering. You can use plastic sheeting as a barrier.
Step 2: Locate And Clean The Problem Area
You will need to mix your white vinegar and water. (1:10). Put it in your spray bottle, and you are ready to go.
Now that you have all the tools that you need, it’s time to get to work. Gather your supplies and head into your crawl space with your devices in hand. It would be a good idea to put these in a bag. As you crawl, you can pull it next to you.
Before you do anything, you will want to spray your problem area with your vinegar mixture. Make sure the area is soaked and that you use the mist setting.
If you use the stream setting, you could scatter the mold spores. Dispersed mold spores can put your health at risk if you are not appropriately protected. After you spray the mold with the vinegar solution, wipe it down.
It would be a wise idea to bring someone with you to assist you. You can also use a putty knife to scrape away large visible mold spores into a trash bag.
Step 3: Apply The Mold Removal Product Of Your Choice
Check the back of your product for instructions. Be sure to follow the instructions for the best results. Always reapply the product so that it can penetrate deeper into the wood.
If your product says to rinse it off, take care to make sure that you rinse it thoroughly. Otherwise, this can damage your wood. it’s also important to take care and not saturate your wood too much as to add too much moisture.
Most products will need to sit for about 5 minutes before you begin to scrub. When working with wood, it’s best to scrub with a brush as cloths and rags can snag or increase your risk of splinters.
Step 4: Disinfect On Your Way Out
After you finish your cleaning and mold removal, as you back out of the crawlspace, spray down the dirt with your vinegar or bleach. This spray down will ensure that you’ll kill any mold spores that fell to the ground during the job. You can also leave the fan running for about a day to continue to ventilate and dry out the area.
Step 5: Assess The Damage From Mold To Your Floors And Floor Joists In The Crawl Space
After you eradicate the mold, it’s essential to assess the entire area for any damage. Check for soft spots and compromised areas, and if you notice anything concerning have a professional contractor evaluate the area. It might be necessary to replace some of the joists or parts of your floor to maintain the structural integrity of your property.
Other Mold Prevention Methods
Your first plan of attack is always preventing growth in the first place. To do this, you need to find out what is causing the moisture in your crawl space.
Check your dirt and your pipes. If your pipe is leaking, fix it. If the issues seem to be the dirt, you can place a dehumidifier or moisture absorber in your crawl space.
Here are a few other methods to help you prevent moisture in your crawl space:
- Add a plastic vapor barrier.
- Seal up your vents
- Seal all gaps
- Protect your crawlspace from outdoor elements by building a barrier around your house.
- Think about installing insulation under the floor.
Costs Of Hiring A Professional To Get Rid Of Mold On Floor Joists In A Crawl Space
Hiring a professional to remove mold in your crawl space can cost you thousands of dollars. If not, tens of thousands of dollars, depending on your situation.
Since the fungus is in your floor joists, an expert cannot remove it without a contractor. Your floor joists provide structure to your home.
Therefore, any mold issues in the formation of your home would need to be assessed by a contractor. This is a liability precaution that professional mold removers take.
If it’s a small job, it may cost around $500. Maybe that’s ideal for you. If so, go ahead! It’s always better to be safe than sorry.
Also, keep in mind, even if you opt to do the job yourself, you’ll face some expenses. You will need to buy mold removal products, cleaning equipment, safety gear, and other supplies. So, if you were to do the job yourself, it would cost anywhere from $80 to $500 depending on your materials cost.
However, there have been cases where professional mold remediation has cost up to $30,000. Of course, this number represents a more extreme case, but it still takes a big bite out of the budget.
Is Professional Mold Remediation Worth It?
Removing the mold in your crawl space is not hard; it’s just time-consuming. Plus, working in a tight space is not very comfortable.
Also, it’s critical to practice proper safety. Wear your protective gear, including a respirator mask, goggles, and gloves when you get rid of the mold in your floor joists.
If you only have a small mold problem in one confined area, you can probably handle it on your own. But larger mold problems can have a tendency to spread if you leave even just a small, minuscule amount behind. When you attempt a DIY job, there’s an increased risk that you won’t do a thorough enough cleaning job.
Therefore, if you decide to take this project on, be sure you are thorough. If you are not, mold will continue to grow, and you may eventually need to replace your floor joists. Therefore, take your time and do it right the first time to avoid wasting time, energy, and money.
When you look at it this way, coughing up the dough upfront for professional mold remediation might be well worth it.
Related Questions
Can mold in your crawl space make you sick?
Yes, mold in your crawl space can make you sick. This is why it’s so important to remove it as well as prevent it. Mold is dangerous to humans, as well as animals.Since wood is a porous surface, the fungus will eventually penetrate it. You want to take all measures possible to eradicate it. If you cannot do this yourself, try asking a friend or family member to help you.If you have mold in your crawl space, check to see if you are experiencing any chronic issues such as:
- Coughing
- Sneezing
- Wheezing
- Difficulty breathing
- Itchy eyes
- Fevers
- Sore throat
These symptoms are signs of a mold allergy. You will need to remove the mold as soon as possible.
Do You Need Mold Removal Services?
Get free, zero-commitment quotes from pro contractors near you.
Some of the most common types of mold you might find in your crawlspace are Stachybotrys, Penicillium, Cladosporium, and Aspergillus. Stachybotrys is the infamous black mold you hear so much about and is one of the most toxic mold species. If you suspect black mold, stop working and call in a pro.
Penicillium is the same mold that helped in the formation of penicillin. It often grows where dirt and decaying vegetation are prevalent. If you’re allergic to mold, this one could cause you some breathing issues.
Cladosporium likes to grow in soil, wood, plants, paper, and many other places, and just a few spores can multiply quickly. This mold type can have sever health consequences as well, so tread carefully.
The most common type of mold you’re likely to find in your crawlspace is Aspergillus. Luckily, it isn’t dangerous like the others, although long-term exposure could cause sinus issues and allergic reactions.
Can a UV light get rid of mold?Cleaning mold with the proper solution or using a professional mold remediation service are the best ways to get rid of mold. However, a UV light can be a good addition to your overall mold removal plan. After you complete your mold removal project, set up a UV light to shine on the floor of your crawlspace for at least a day.
It will help kill remaining spores, dry out the area, and discourage further mold growth.

Heather is a passionate writer who loves anything DIY. Growing up, she learned everything from home repairs to design, and wants to share her tips with you. When she's not writing, she's usually hiking or searching for her next DIY project.
More by Heather Robbins


![The 10 Best Table Saws - [2022 Reviews & Buyer's Guide]](https://cdn-fastly.upgradedhome.com/media/2023/07/31/9070645/the-10-best-table-saws-2022-reviews-buyer-s-guide.jpg?size=350x220)


