How To Edge A Flower Bed With A Power Edger

Edging out a flower bed used to mean digging the outline with a garden spade. Fortunately, this task is much less tedious and significantly more accurate with the emergence of power edgers.
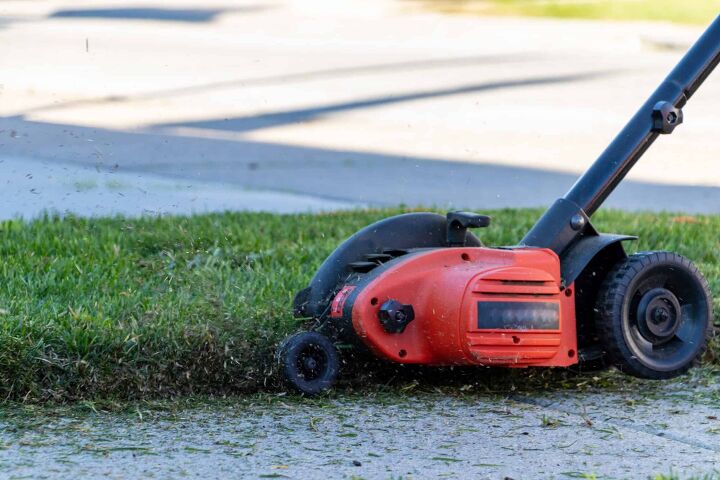
To edge a flower bed with a power edger, map out the design with stakes and string and walk the power edger along the edges of the flower bed. You may have to pass over the border multiple times to carve the edges to your desired depth.
In this article, we’ll discuss how to pick the right edger for the job, and how to edge your flower bed. We’ll also give you some ideas for finishing off your garden edges.
Do You Need Landscaping Services?
Get free, zero-commitment quotes from pro contractors near you.

Why Should I Use a Power Edger?
Manually digging the edges of your flower bed is always an option. But chances are, a spade won’t cut edges that are anywhere near as straight and clean as a power edger. Here are some of the advantages of using a power edger to edge your flower bed:
- User-Friendly: Some people might resist the change to a power edger because they don’t know how to use one. But this is one power tool that is extremely simple to operate. Most power edgers have a guide wheel that makes the job even simpler.
- Precision: The blades of the power edger help to achieve the exact shape you want for your flower bed.
- Ease of Maneuvering: Power edgers with wheels are extremely easy to push. The wheels help to guide your path through the grass and take the effort out of pushing the tool.
- Low Maintenance: Power edgers don’t need much in the way of maintenance. The blades are easy to clean after each use. They also don’t break down very easily and are usually built to last many years.
- Multipurpose: A lot of power edgers have adjustable blades. This allows you to perform many tasks in different areas of the yard. Some even let you adjust the height of the machine for additional versatility.
Which Kind of Edger Should I Buy?
Power edgers can be the perfect choice for carving out the edges of a flower bed. However, different types of power edgers are suited for various tasks. Here are some considerations to keep in mind when choosing an edger:
Gas vs Electric: Gas-powered edgers are built for larger jobs that require more power. Electric edgers are smaller, quieter, and more suitable for small jobs. For edging a flower bed, electric is your best bet.
Walk-Behind vs Stick: A walk-behind edger has wheels to help maneuver the edger. A stick edger is a smaller, lighter tool, and can be easier to maneuver. Stick edgers, however, are better for when you’ve already established an edge. Walk-behind edgers are the ideal tool for making clean, well-controlled, straight edges around a flower bed.
Straight vs Angled Blades: Flat, straight blades are great for basic lawn edging. They work best in areas where the lawn is even with the nearest hard surface. Angled blades are more suited for flower beds since they’re able to handle varying heights and more delicate features.
How to Safely Use a Power Edger
It’s important to read all of the manufacturer’s instructions and precautions when using any power tool. And no matter how familiar you are with the tool you still need to follow all safety precautions.
While you can control your actions, you can’t control the actions of a faulty tool or other environmental obstacles. Here are the most important guidelines to follow:
Use Proper Safety Gear: Make sure you’re wearing the proper attire for working with potentially dangerous tools. This means long-sleeves, long pants, and sturdy, closed-toe footwear. Also, be sure to wear safety goggles, a helmet, and earplugs if needed.
Pay Attention to Posture: Be mindful of the way you’re standing while you operate a power edger. You need to have a firm stance with both feet planted firmly on the ground. If you feel like you’re losing your grip at any point, turn the tool off immediately.
Remove Debris Ahead of Time: Power edgers are only designed to handle grass and soil. If a hard object like a rock or plastic object gets caught up in the blade, it could be dangerous. With the metal blades continuously spinning, an errant object can go flying in any direction.
Don’t Leave Your Tool Unattended: Never walk away with your power edger running for any reason at all. Even if you’re walking 2 feet away, turn it off. Kids and animals are notoriously predictable, and it’s better to be safe than sorry.
Safe Storage: When you’re finished with your job, store your tool in a cool, dry place away from children and pets.
Steps for Edging a Flower Bed with a Power Edger
Step 1: Figure Out your Shape
Choose the shape of your flower bed. This will depend on the façade of your house and the look you want to achieve with your garden. Some opt for clean, straight lines for a tidy look. Others prefer more subtle curves that evoke the image of flowers in the wild.
Step 2: Map your Edges
Layout the plan of the flower bed with string. You can do this by first placing stakes in the corners of where you want to cut. Next, tie a string around the stakes and arrange the strings in the exact shape you want the flower bed to be.
Step 3: Practice Before Cutting
Before you turn it on, walk along the edges you mapped out with the power edger. You need a good feel of the weight of the tool in your hand to ensure an accurate cut.
Step 4: Put the Edger in Place
Turn the motor on and line up the blade where you’ll be making your first cut.
Step 5: Carve out the Edges
Engage the blade and start cutting while following the design you laid out. Move slowly, being careful not to rush the tool. It’s common to run into some stubborn roots – you may have to make several passes through these spots.
Step 6: Reinforce the Edges
Make another trip around the border with the power edger. Repeat this until you’ve reached the depth you need for your flower bed. Experts maintain that 5 inches should be the minimum depth for your flower bed edges.
Step 7: Clean Up
Remove the excess soil and grass that came up while you were edging. If you’re okay with how it looks, spread it out around the flower bed for extra fertilizer.
Step 8: Lay your Mulch
Even if you don’t plan to plant flowers right away, you should still lay mulch when you finish edging. This will help keep weeds at bay, to minimize the weeding needed when you’re ready to plant. Mulching will also help the soil maintain a good temperature to optimize the health of your plants.
Choosing a Finishing Touch
Now that you’ve cut the shape of your flower beds, you can leave the edges alone, or line the border. Here are some ideas to finish off the edges:
Use a flower bed fence: This is one of the more common ways to edge a flower bed. These are usually used for rectangular or square beds since it’s hard to make curves with fences. Flower bed fences can be made with wire, plastic, or wood.
Use stones for edging: Stones are a great, natural look for edging a flower bed. You can make these beds look as natural or as clear-cut as you’d like. For a more natural feel, choose ragged, natural shaped rocks. For a cleaner, tidy look choose smooth, uniform stones.
Green edging: Instead of using a hard material, you can use different plants or shrubs to edge the flower bed. Shrubs might be the better option for this since they can last a long time.
Do You Need Landscaping Services?
Get free, zero-commitment quotes from pro contractors near you.

Related Questions
How much does a power edger cost?
The cost of power edgers varies with their capabilities. Some offer more features for added versatility, like multiple blades. For basic electric power edgers with wheels to maneuver around your flower bed, expect to spend about $100.
Can you edge a flower bed with a weed eater?
A weed eater, also known as a string trimmer, can be used to edge a flower bed. But for clean, precise edges and a quicker job, a power edger is better.

Kathryn is a craft aficionado who loves writing about DIY home improvement projects. When she's not writing, she loves reading, listening to musicals, and playing with her kids.
More by Kathryn Flegal


