How To Cut Foam Board (Quickly & Easily!)
Foam board, whether it be a thick insulating style found in large sheets or a thin type generally used for crafting, requires a bit of delicacy to achieve the perfect cut. Regardless of the type of foam board you intend to cut, it is crucial that you work with a craft knife or sharp utility knife for best results. Or, larger cuts can be made with the assistance of electric tools.
Whether you need to cut rigid, thick foam board, make straight cuts in the thin variety, or want to create curves or shapes, we’ll show you all the proper techniques.
Do You Need Insulation Installers?
Get free, zero-commitment quotes from pro contractors near you.

How to Manually Cut Thin Foam Board
Sometimes referred to as foam core board, thin foam board is the type that is used for mounting artwork and photos or crafting large displays for presentations. This foam board is generally between 1/18 and 3/16-inch thick and consists of two sheets of thick paper with a layer of polyurethane or polystyrene foam in the center of them.
To cut thin foam board manually, without the use of electric tools, you’ll need either a razor knife or sharp craft knife and a straightedge to guide your cuts. Follow these steps to make straight cuts in thin foam board:
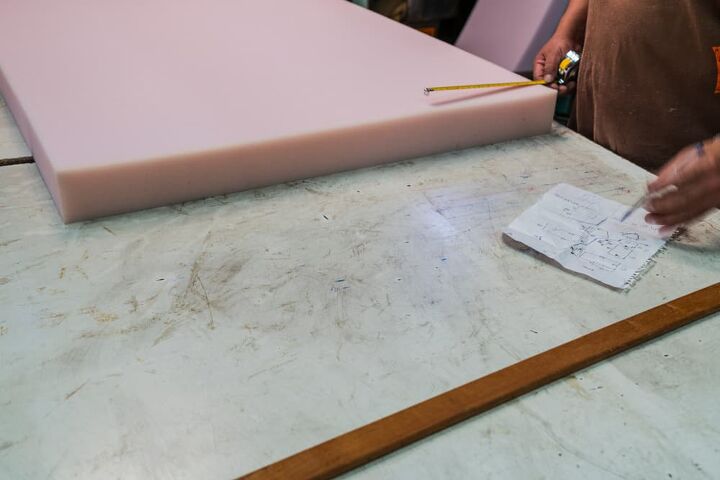
- To begin, measure the board and mark where the start and end points are for your intended cut line. This procedure is the same as if you were cutting a piece of paper or sawing wood.
- With the points marked, position your straightedge along the line.
- Hold the straightedge firmly in place and use the tip of your knife to pierce the top layer of paper.
- Once the knife has penetrated the surface, shift the angle so that it is no more than 30 degrees from the foam board’s surface. This position will help to prevent tears and snags as you cut.
- Slide your knife slowly, following the straightedge, without going all the way through the foam.
- You’ll want to make at least three passes with your knife in order to achieve a clean, thorough cut. Once the cut is complete, you can use the knife, or a pair of scissors, to trim off any excess foam or paper.
Make sure that you choose a knife that has a comfortable handle. Simple blades are best when working with thin or soft foam.
Quick Tip: Rub the wax from a white candle against your blade before you start slicing through the foam. This will make the blade slide much smoother through the foam.
Using a Mat Cutter to Cut Thin Foam Board
Mat cutters are designed for cutting precise lines in art mats, however, they can also be used to cut thin foam board. Before you head over to your local craft store and purchase a mat cutter, make sure that you consult the instruction manual to ensure that it can handle your chosen foam board.
Cutting with a mat cutter involves a slicing device that slides along a rod to cut only straight lines. Simply position the foam board so that it is lined up at the desired slicing location, same as you would with a basic paper cutter. Then, hold the board in place with one hand and use your other hand to operate the cutting tool.
To cut the board with a mat cutter, slide the cutting tool from one side of the rod to the other. That’s all there is to it!
Cutting Circles and Curves in Thin Foam Board
If you don’t have access to a circle cutter that is designed for foam, the best tool for cutting a circle or curve in a thin foam board is a sharp knife. Begin by marking the center of the hole and use a compass to draft the circle on one side of the board. Then, use a nail or needle to pierce a hole through the center and recreate the circle on the other side.
Using your sharp knife, carefully follow your markings and only penetrate the first layer of paper. Repeat this process on the opposite side of the foam, using the knife to cut all the way through.
Alternatively, if you have a foam-board circle cutter, all of these tools will be combined in one. Instead of a pencil tip, the circle cutter has a compass with a tiny blade. Simply position the cutting tool so that its pivot point is located where the center of the circle is and the outer blade is along the marked circle.
Then, hold the pivot point while you rotate the blade around the perimeter. You may need to complete multiple passes or repeat the process on the opposite side to perform the cut.
Quick Tip: Cookie cutters can be used to cut specialized shapes in soft or rigid foam, provided that it is ½ inch thick or less. You may need to press firmly against the foam for the cookie cutter to pop the piece out.
How to Cut Rigid, Thick Foam
Thick foam board sheets, such as those used for insulation, are generally stiff enough to snap into a perfectly straight line when properly scored. Begin by marking the start and end points for your cut line, as you would with a thin foam board. Then, proceed with the following steps:
- Place a straightedge along the start and end marks.
- Use clamps to keep the straightedge in place on either end. Make sure that it is properly aligned on the side that intend to use for your project, not the scrap section. This will help to protect the piece while scoring.
- With a marker and your straightedge as a guide, draw your cut line.
- Using a sharp utility knife, score along your drawn line.
- Detach the clamps and straightedge.
- Position the thick foam board upright and apply pressure along the back, behind the cut line, to snap the board.
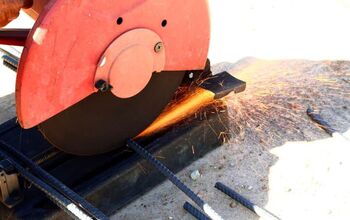
If the board is too thick to snap easily after scoring, you can use a foam saw or a hack saw instead. Even the average carpenter’s cross-cut saw may be used to cut thick pieces of rigid foam board.
Making Curves and Cutouts in Thick Foam Board
In some instances, like if you need to install a foundation wall around an electrical outlet box, you might need to create a cutout in thick foam board. For these types of cuts, position the board into its intended location against the outlet box to create an impression on the back of the panel.
Or, alternatively, you could measure the area and use a separate box to create an impression. Then, using either a drywall saw (for thick boards) or a sharp utility knife (for thinner boards), you can make the cutout in the foam.
The process of cutting curves or shapes into thick foam board is slightly different than doing so on their thin counterparts. For instance, small shapes tend to be nearly impossible to cut out, while a slightly curved edge along the board’s edge can be relatively easy to achieve.
For best results, follow these steps for cutting curves and cutouts in thick foam board:
- Using a marker, draw your desired shape onto the thick foam board.
- With a small, sharp craft knife, score this outline.
- Sharpen one long edge of a narrow putty knife and use it to slice slight curves into the foam.
- For clean cuts, a forceful pulling motion of the blade, similar to how you cut with a utility knife, will do the majority of the cutting. This is often better than using a sawing motion.
Safety Considerations
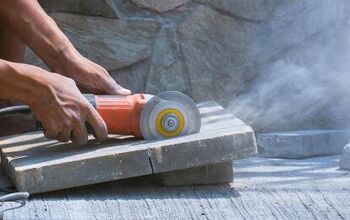
If you’re using electric tools, such as a saw or mat cutter, it’s important that you wear the proper Personal Protective Equipment. Always wear necessary eye protection and use caution.
In some cases, the cutting will produce fine foam dust. To protect your lungs from breathing it in, consider wearing a face mask.
Do You Need Insulation Installers?
Get free, zero-commitment quotes from pro contractors near you.
Related Questions
Can you cut foam board with scissors?
Heavy-duty scissors can be used to cut through soft, thin, or flexible foam. However, it can be difficult to achieve smooth cuts with scissors.
Can you use a table saw to cut foam board?
Using a table saw to cut thick foam board can create clean, straight cuts. However, it will produce a lot of foam dust in the process. To avoid unnecessary debris, simply use a utility knife to score the board and snap it.

Jessica considers herself a home improvement and design enthusiast. She grew up surrounded by constant home improvement projects and owes most of what she knows to helping her dad renovate her childhood home. Being a Los Angeles resident, Jessica spends a lot of her time looking for her next DIY project and sharing her love for home design.
More by Jessica Stone