How To Connect Your Thermostat Wires to the AC Unit
Thermostats are excellent pieces of equipment used to keep your home at the desired temperature. You can set the temperature, and the thermostat will do the job for you. If you don’t already have it connect to your AC unit, you might wonder how to do that.
There are several steps you need to take to connect your thermostat to your AC unit:
- Disconnect the thermostat
- Label your wires
- Familiarize yourself with the color coding for the wires
- Check the wires
- Connect the wires from the control board to the outside unit
Connecting your thermostat to your air conditioner is more straightforward than it sounds!
In this guide, we will describe how to connect your air conditioner to your thermostat. The instructions will be formatted in easy-to-follow steps. If this is your first time, this guide is perfect for you.
Do You Need Thermostat Installation or Replacement Services?
Get free, zero-commitment quotes from pro contractors near you.

Step One: Disconnecting Your Thermostat
The most important thing you will want to do is turn the power off to the wires for your thermostat. Once the power is off, then you can remove the thermostat from the base.
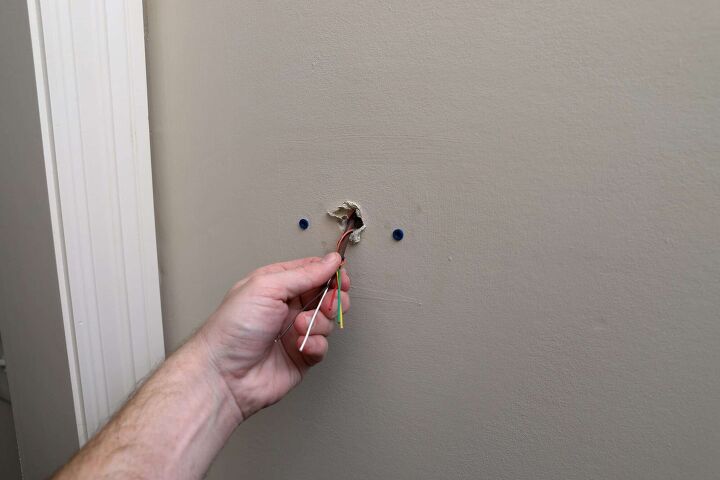
When you remove the thermostat, you will notice wires coming from out of the wall. These wires will be connected to the base. Before you disconnect everything, it’s a good idea to have labels, so you remember where everything goes.
Step Two: Label Your Wires
Before removing the wires from their rightful places, you need to either take a photo or label them. If you choose to label your wires, you will need:
- Paper tape or masking tape
- A marker or a pen
You simply wrap the tape lightly around the wire while creating a little tab so you can label th wi.
Also, when you disconnect the wires, you should spread them out. Spreading the wires keeps the large cable from falling back into your wall. If the wires fall into your wall, you will need to fish it out or cut a hole to get them out.
Step Three: Familiarize Yourself with the Wire Coding
Wire Coding Basics | ||
Most Common | ||
Colors | Labels | Function |
Red | R | Power (24V) |
Yellow | Y | Cooling |
Green | G | Fan |
White | W | Heating |
Blue | C | Common |
Red | Rh | Power to Heat |
Red | Rc | Power to Cool |
This table shows the most common colors for each function. However, your wires may not be the same as the colors in the diagram. If they’re not the same, check the manufacturer and get the correct correlations.
For instance, the wire for cooling may be blue instead of yellow. That’s important to know when hooking up an AC unit to your thermostat. Also, there should be a jumper wire between RH and RC. If your jumper wire is not there, your air conditioner will not power on and off.
About Thermostat Labels
Check the base of your thermostat for labels as well. Most thermostats have their terminals labeled, so you know where to put each wire.
Ensuring that you read all labels will help this process to go smoothly. If you don’t pay attention to the names, you may hook your thermostat up incorrectly.
Also, some thermostats will say, “Will not operate without wire to ‘C.'” This means that you need to connect the common wire for it to function.
Step Four: Check the Wires
Before you connect the AC unit, we suggest that you check the wires that connect to the control board. (A side note: For the red wire, it doesn’t matter if you place it into R or RC because of the jumper wire.)
Make sure all the set screws are tightened before connecting your AC unit. It’s important to note that these two AC wires don’t link straight to the contact terminal for your unit.
Typically the AC wires will be attached to two more wires connected by wire nuts. Those connected wires will then attach to the contact, which will send signals to your AC unit.
Step Five: Connecting Your AC Unit
Now it’s time to connect your air conditioner. On the control board, the wires will insert your AC wires into Y and C. It doesn’t matter which wires go to which terminal.
If it makes you feel better, though, you can insert the additional white wire into C for common. White is also a color that’s used for the ‘common’ wire instead of blue.
How Does the Contact Terminal Operate Your Air Conditioner?
The two wires that you attached to the contact terminal sends power through the terminal’s coil. The coil will draw 24 volts from the control board, which will suck a plunger in on the contact.
Once the plunger draws into the contact, the volts will then be allowed to go through the terminal. When the plunger relaxes, the power will stop flowing through.
How to Test the Thermostat
To test your AC Thermostat, you will need someone else to stand by the furnace:
- Raise the temperature until you hear a ‘click’.
- Let your assistant know that you raised the temperature.
- Ask them if they heard the furnace kick on.
The sound of the furnace turning on lets you know that the furnace has received the signal from the thermostat. However, if the test failed you will need to investigate the issue.
If Your Setup Isn’t Working
If your assistant does not hear the clicking of the furnace, something may not be connected correctly. Take your thermostat apart to check all the wires. If the wires are placed successfully, then the malfunction may be a sign that you need a new thermostat.
Installing a New Thermostat
To install a new thermostat, you can simply follow the instructions in this guide. The process is the same, except that you will need to connect the wires to the control board.
When you install a new module, it’s a great idea to read the instruction pamphlet first. The booklet contains all the vital information for that specific manufacturer. Next, find out each of the wire functions, and place them accordingly onto your furnace’s control board. Also, always adjust the set screws, so they hold your wires in place.
Tips for Success When Installing Thermostat Wiring
Whether you are installing a new thermostat or simply changing its location, you want to choose where you place it carefully. It should always be installed on an interior wall, as exterior walls experience temperature alterations as the seasons change – warm in summer and cool in the winter.
Placing a thermostat on an exterior wall will lead to incorrect readings, causing your HVAC system to work too hard. As a result, your home may be too warm in the winter and too cool in the summer, wasting both energy and money. The best location for a thermostat is on an interior wall positioned near the middle of your home that is not affected by the following:
- Heat, steam, or moisture from a bathroom
- Drafty windows or doors
- Exposure to direct sunlight
- A neighboring cooling/heating register or grate
- Heat from a nearby appliance or from cooking
If installing a thermostat, connecting it to an air conditioning unit, or simply adjusting wires isn’t something you have the time for or the skills, you may want to consider contacting a HVAC contractor. For optimum results, it is often best to enlist the help of a professional. However, if you feel confident in your abilities, the steps outlined above should help simplify the process for you.
Related Questions
What Should I Set My AC Thermostat At?
During summer, your body adjusts to higher heat. While 60 degrees Fahrenheit seems like a great idea, that will most likely be too cold for you.The best setting during summertime for your AC thermostat is around 75 degrees Fahrenheit. The cooler you set it, the more energy it draws.
What color wire controls the air conditioning system?
The yellow wires located underneath your thermostat are connected to your compressor and control your air conditioning system. They connect to the Y terminals on your thermostat and end at your compressor contactor through an air handler.
How Do You Know if Your AC Thermostat is Bad?
There are several ways to tell if your AC thermostat is bad:
- No power in your thermostat
- Your AC or heater won’t turn on.
- The heater or air conditioner continually runs and doesn’t turn off.
These are the telltale signs that your thermostat needs to be replaced.
Do You Need Thermostat Installation or Replacement Services?
Get free, zero-commitment quotes from pro contractors near you.
A Few Takeaways
Connecting your thermostat to your AC unit is relatively easy, and although you may want to hire the job done, it can often be performed by the average homeowner. However, if your wires are not connected the right way to the furnace control board, your air conditioner will not operate.
To avoid undesirable results, make sure that you familiarized yourself with your thermostat’s wire codes. Not every module will have the same setup or the same correlation between the colors and the functions.
If you don’t have the information you need, feel free to do further research online or bring your thermostat to a home improvement store. An associate will be happy to assist you!
Related Guide

Heather is a passionate writer who loves anything DIY. Growing up, she learned everything from home repairs to design, and wants to share her tips with you. When she's not writing, she's usually hiking or searching for her next DIY project.
More by Heather Robbins


![10 Best Cordless Leaf Blowers – [2022 Reviews & Ultimate Guide]](https://cdn-fastly.upgradedhome.com/media/2023/07/31/9070789/10-best-cordless-leaf-blowers-2022-reviews-ultimate-guide.jpg?size=350x220)