


How To Clean A Paint Sprayer (Quickly & Easily!)
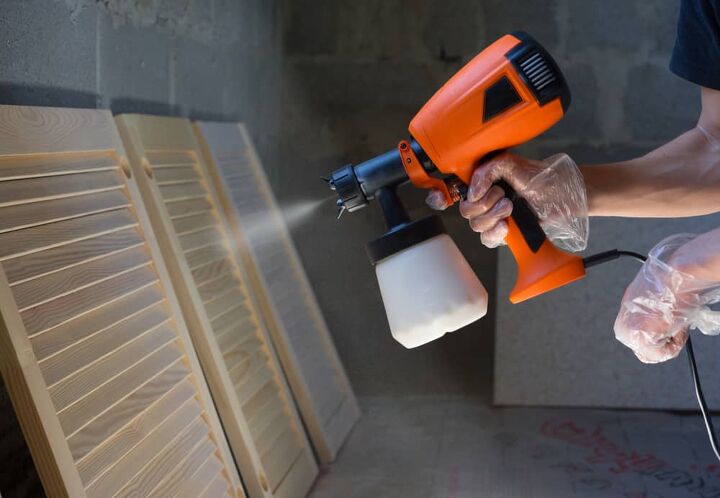
If you recently painted a home, you probably have a sprayer in your possession. Obviously, if you have a paint sprayer, then you will need to clean it out if you want to use it again. (Trust us, you’re going to want to use it again.) Not cleaning your sprayer will clog it and damage it. So, how do you make sure you can use your sprayer time and time again?
To remove paint from your paint sprayer, you will need to follow these steps below:
- Release any air pressure in your sprayer.
- Flush out the sprayer nozzle using the proper solution for your paint.
- Clean your pump and gun using the right solution.
- Use a rag to clean the tip.
Understanding how to clean your sprayer properly isn’t something that should be taken lightly. This guide will give you the scoop on maintaining your sprayer and keeping it clean.
Do You Need Painting or Staining Services?
Get free, zero-commitment quotes from pro contractors near you.

Cleaning Your Paint Sprayer: A Step-By-Step Guide
Cleaning your paint sprayer is best done immediately after you use it. If the paint dries in the sprayer, there’s a chance that you won’t be able to clean it and that you will need a replacement. So, the sooner you start, the better.
Before You Begin: Prep Yourself
The first thing you have to be aware of is that you should grab some protective gear. Nitrile gloves, goggles, and a smock are the bare minimum. Put on your gear before you start any other steps towards cleaning that sprayer. When you’re prepping, take a closer look at the paint you have, making a note to see if you’ve been using oil-based or water-based pigment.
Step One: Remove The Pressure From Your Sprayer
Every paint sprayer gets the power it needs from pressure that propels the paint forward. To do this, you’re going to have to do something known as the pressure relief procedure. Here’s how to do it:
- Start by engaging your sprayer’s trigger guard so that you don’t spray yourself in the face.
- Turn off your paint gun.
- Drop the sprayer’s setting to the lowest possible level, and reverse the spray pattern of your tip. Turn the trigger lock off.
- Bring the sprayer closet to the bottom of your waste bucket, and pull the trigger.
- Keep the trigger pulled until you no longer feel pressure being released. The sprayer should be safe to work with here.
- Turn the trigger lock back on and bring the sprayer to “PRIME.”
Step Two: Flush Out Your Paint
Now that your paint sprayer is no longer a high-pressure time bomb, you can start to flush out your paint. Flushing your paint out is the best way to clear your sprayer’s tubing and canister from the paint that it has. You will need to have two buckets for this: a designated flush bucket and a waste bucket.
- Start by removing the tip, tip guard, and intake from your paint sprayer.
- In your flush bucket, add water (if you used a water-based paint) or mineral spirits (for oil-based paint). This is your flushing bucket. Place the intake in a bucket of the flush solution that coincides with the paint type used.
- You will now need to flush out your system and remove any leftover paint. To do this, put the intake into the bucket of flushing solution and then point the drain tube inside a waste bucket. Switch your sprayer’s setting to “SPRAY.”
- Turn the sprayer on, hold the trigger, and spray the flush fluid into the waste bucket until it starts to run clear.
- Once it runs clear, turn the sprayer back off.
Step Three: Flush Out Your Pump And Gun
Seeing the flush fluid run clear is a great sign, but that doesn’t mean you’re fully done with the flush bucket quite yet. Here’s how you can make sure that your pump and gun are going to remain clog-free.
- Once you’ve flushed the paint out, switch the gun setting to “PRIME” and turn it back on. Point the sprayer at the waste bucket.
- Watch your drain tube and wait until the tubes now run clear, too.
- Once this happens, turn your paint sprayer off and remove the intake tube from the flush bucket.
- Turn the sprayer gun on again and point it at the flush bucket. Pull the trigger until the flush fluid is removed.
- Turn the sprayer off and remove the filters and the tips. You’re ready for the next step.
Step Four: Clean The Bits
Once you have cleaned out the majority of the sprayer gun’s interior, it’s time to clean the other parts—the filters, the tip, and the tip guards. Unlike the other steps, that involved tons of switching on and off, then flushing chemicals through them, this part of the cleaning process is fairly simple.
All you need to do is take a clean rag and wipe all of these items down with a microfiber rag that is dipped in flushing fluid. Once they’ve been wiped down, place them back in the paint sprayer and you should be finished with your cleaning session.
How Do You Dispose Of Used Paint?
Now that you’ve finished cleaning out your paint sprayer, you now have a giant bucket of used paint that’s partially diluted that you have to take care of. It’s important that you do not try to pour the paint down the drain, since this can cause permanent damage to your drain pipes as well as the local water supply.
Each local waste disposal group will have its own specific instructions that you should follow in order to avoid being fined. While we can offer some tips, it’s always best to find out the specific guides that are local to your area just to stay safe. That being said, there are some guidelines we can offer:
- Make sure water-based paint is completely dried before you throw it in the garbage.
- Latex-based paints can also be thrown in the garbage after they’re dries, since they are not considered to be
- If you live in a neighborhood that recycles, then pour the paint out, wash your paint bucket, and place the paint bucket in the recycling bin.
- Oil-based paints need to be brought to your local hazardous waste facility, since it can cause serious damage to your local environment.
- If you have any paint leftover from your project that’s still being left in the bucket, consider storing it for your next project or donating it to a worthwhile cause.
How Do You Dispose Of Used Flushing Solution?
This depends on your area’s rules, but only to a point. If the solution was just plain water, chances are that you can just let the bucket dry. If you had to use mineral spirits in order to ensure that your paint sprayer is totally clean, then you may need to drop the spirits off at your local hazardous waste center.
Because mineral spirits are considered to be toxic waste and a potential environmental hazard, spent spirits need to be properly disposed of. If you risk it by pouring it down your drain or spilling it in a nearby lake, chances are that you will face a fine. Besides, it’s kind of a jerk move to do that.
Do You Need Painting or Staining Services?
Get free, zero-commitment quotes from pro contractors near you.
Related Questions
Is buying a paint sprayer worth it?
This all depends on who you ask and what you are going to be using it for. Most interior designers will say that it’s usually not worth it, especially if you are a casual painter who only needs to have a way to redo their home’s paint. Even when it comes to standard room painting procedures, it’s often better to go with the ol’ tray and roller solution.Sprayers are ideal for projects that involve curved surfaces, such as cars or furniture. If you’re not doing large-scale spraying, it’s not worth buying one for your toolshed.
Which is better, spray painting or roll painting?
Both have their perks and pitfalls. Spray painting works well if you don’t need much accuracy and need to get things painted in a flash. It also can work well on cars. Roll painting is a better candidate for rooms and areas that require a certain amount of accuracy and attention to detail. If you aren’t sure which painting style will work better for you, then the best thing that you can do is stick to a roller. It’s a safe bet.
What is better, an air or airless paint sprayer?
According to most home improvement gurus, airless paint sprayers are usually the better bet. This is particularly true when you’re working with thick paints, such as latex paints. Because they tend to work with thicker paints, they are the most commonly selected paint sprayer for heavy-duty, outdoor painting projects as well as general project use.If you want to do indoor painting work or want to work with ultra-light paints, then you might want to choose an air sprayer instead. Not sure which sprayer is better for your particular project, give a call to a professional for advice.

Ossiana Tepfenhart is an expert writer, focusing on interior design and general home tips. Writing is her life, and it's what she does best. Her interests include art and real estate investments.
More by Ossiana Tepfenhart


![10 Most Dangerous Neighborhoods in Baltimore [Updated]](https://cdn-fastly.upgradedhome.com/media/2023/07/31/9075655/10-most-dangerous-neighborhoods-in-baltimore-updated.jpg?size=350x220)


