How To Change Drive Belt On Troy Bilt Bronco Riding Mower
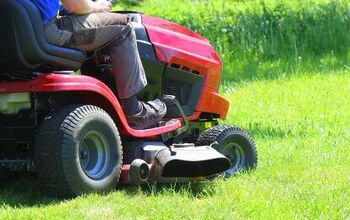
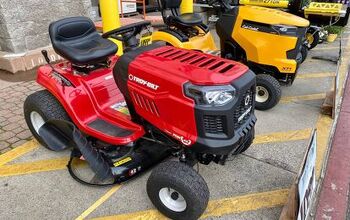
Troy Bilt are well known for their highly durable professional riding mowers. One of the most popular of these has been the Bronco. But even the most expertly designed components need replacing at times.
To replace a drive belt on a Troy Bilt Bronco Riding Mower, there are six steps you should take. In summary, these are:
- Make the mower safe
- Remove the deck
- Gain access to the drive belts
- Remove upper drive belt
- Remove the lower drive belt
- Install the new drive belt.
This may be all you need to know if you are already well-versed in riding mower maintenance. But if you need a little more guidance, read on. Be sure to consult your supplier’s manual before attempting work as some models may vary.
Do You Need a Mower Repair Service?
Get free, zero-commitment quotes from pro contractors near you.

1. Make The Mower Safe
Before you get started you will want to make sure the mower is on level ground. You can also set the parking brake at this point which will release the belt tension. You should make sure the mower has fully cooled down and there is no ignition capability. Disconnect the spark plug wire, then ALWAYS the black and then the red cables from the battery.
(Caution: be careful not to let your wrench touch any metal on the battery. You will be dealing with a lot of electricity otherwise).
2. Remove The Deck
Set the deck height lever to its lowest position. You’ll now need to remove the PTO belt from the engine pulley. To do this you should first make sure that the PTO lever is disengaged.
You can now work on unfastening the belt guards (or keepers). These are fastened with a self-tapping hex screw, but if they are tight use a ½” wrench to loosen them. With the belt guard loose, it should just pop out from where it passes through a hole in the frame. Make a note of the location of the hole for when you reassemble. The PTO belt should now slide off without much resistance.
At the front of the mower deck, there’s a bow-tie cotter pin, or quick link, which secures the deck engagement cable. You can remove this and then pull the engagement cable out of the slot. You can now unhook the PTO cable from the idler pivot bracket. Depending on your exact model you may also remove the spring which it is attached to.
Removing the Hanger Brackets
With the utmost care, you can now remove the left and right hanger brackets and release the deck. Some models have spring-loaded release rods. You need only rotate them against the bracket to release the deck.
You should now remove the bow tie clip which secures the front lift rod and bring the rod out of the deck. Alternatively, some decks have a slot for the hanger rod. In these cases, you should slide the deck forward and lift the rod out of the slot. That will release it from the deck. Now return the deck lever to its highest setting.
The deck should be ready to slide out from under the rider, and you will have better access to the drive belt.
3. Gain Access to the Drive Belts
You can remove the battery and battery tray, which follows the Troy Bilt official guidelines but can be a little fiddly. You can also support the mower on its side or simply jack it up. But you must be careful to ensure it is well supported and secure.
However, you will need to use the access through the battery opening, so it is wise to start with that and see how well you can access the drive belt from there.
4. Remove Upper (Rear) Drive Belt
Using a rope or a large set of bent nose pliers, carefully unhook the lateral spring from the frame. It is attached to the bottom of the upper drive belt. The idler pulley should be loosened so that it can be lifted enough for the belt to clear the keepers. Again, you can use your ½” wrench for this.
Slip the upper belt out of the top sheave of the variable speed pulley and off of the transmission input pulley. You can now withdraw the upper belt through the battery opening.
5. Remove the Lower (Front) Drive Belt
From this point, you should take note of the order of the parts you remove.
Remove the bolt securing the PTO pulley to the engine crankshaft. An air-powered impact wrench will make this job easier. You should now be able to clear the belt guards stamped into the frame by lowering the poly and belt. You can then ease the pulley from the crankshaft.
Now remove the rear flat idler pulley from the double idler bracket. This can be done with your socket wrench. Everything is now ready for the belt to be removed. It may still offer a little resistance so walk it carefully over the variable speed pulley system above the transmission.If it continues to offer resistance, pivot the variable speed pulley and it should slip past the remaining belt keepers.
6. Install The New Drive Belt
You will now have to repeat the previous steps in reverse order to install your new belt.
Here follow a few tips that will help you as you go:
- When threading the replacement belt through it is a good idea to cable tie the course together at the threading end. This will stop it from flaring out and impeding its route.
- The belt must be routed inside the front spacer bolts.
- The spacer bolt in front of the double idler bracket should go between the courses of the belt.
- To get optimum movement on the engine crankshaft, apply a little anti-seize compound. You can then reinstall the crankshaft pulley.
- You may also want to apply a thread locking compound to the crankshaft bolt. Then tighten up the crankshaft bolt to a torque of 36-50 ft.
When you’re sure everything is back in its right place you should test the operation out. Make sure you do this in a safe area before taking back out into the field. Be sure to check that the belt is tight enough. You can check out a guide to this here. You might also want to check out this guide if you encounter any issues with power.
Do You Need a Mower Repair Service?
Get free, zero-commitment quotes from pro contractors near you.
Related Questions
Is it a good idea to use drive belts not made by Troy Bilt?
You should seek OEM belts for replacement. There are quite a few inexpensive replacements out there but they will not likely last as well as official products.
Should I replace both belts at once?
When a belt does fail with this model you should seek to replace both belts. This way your mower will function at the optimum level.
Will replacing the drive belt myself void my warranty?
This will differ from model to model, but you should always assume that it will unless otherwise stipulated. If you are not sure Troy Bilt offers a great online service so you can check with them directly.

We are a team of passionate homeowners, home improvement pros, and DIY enthusiasts who enjoy sharing home improvement, housekeeping, decorating, and more with other homeowners! Whether you're looking for a step-by-step guide on fixing an appliance or the cost of installing a fence, we've here to help.
More by Upgraded Home Team